
Now that my dress form has been adjusted to approximately my measurements, I want to add padding and make a cover.
I had some batting set aside for a quilt, and it seemed to be the perfect weight for this project. The batting is thick, good for layering, and easy to pin. The dress form’s cover is a very thin knit glued to the edges of the papier-mache body pieces. I can slip a needle underneath it, but it’s very delicate.
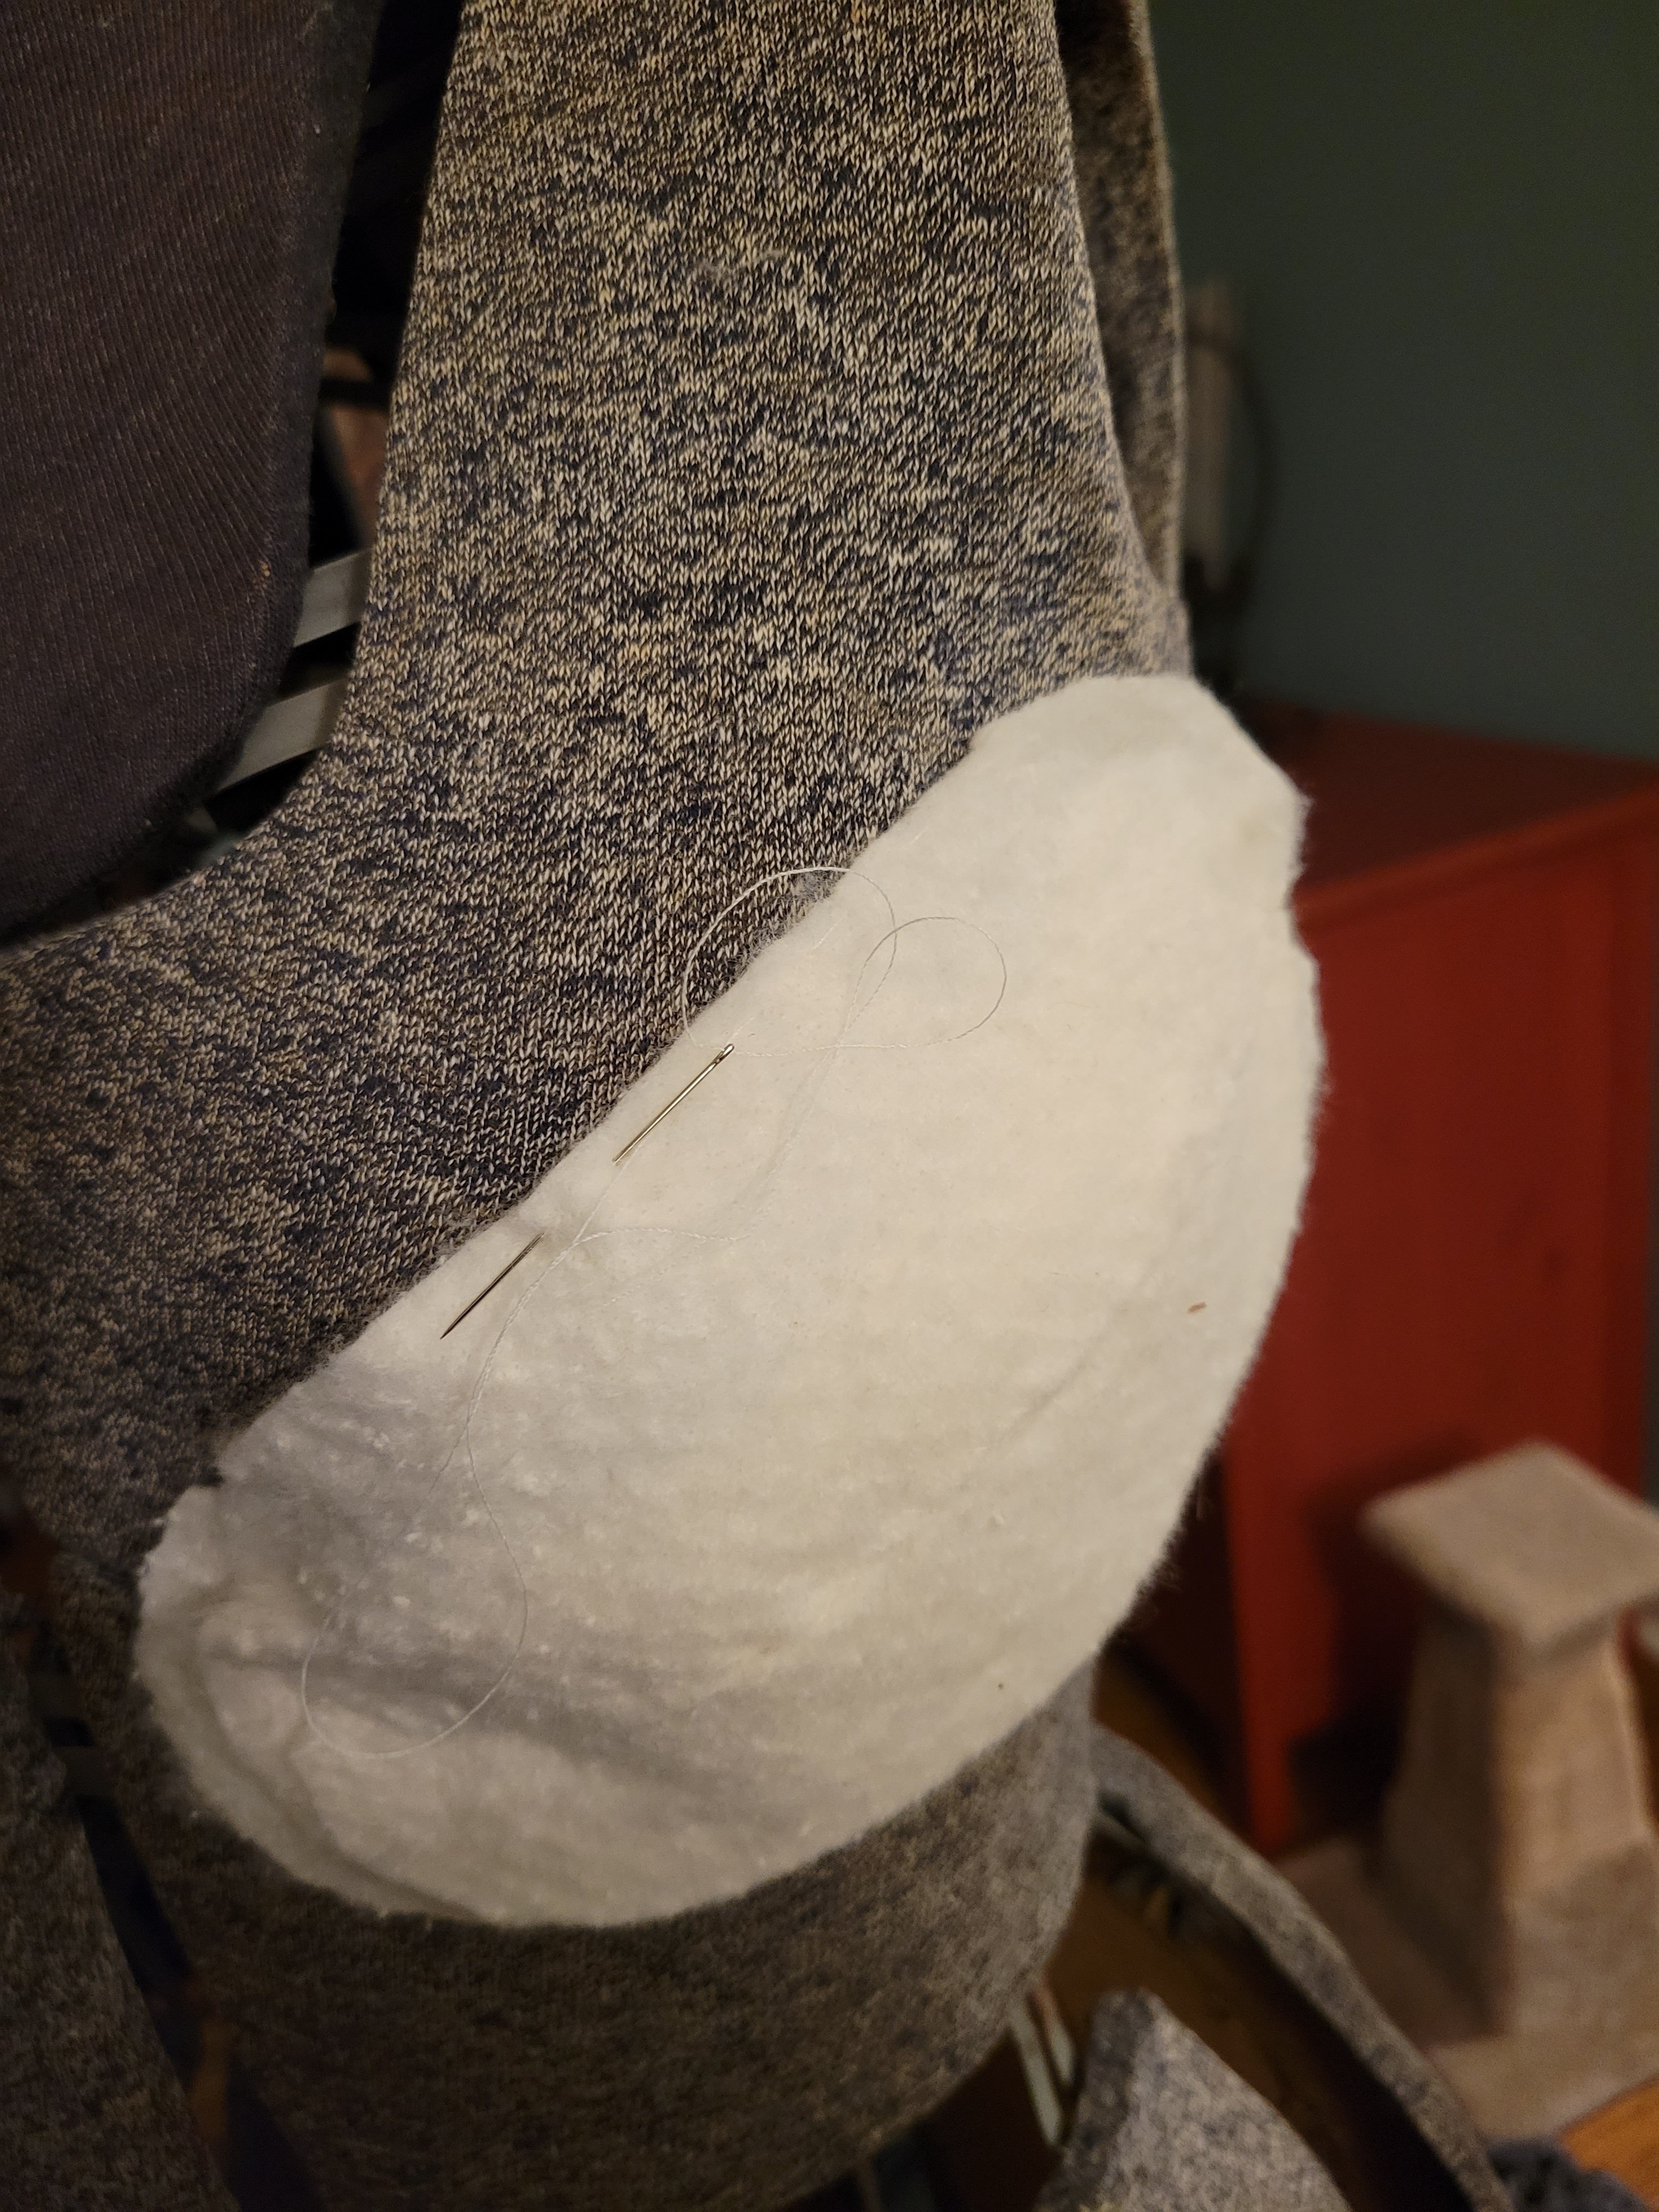
The bust was very pointy! And small. I made three layered pieces with the batting to use as padding. I eyeballed the size of the largest, bottom layer, which I held up to myself to judge the fit. Then I trimmed the piece accordingly and cut the other two layers. I sewed them all together, then carefully stitched them to the dress form. I used a simple whip stitch.
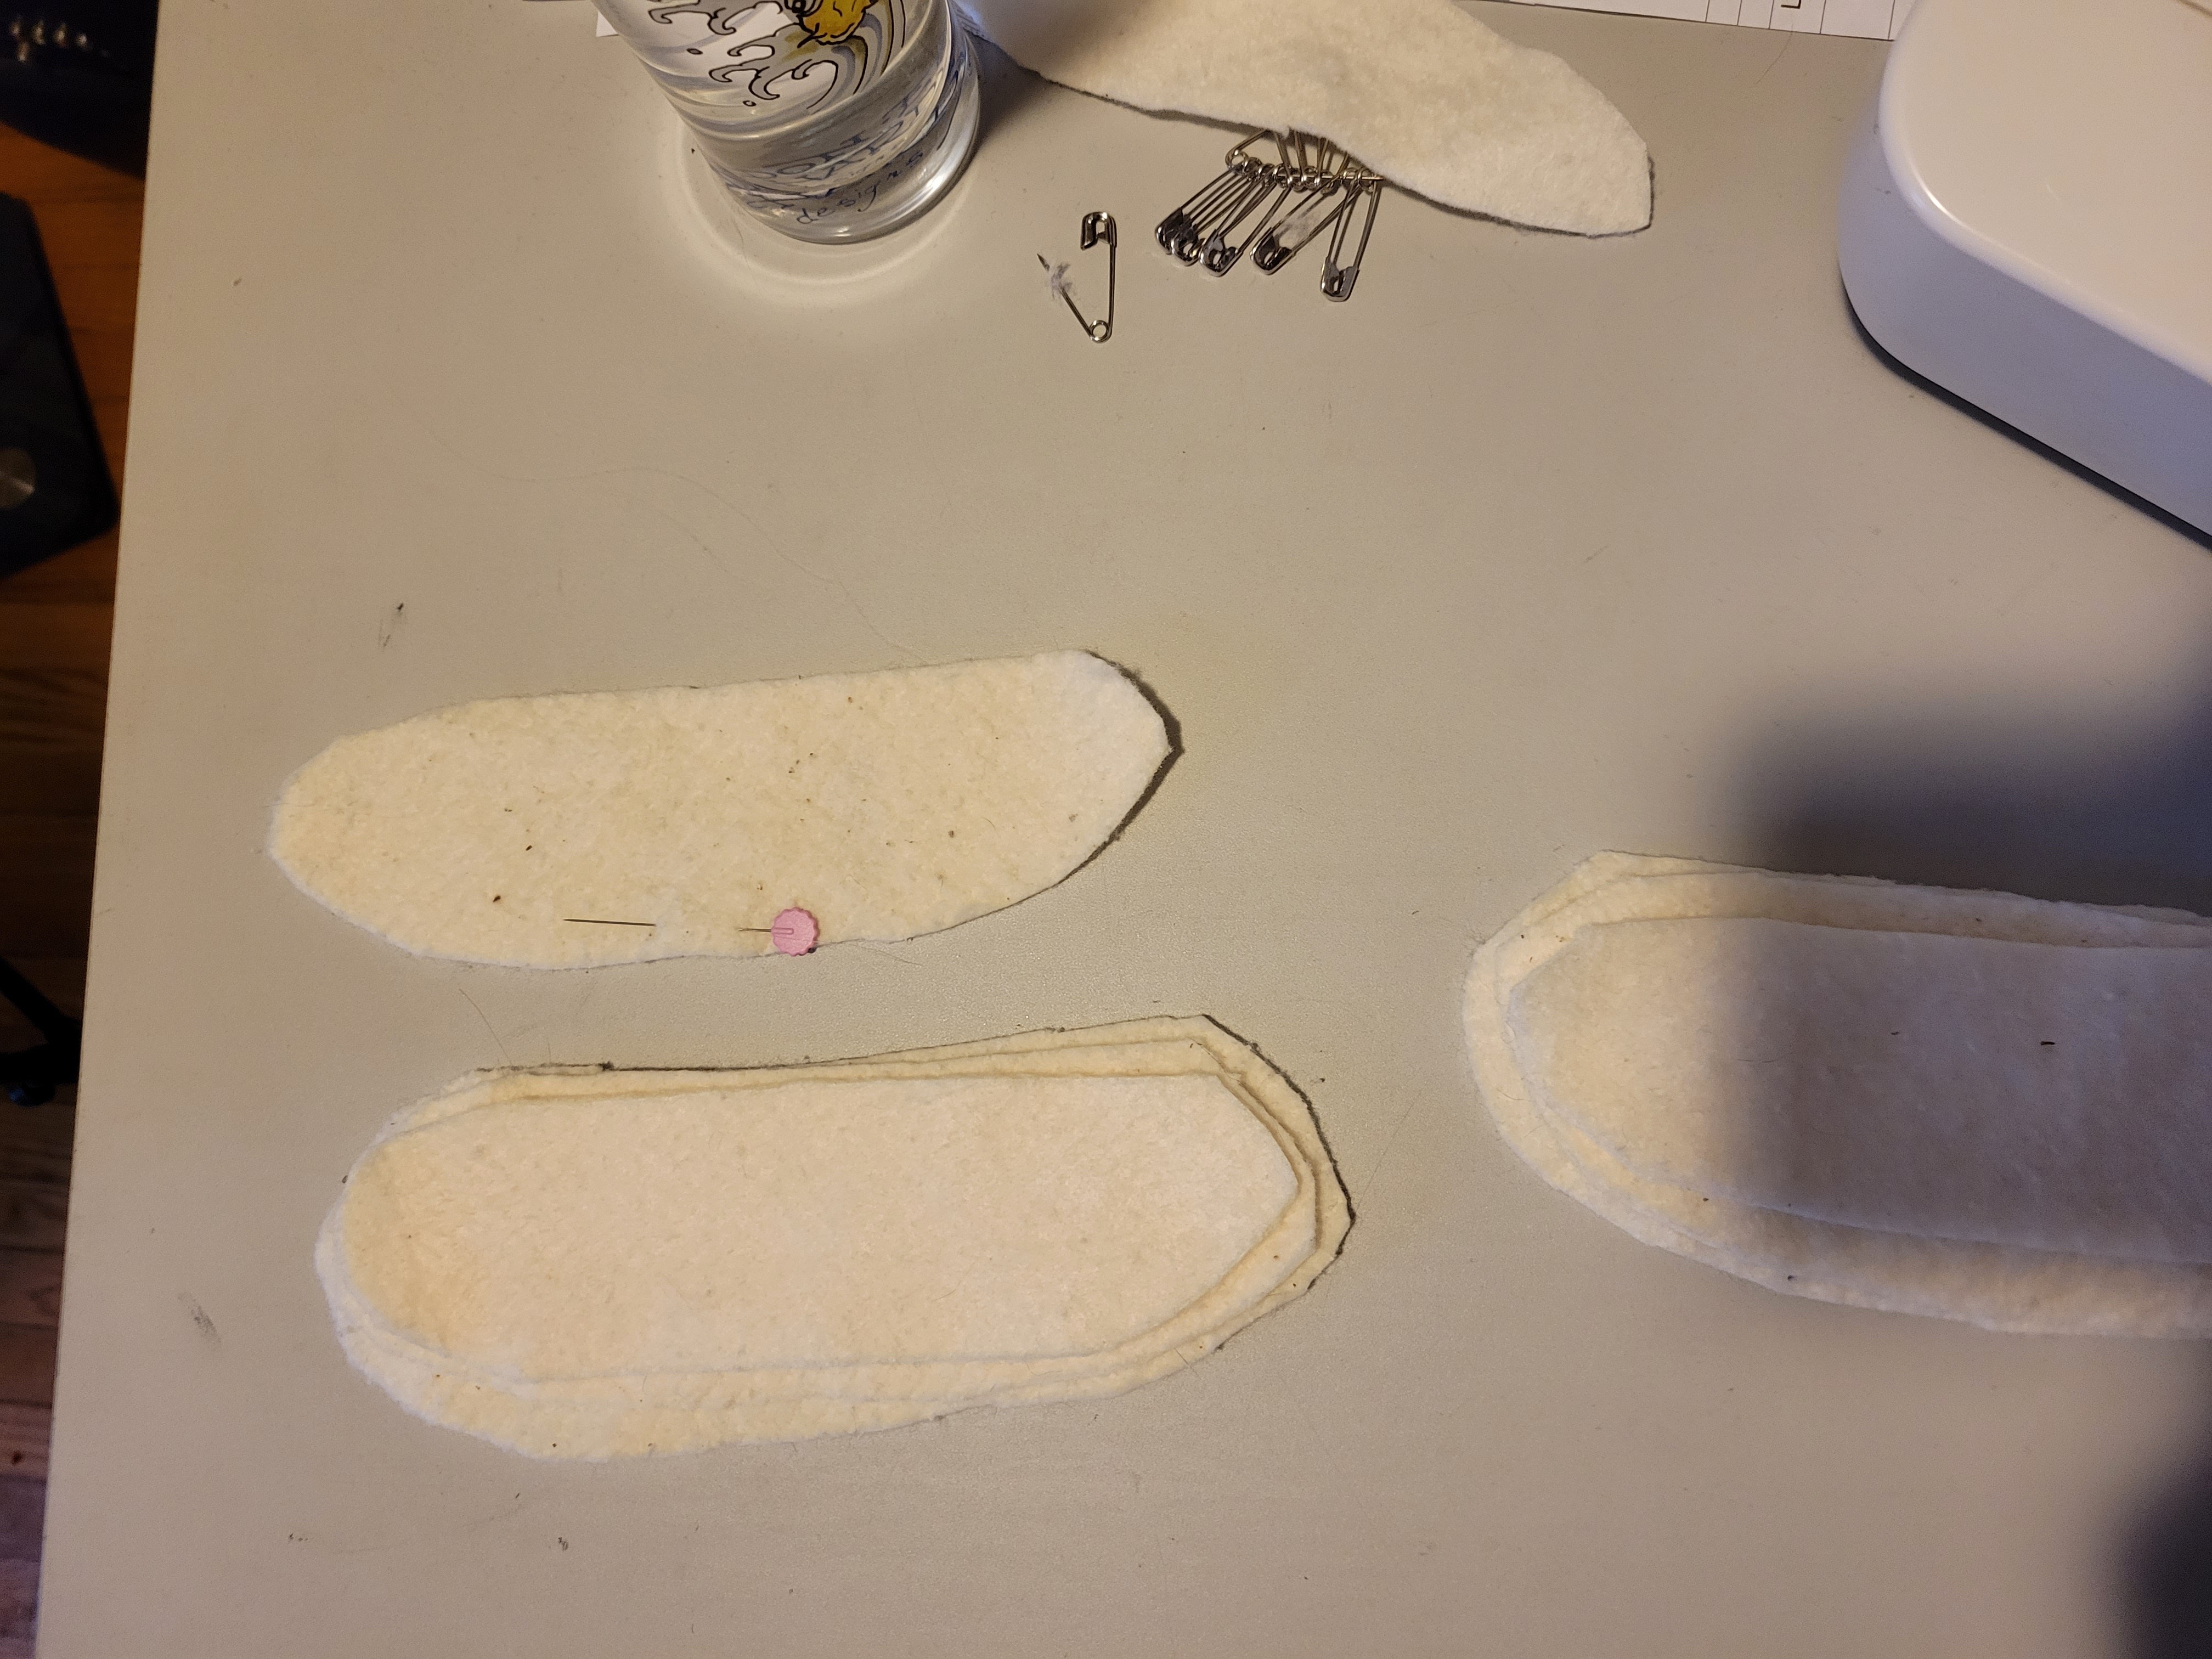
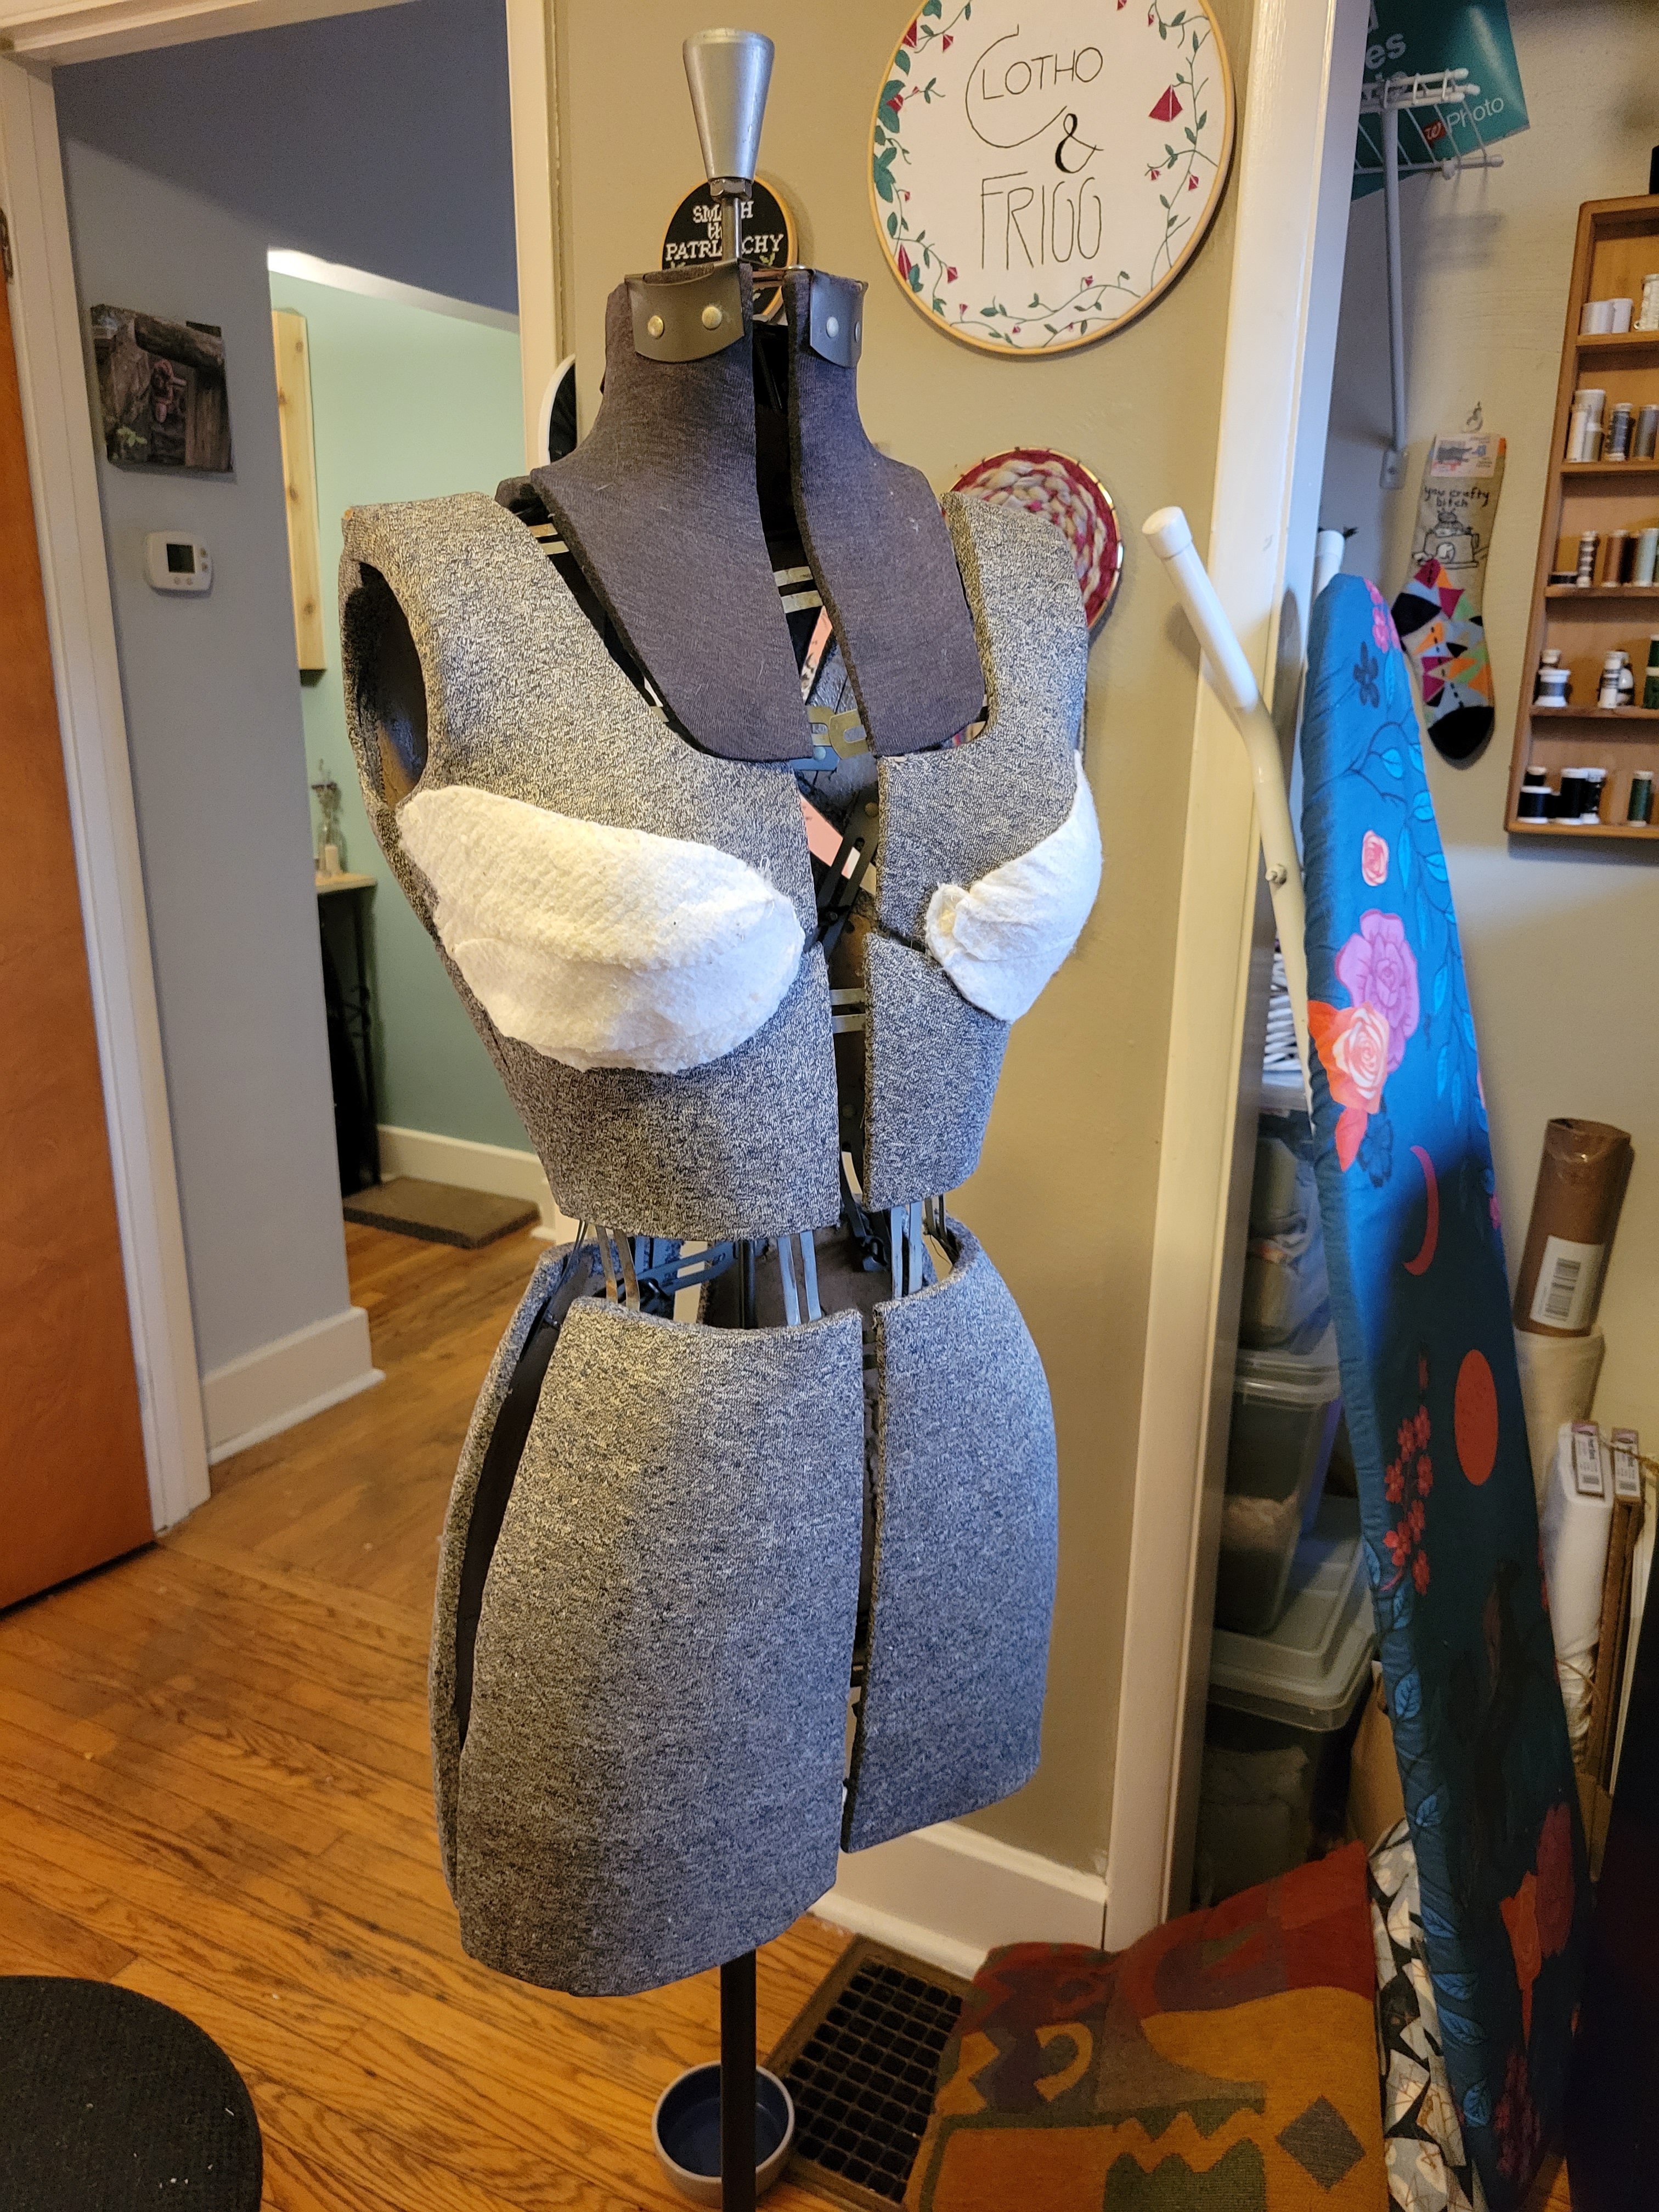
The bum was completely flat. A regular Pamela’s Pancake. At this point, I had used up all my batting, so I used some thick wool scraps instead. I used the same method as the bust to cut and attach the pieces. It’s a little crude, but it works.
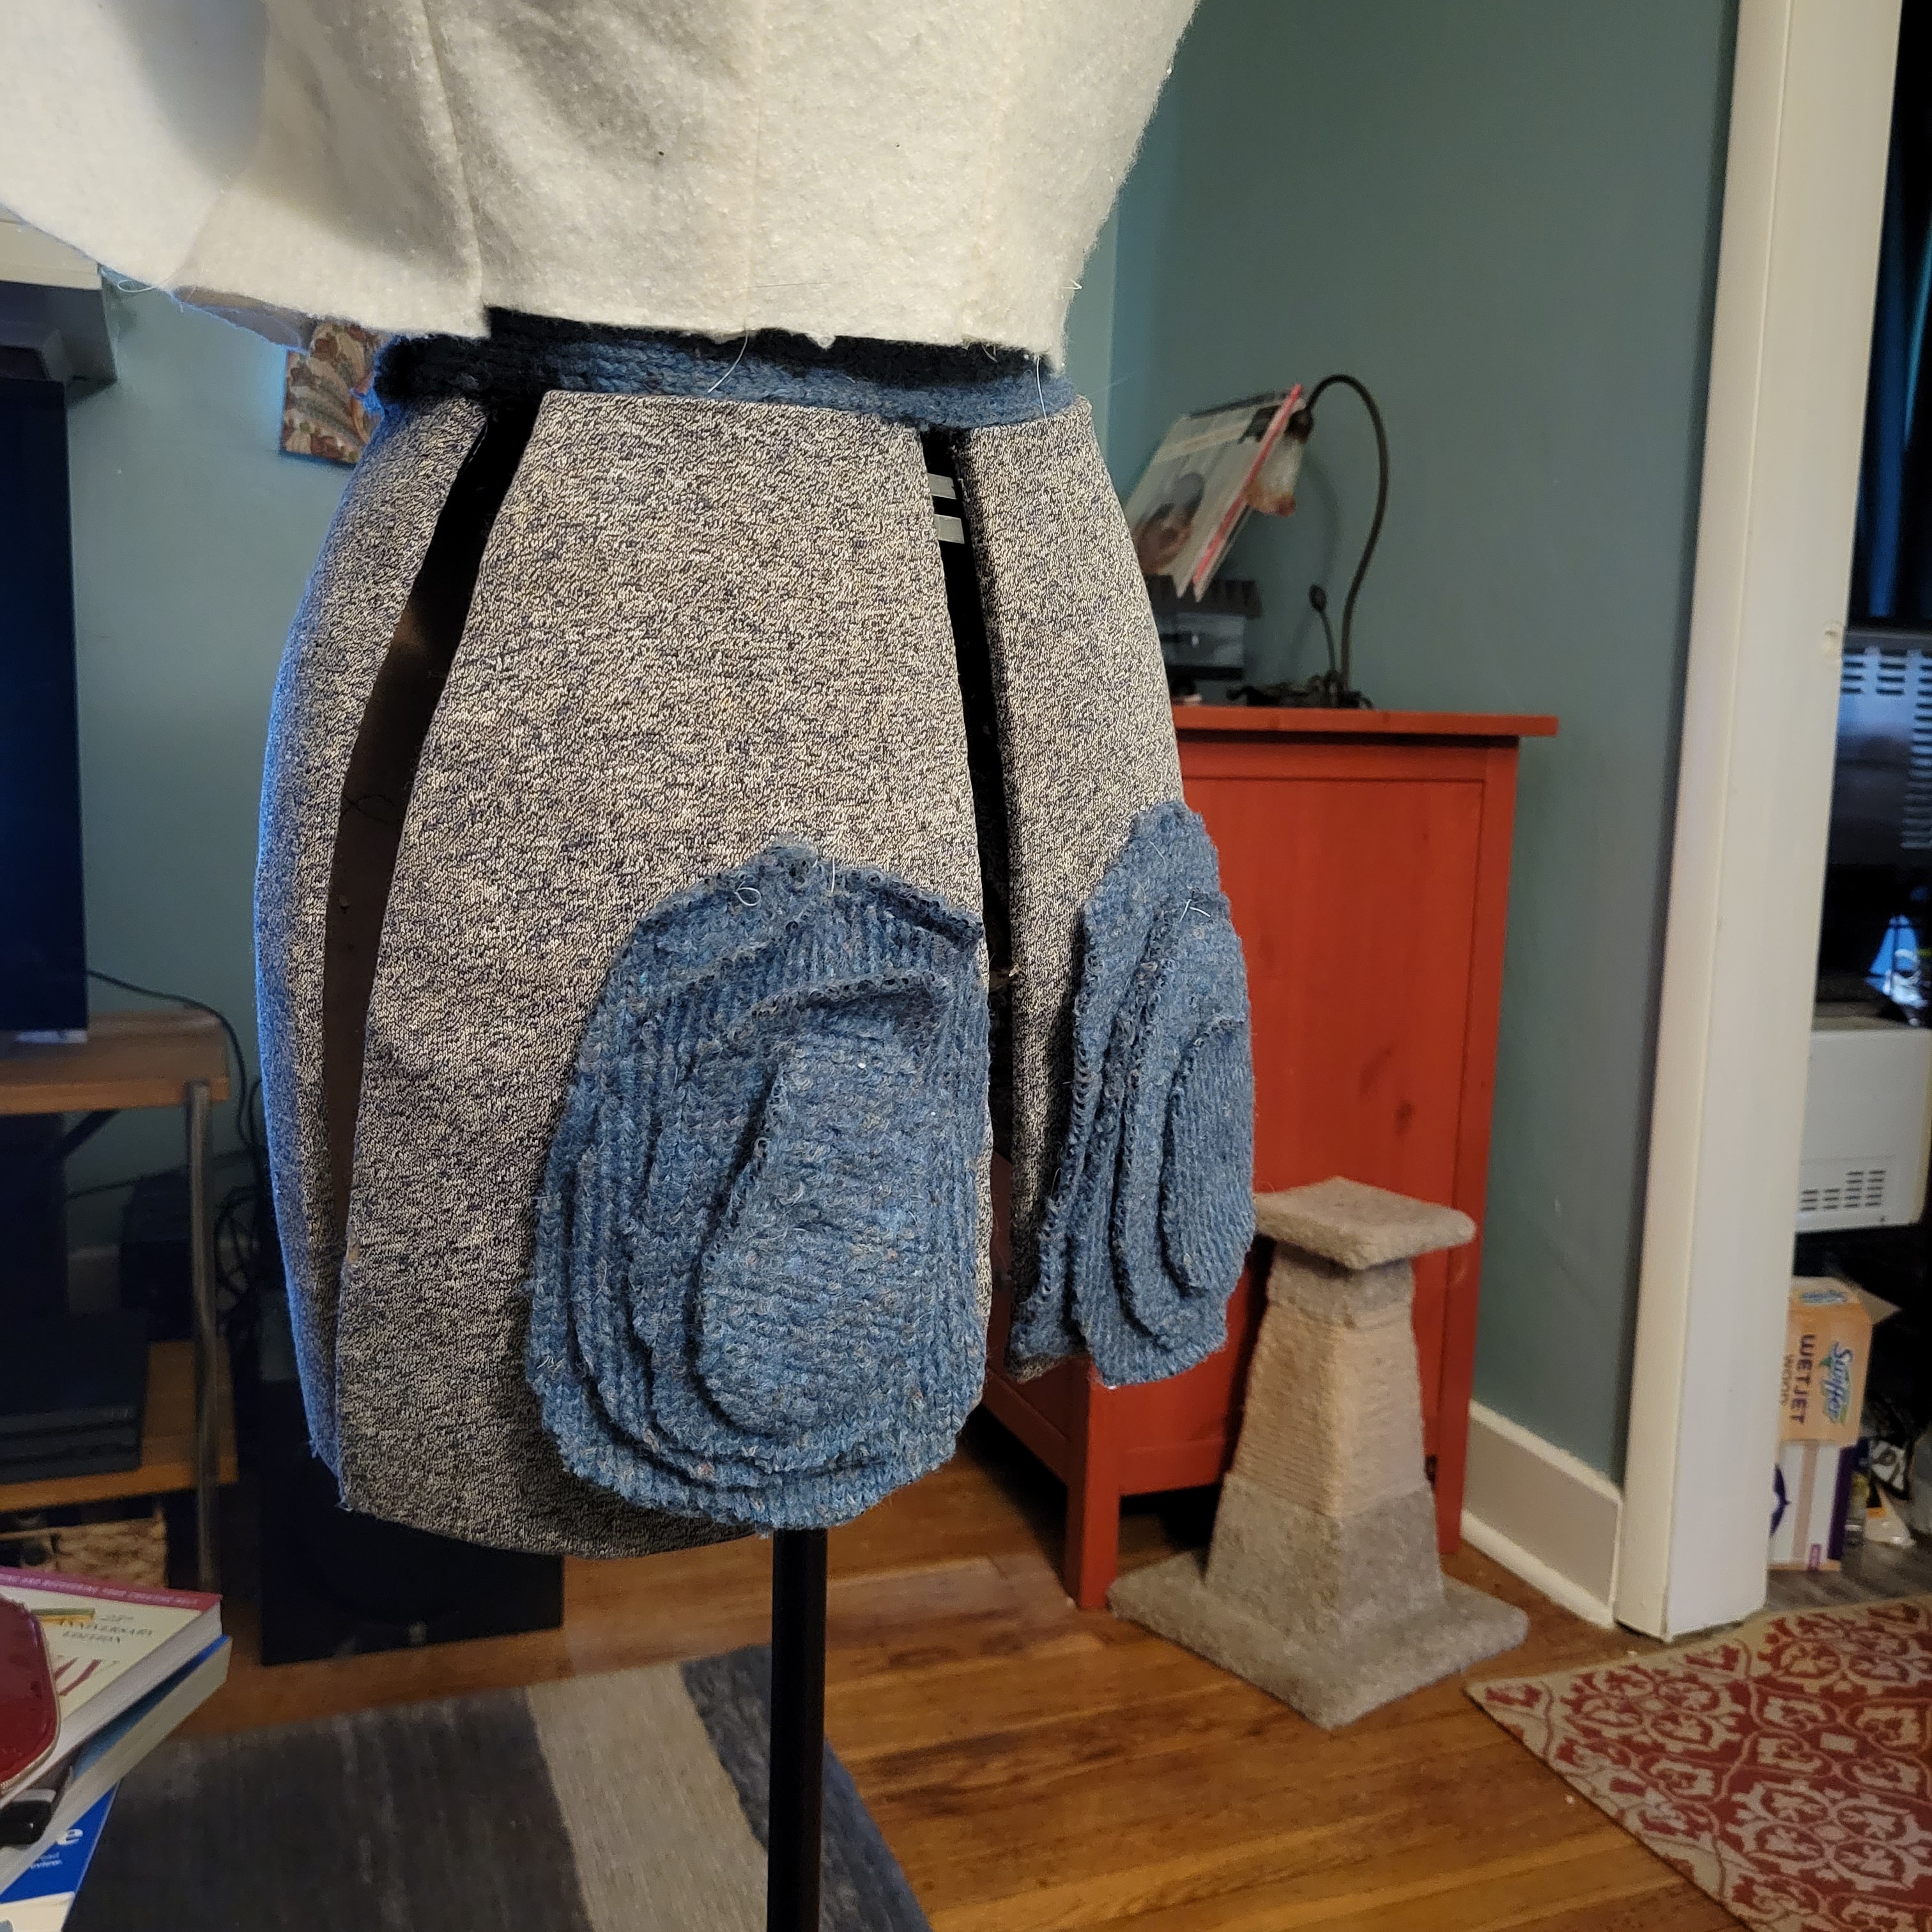
My pads are definitely not perfect, but they give the dress form a more modern shape.
I went to the fabric store and bought more batting. For the upper bodice, I used my custom sloper block. I sewed it up like normal, with the front and back darts, leaving the front open. Because the sloper has built-in ease, it was a little too big.
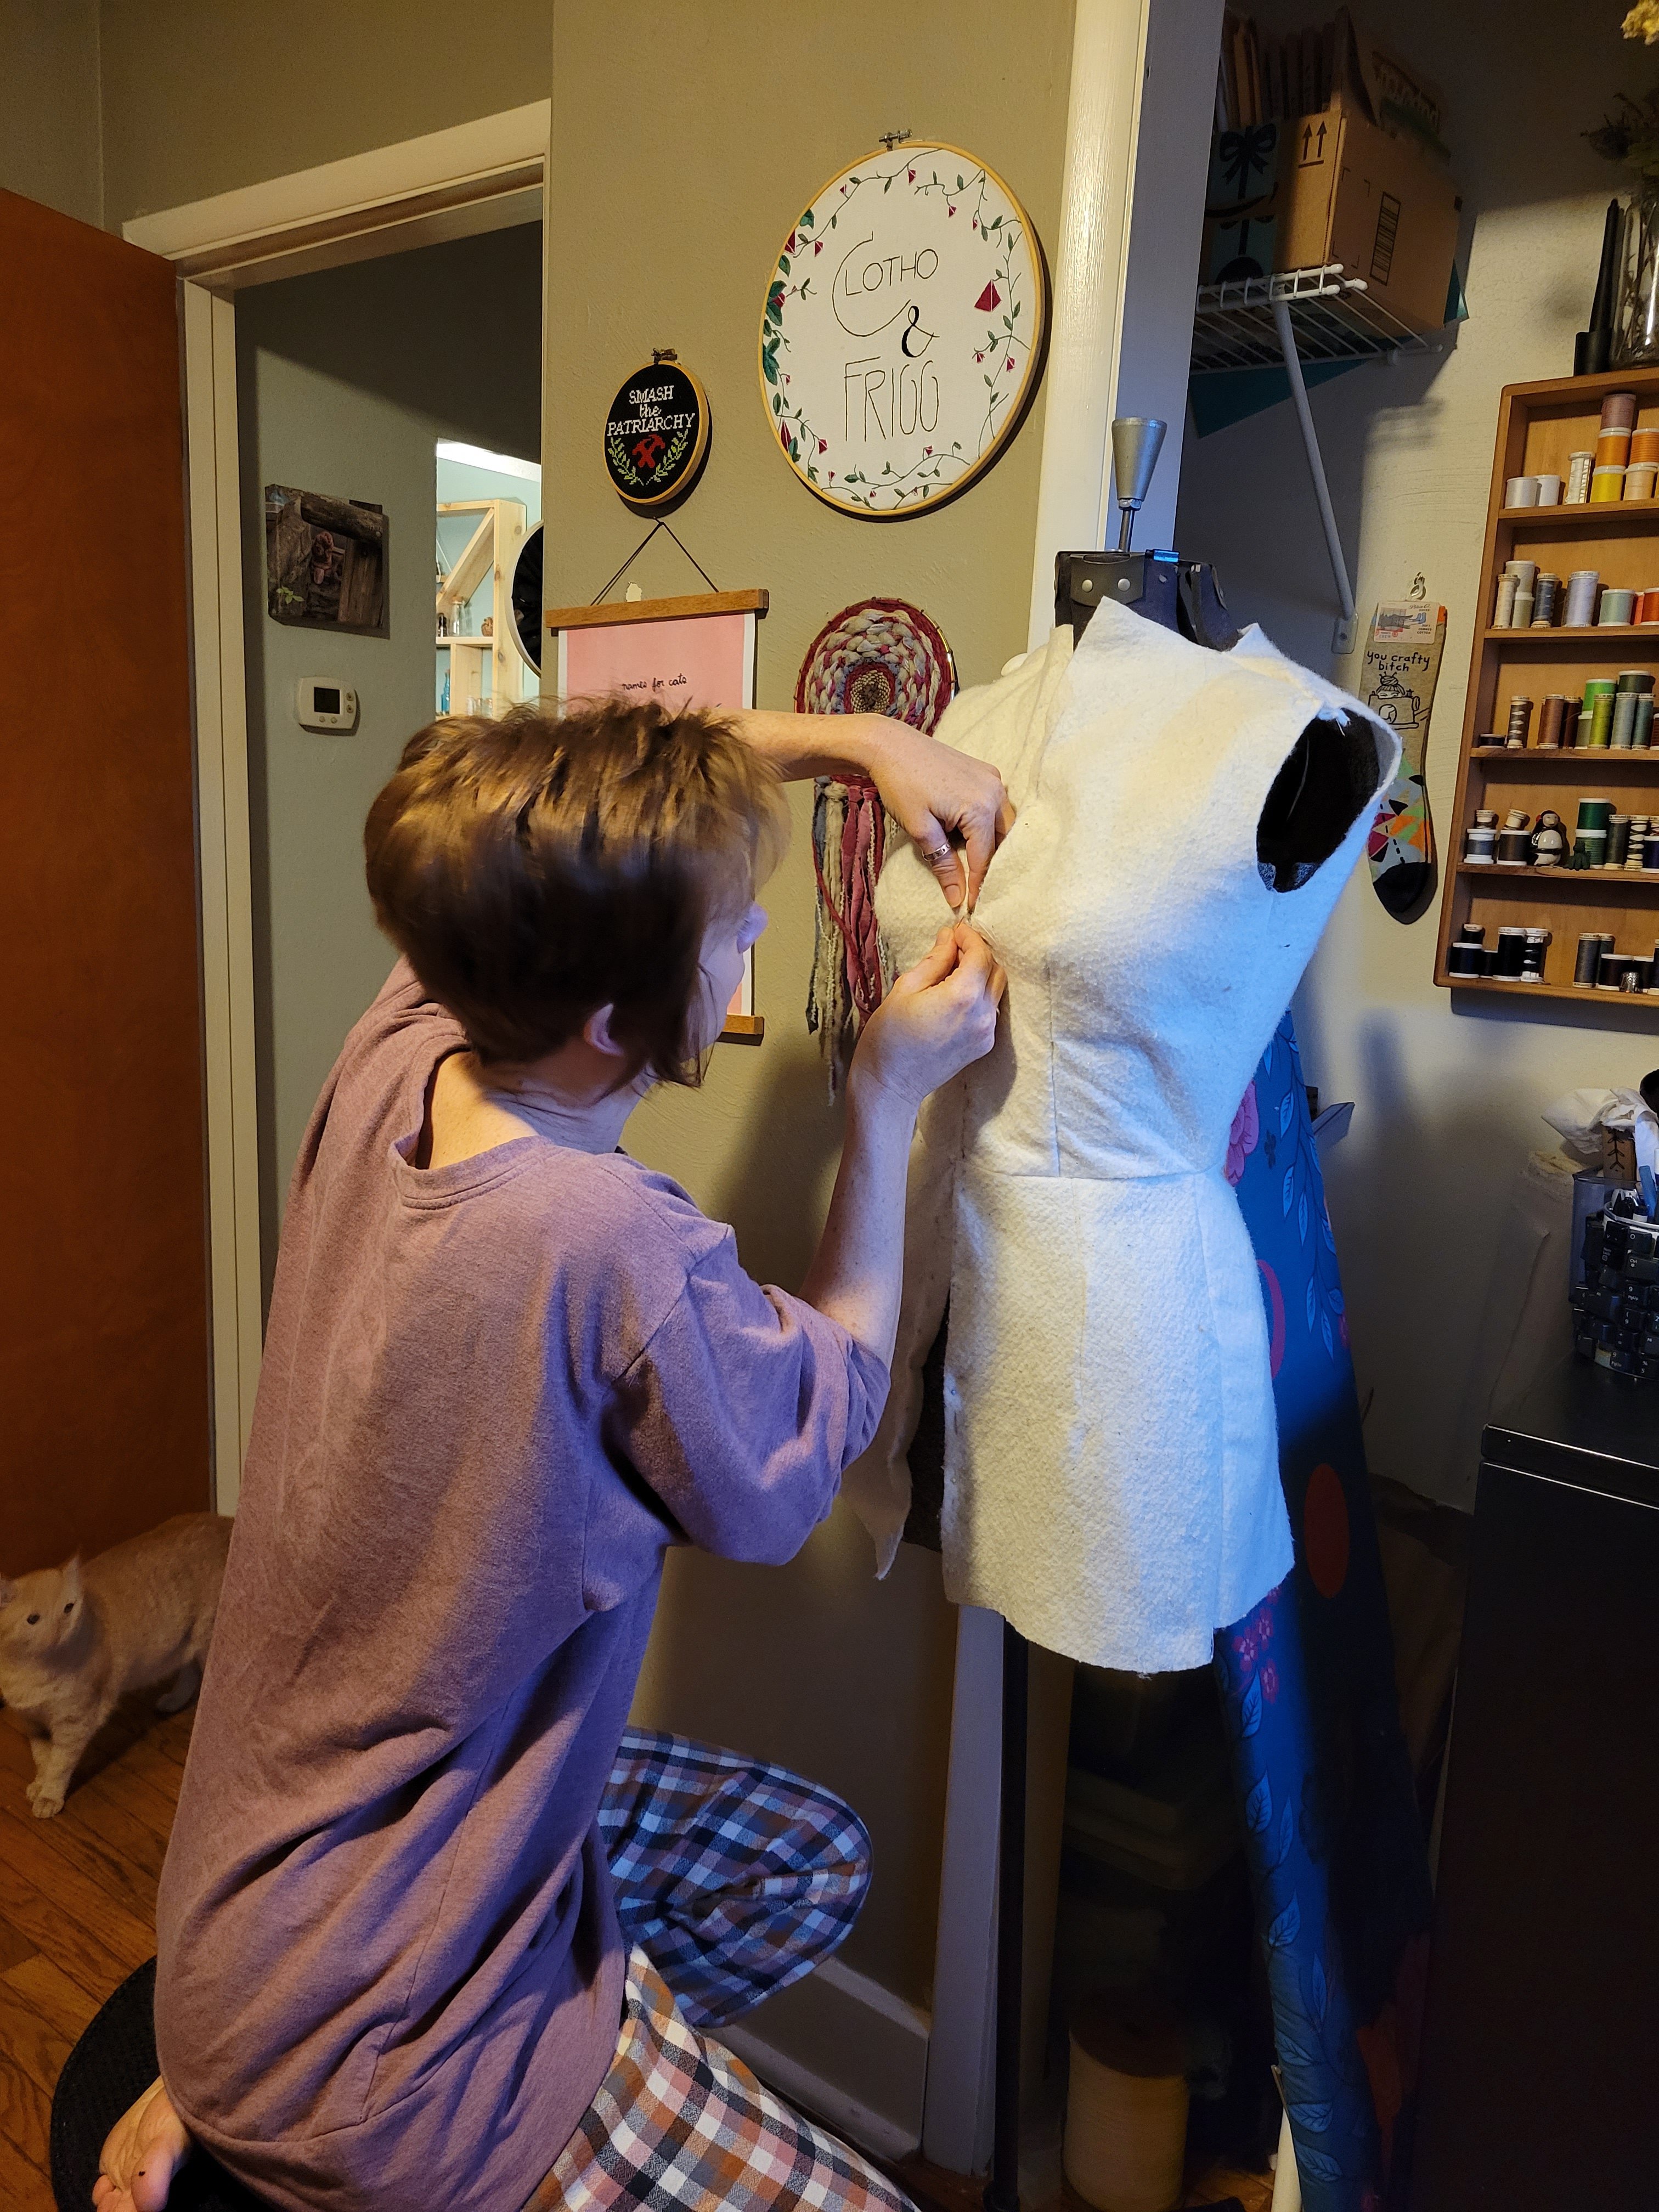
I put it on the form inside out and used safety pins to close the center front. Then I pinned the darts flush with the body, hand sewing them. I took in the side and shoulder seams a bit, too.
For the lower body, I practiced draping for the first time! I lined a square of batting up with the waist and center front, pinned a dart, and cut the shape of the side curve. Each of the four bottom pieces were hand-cut this way. I sewed them together, leaving the front open, then attached the “skirt” to the bodice at the waist. Finally, I hand-tailored the back inside out, like the front.
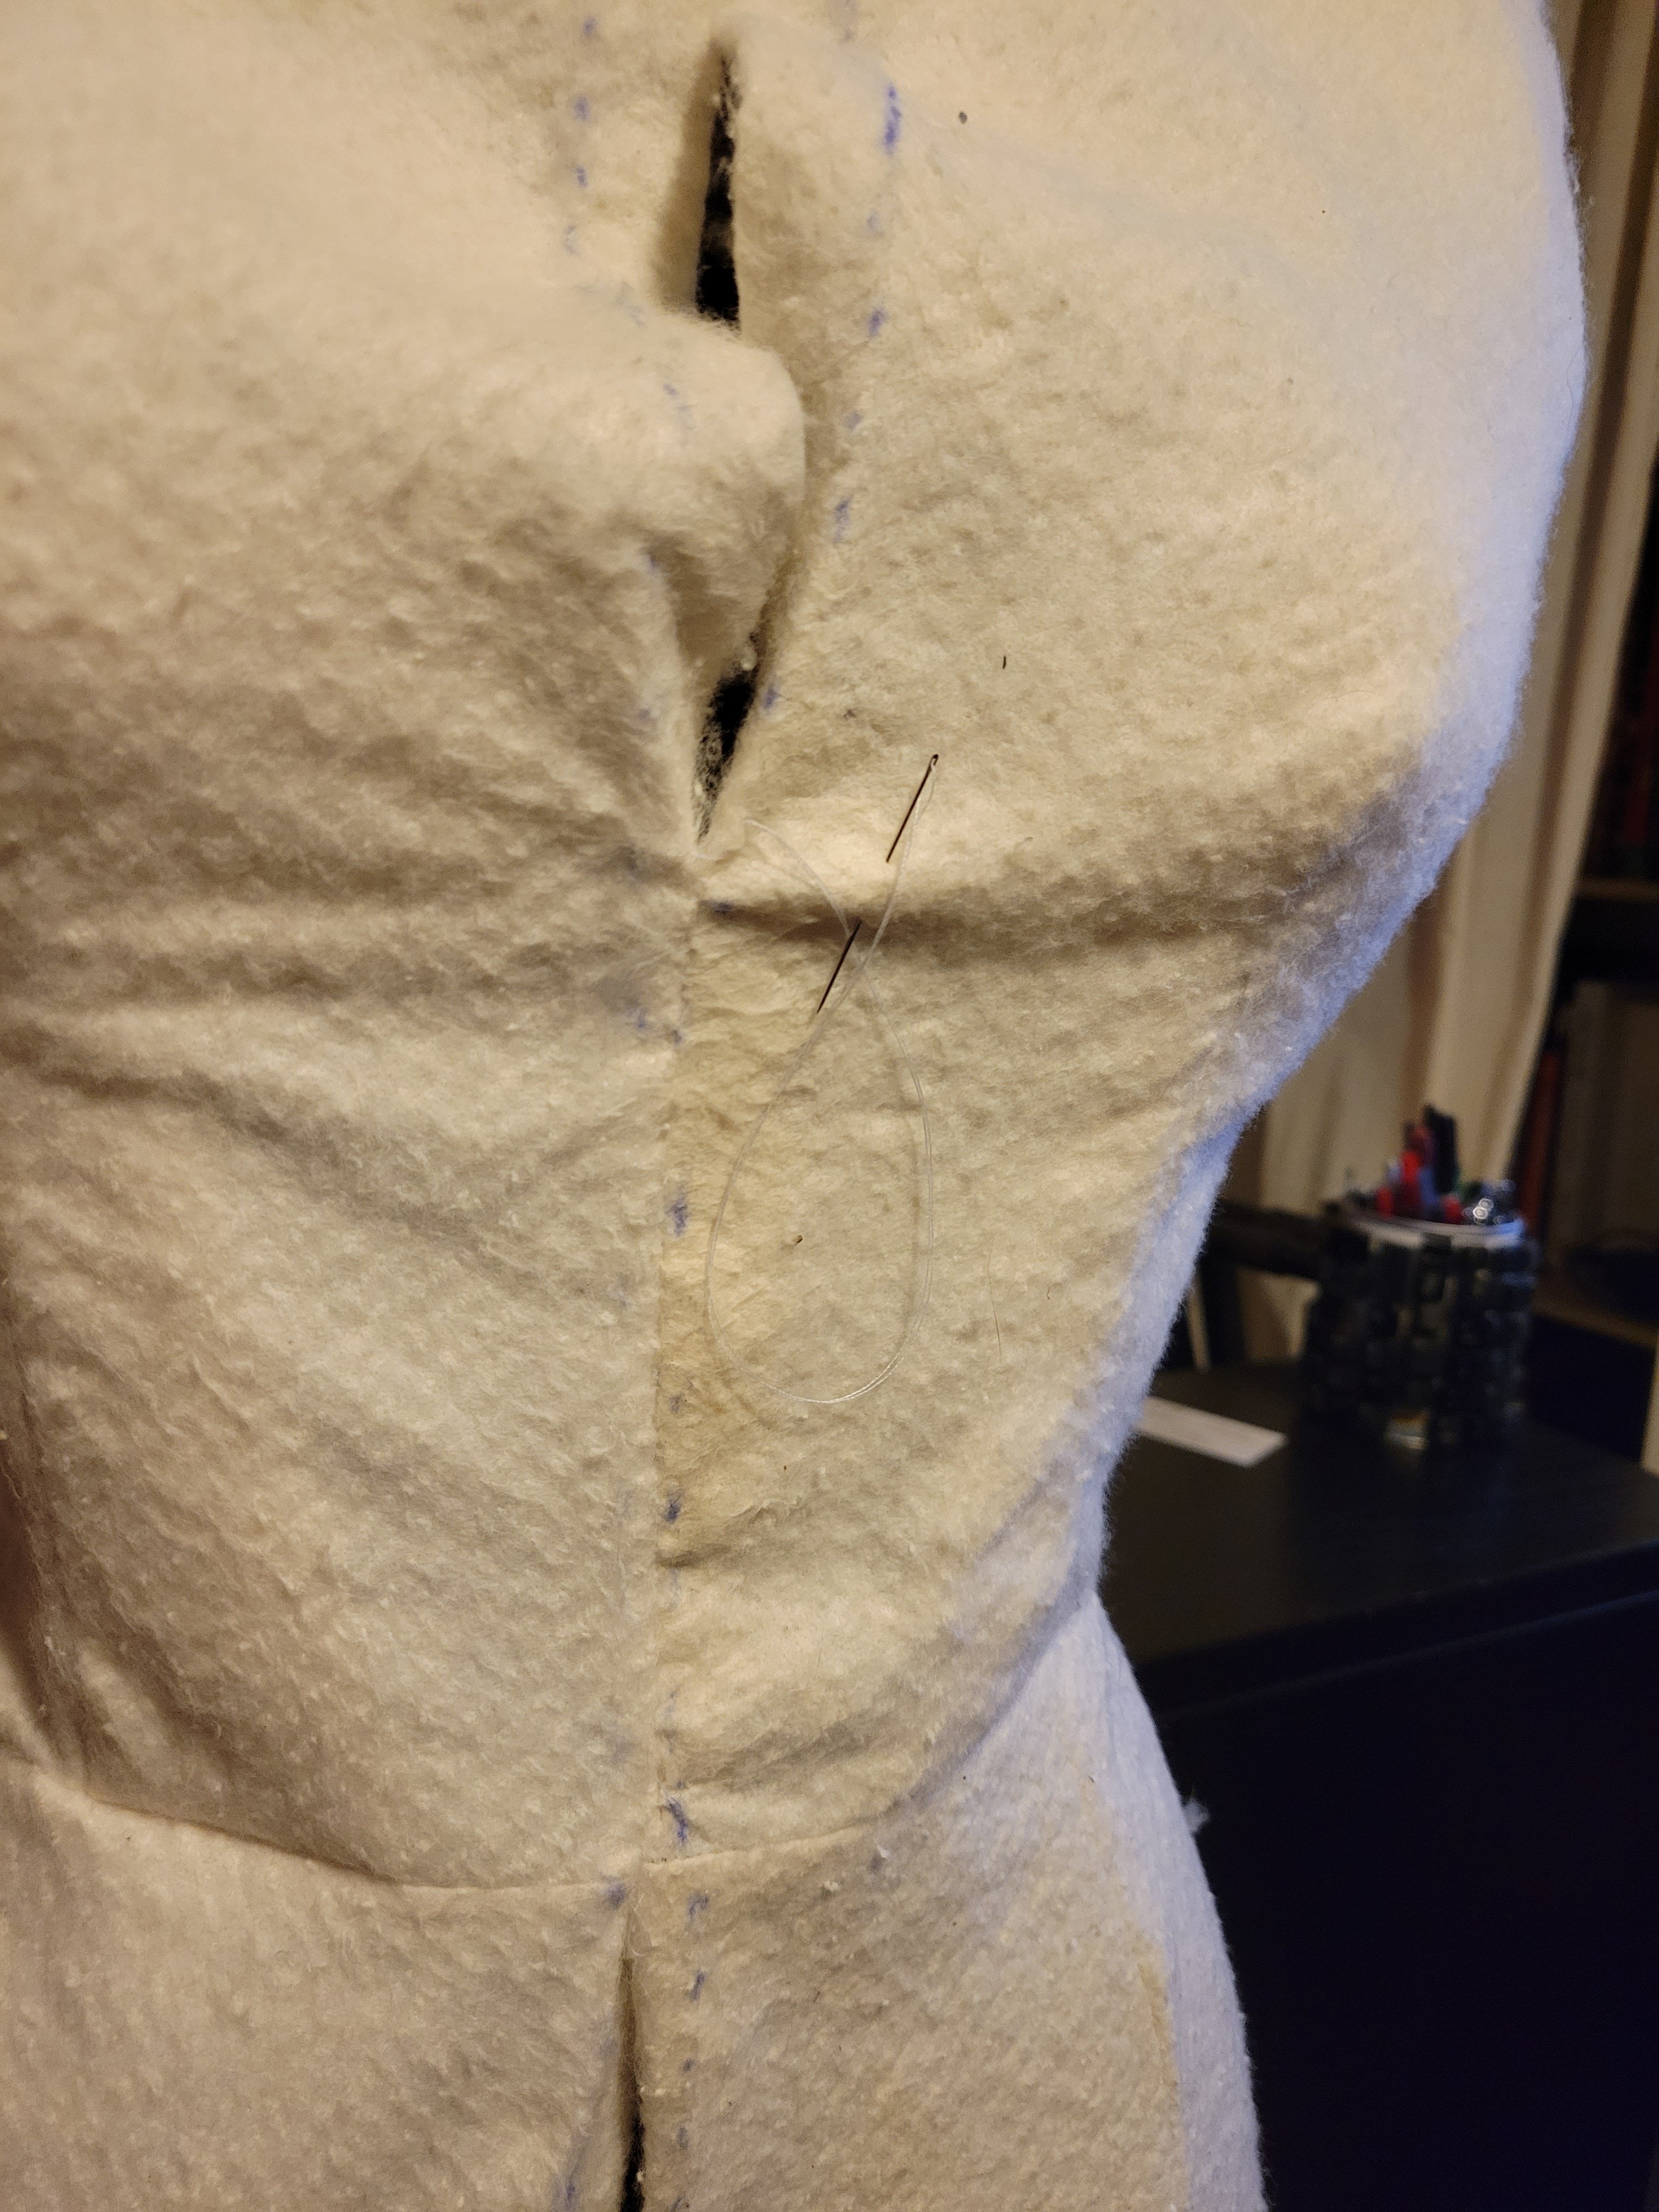
The final step was to sew the cover closed at the center front. It was tight, difficult to sew. So I pinned the center front, but I pinned it with the seam allowance to the outside. I marked where the sides should meet with a ballpoint pen.
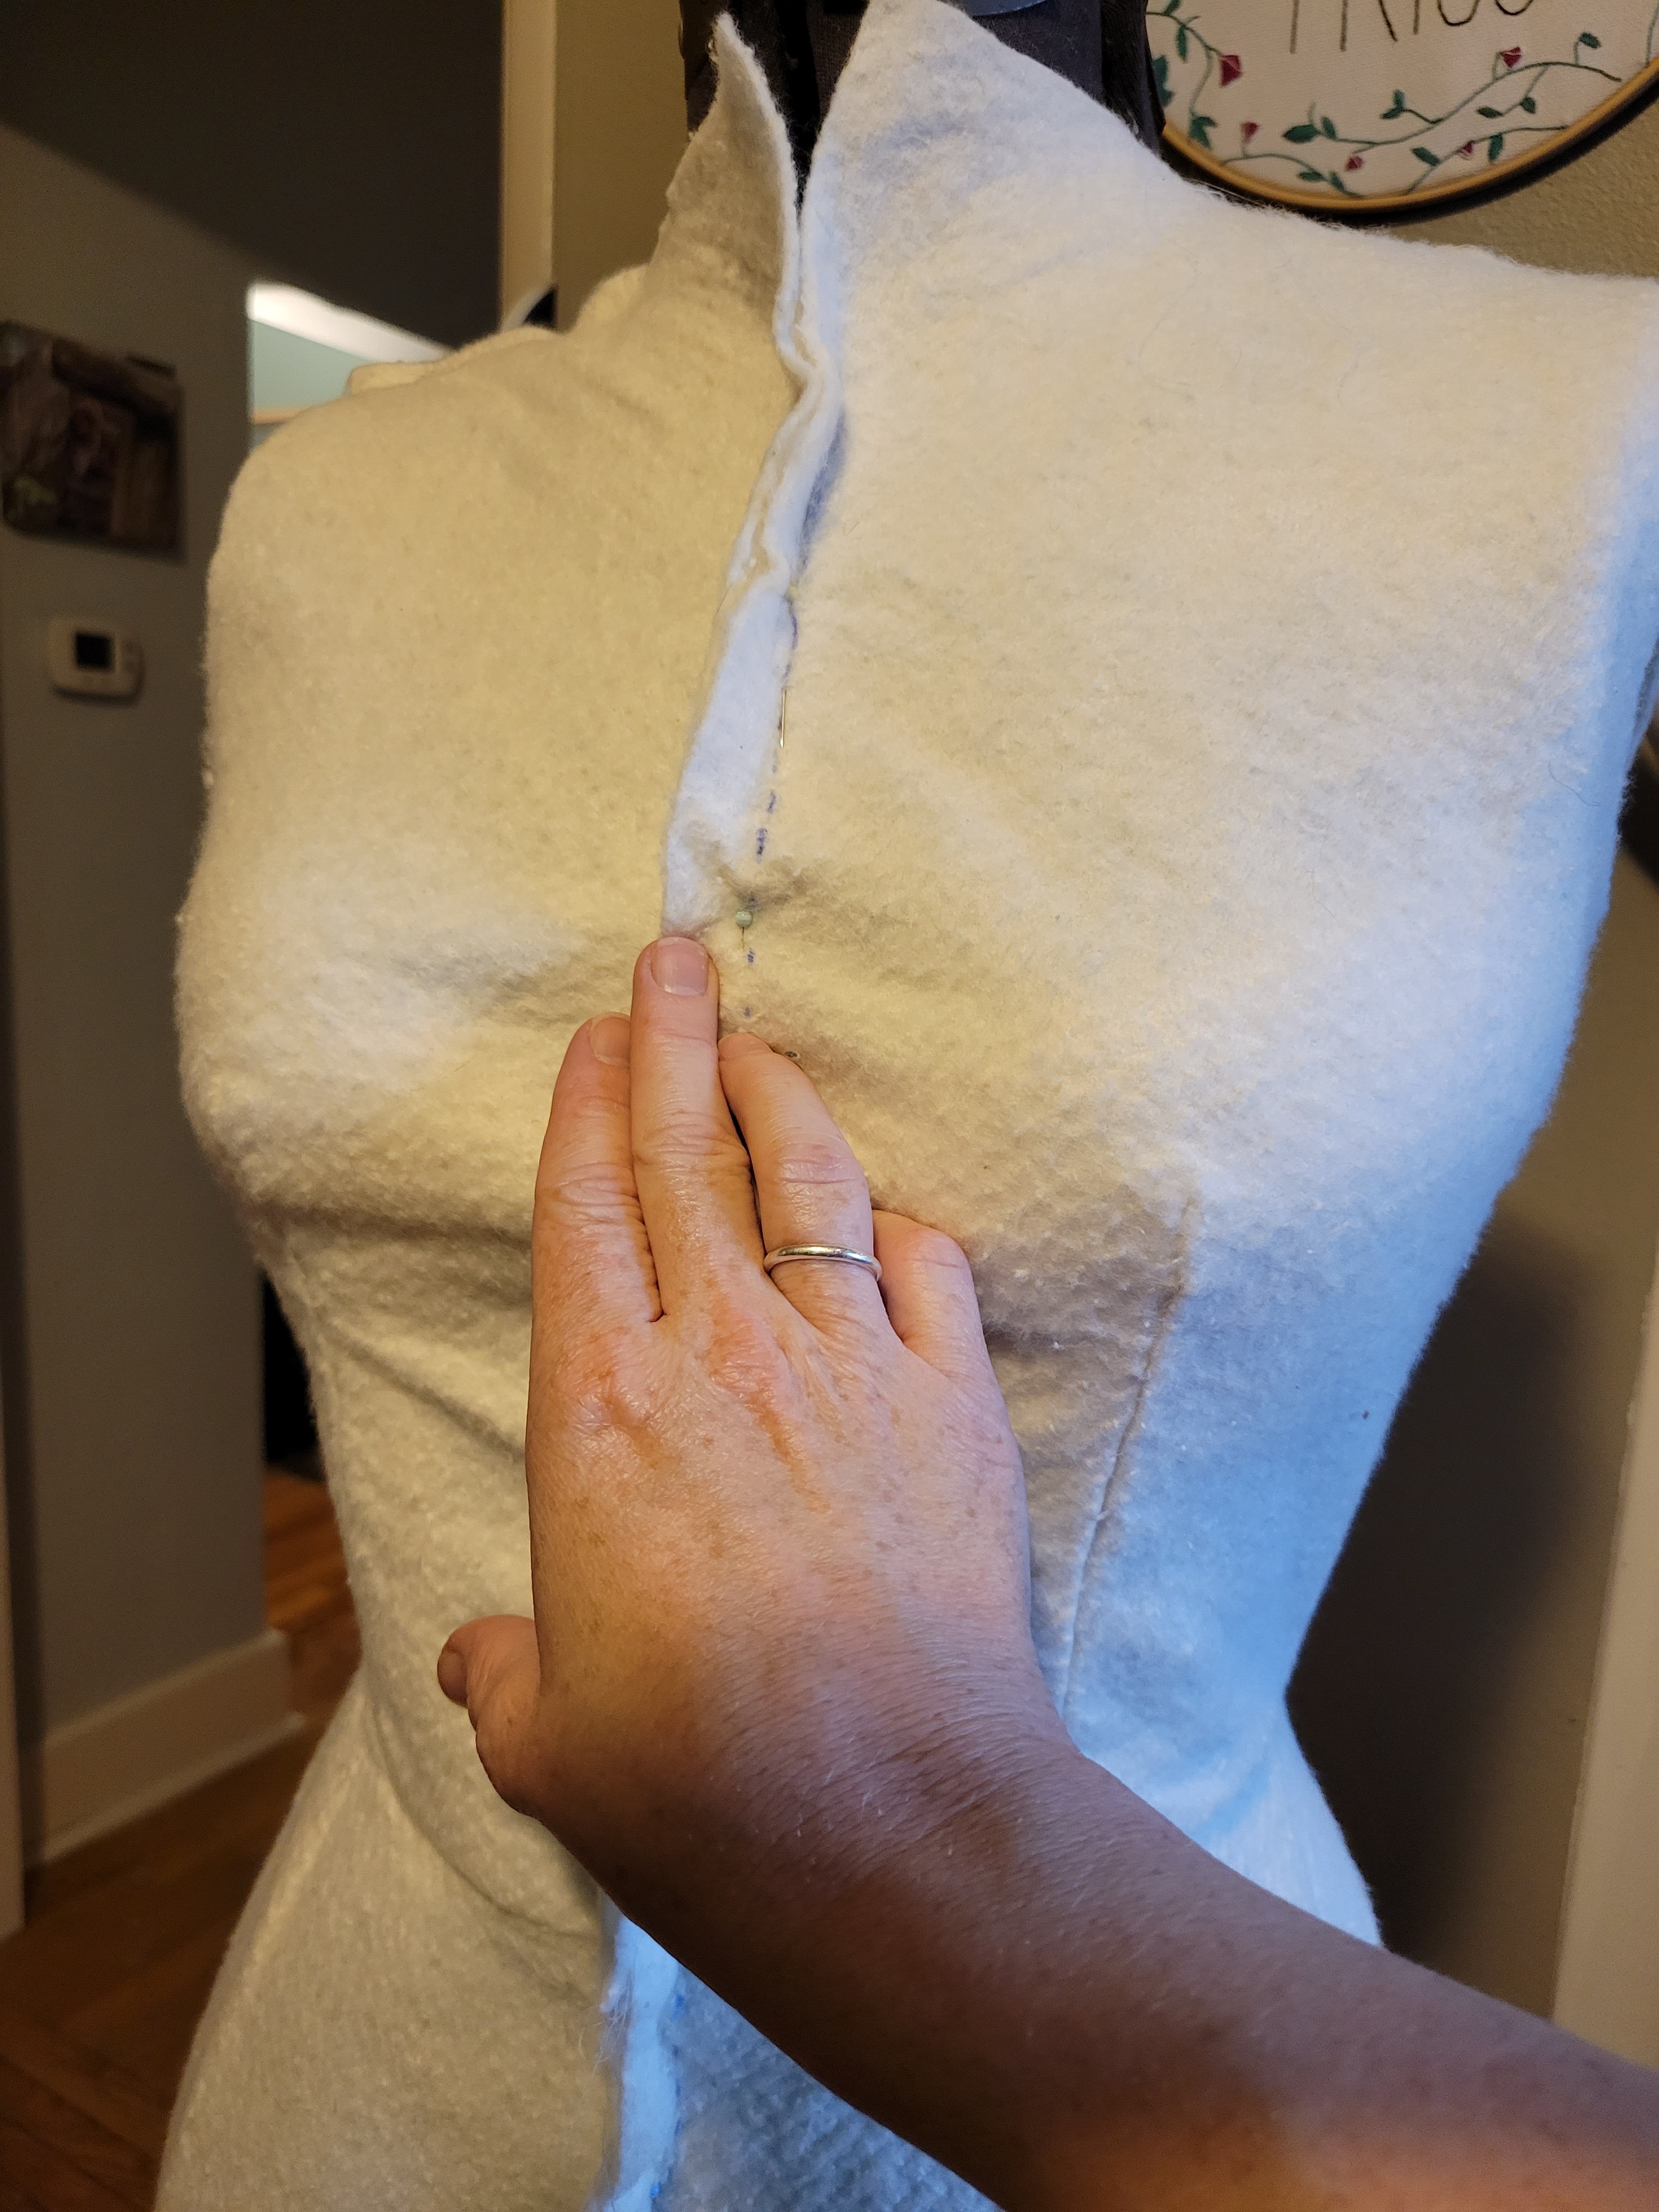
With the marks in place, I started to sew the cover using a ladder stitch. I started at the waist seam so it would match, going up toward the neck. After finishing that, I worked from the waist down. Some of the pen marks are on the outside, but the cover fits well! It covers all the gaps, protects the fragile original cover, and is pinnable.
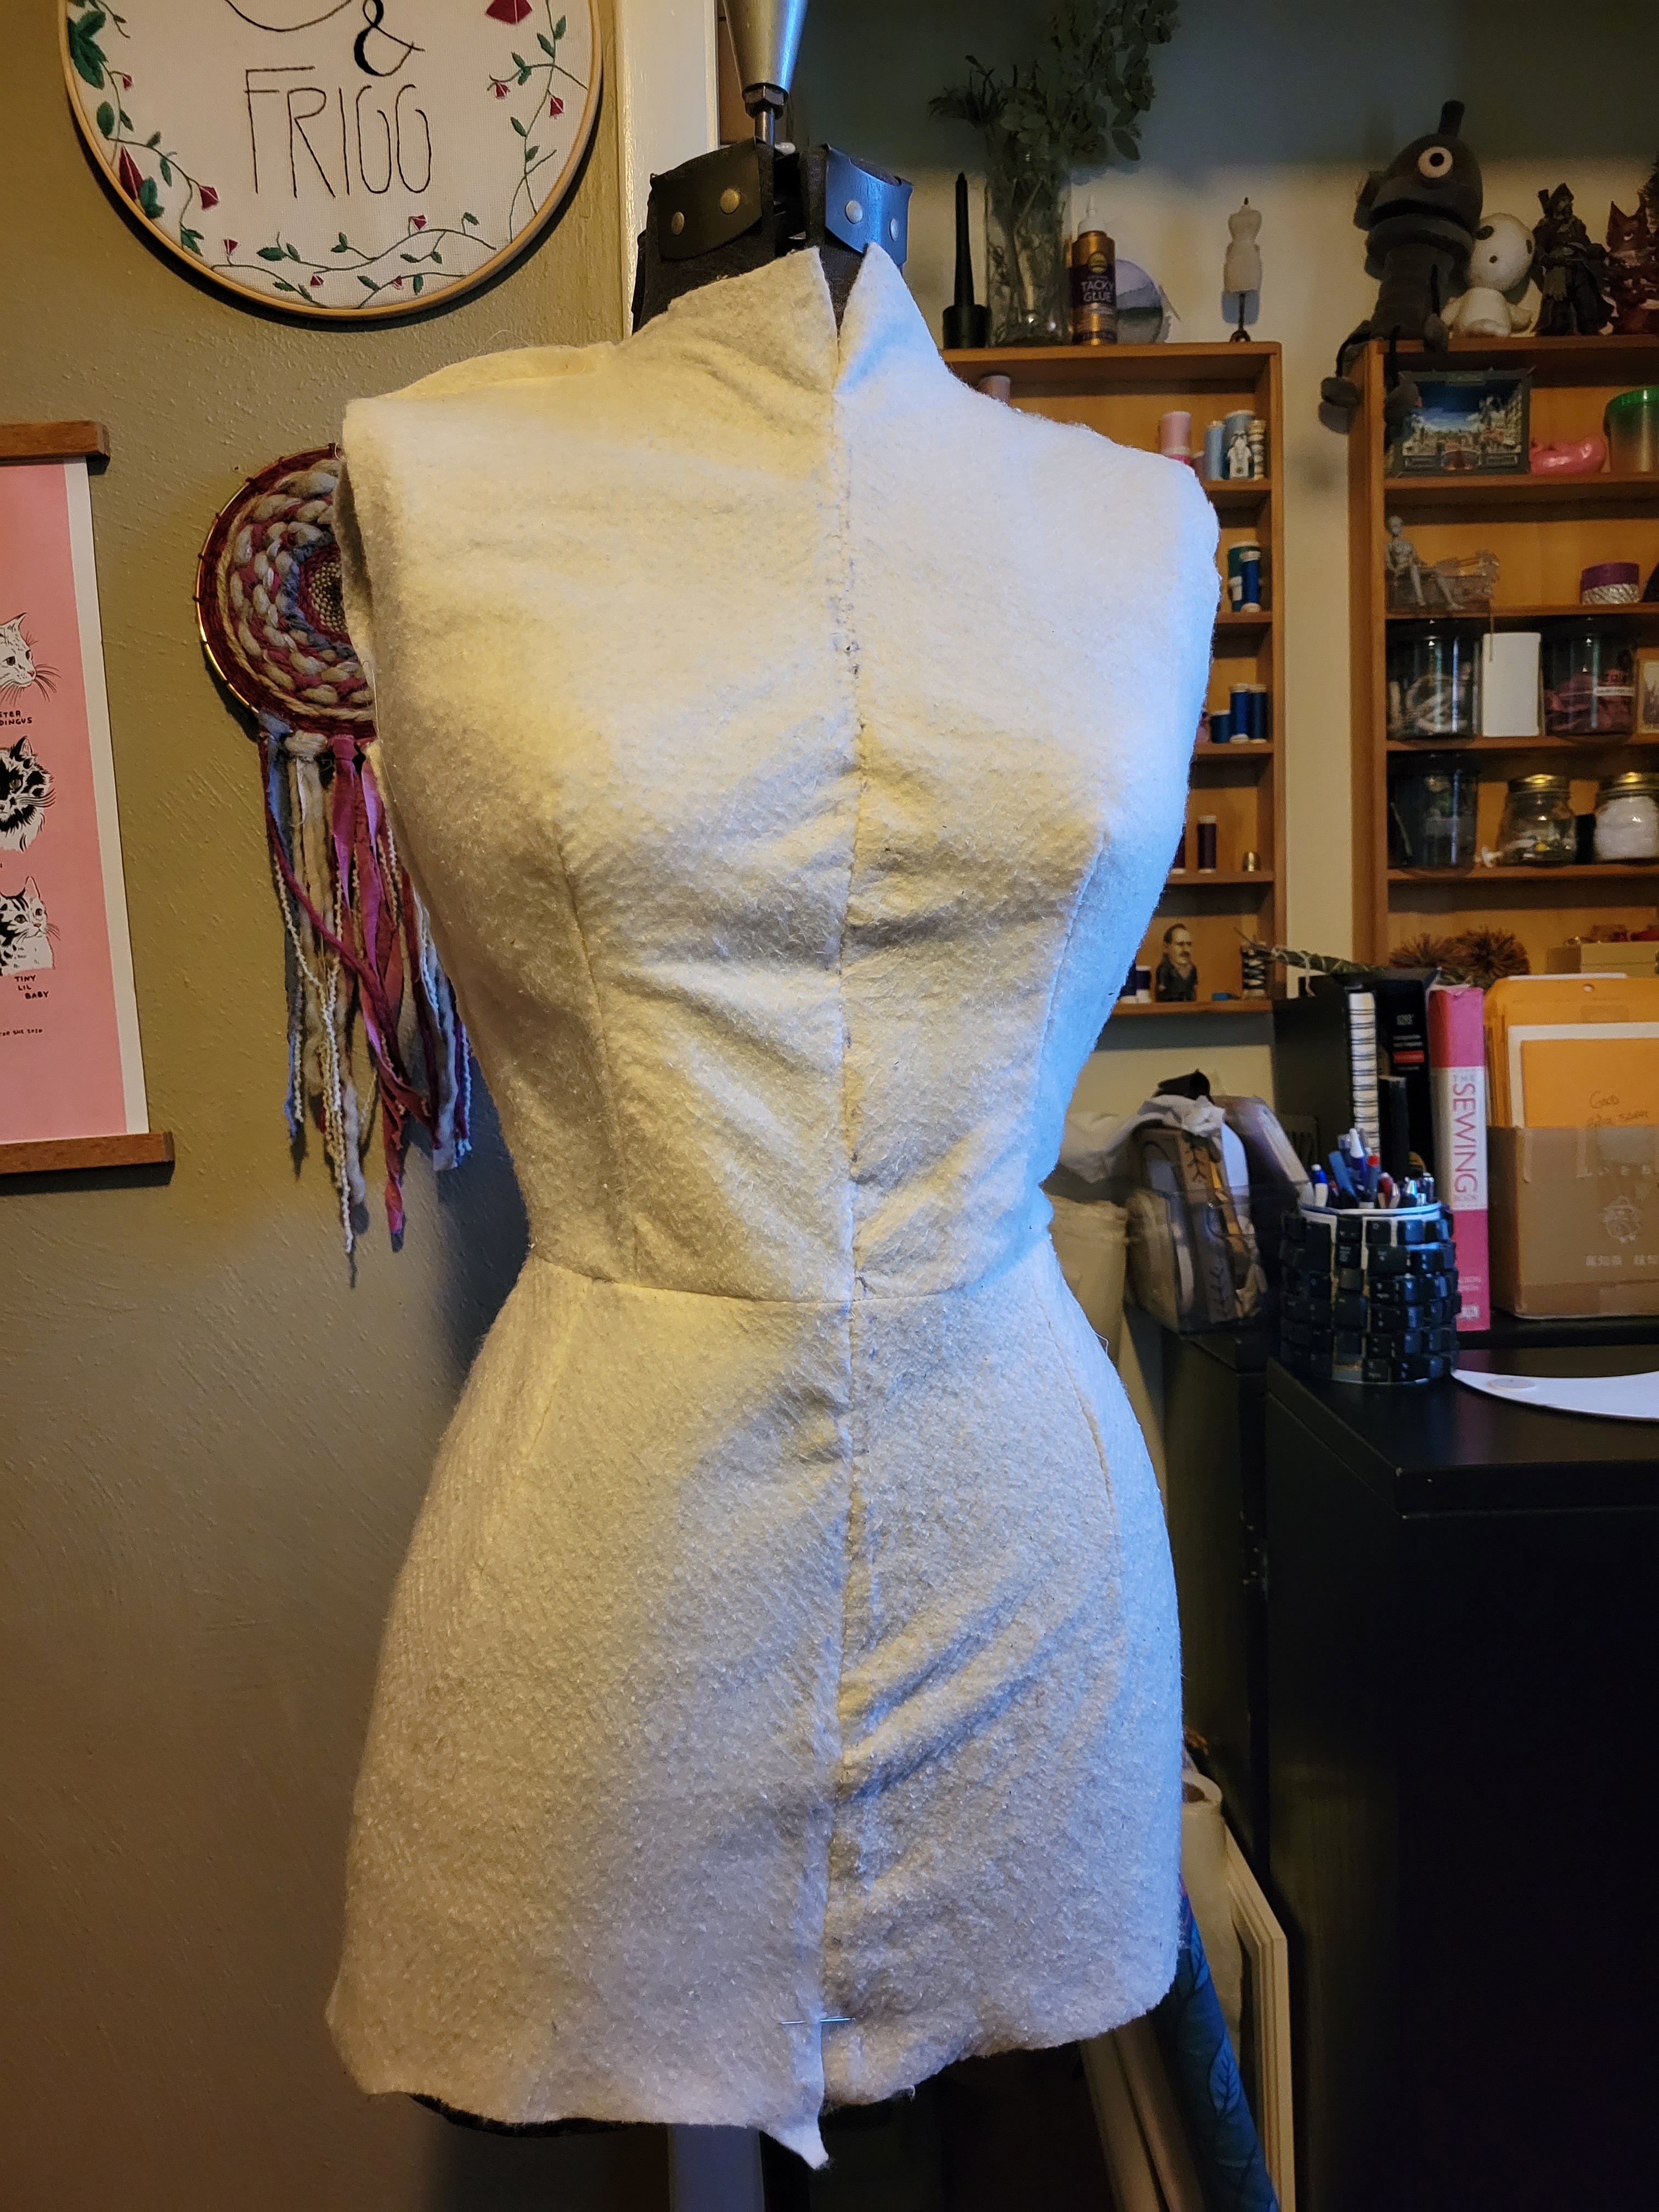
Eventually, I want to make a pretty, knit cover to go over the batting. But at this point, I am happy with the progress I’ve made. I can use this dress form to size garments, drape and experiment with fabrics, and hold my current projects so they don’t get wrinkly!
In case you’re wondering, her name is Jenny. It was the name I was supposed to have before I was born, which seemed appropriate for my doppelganger.
Thanks for reading! <3