
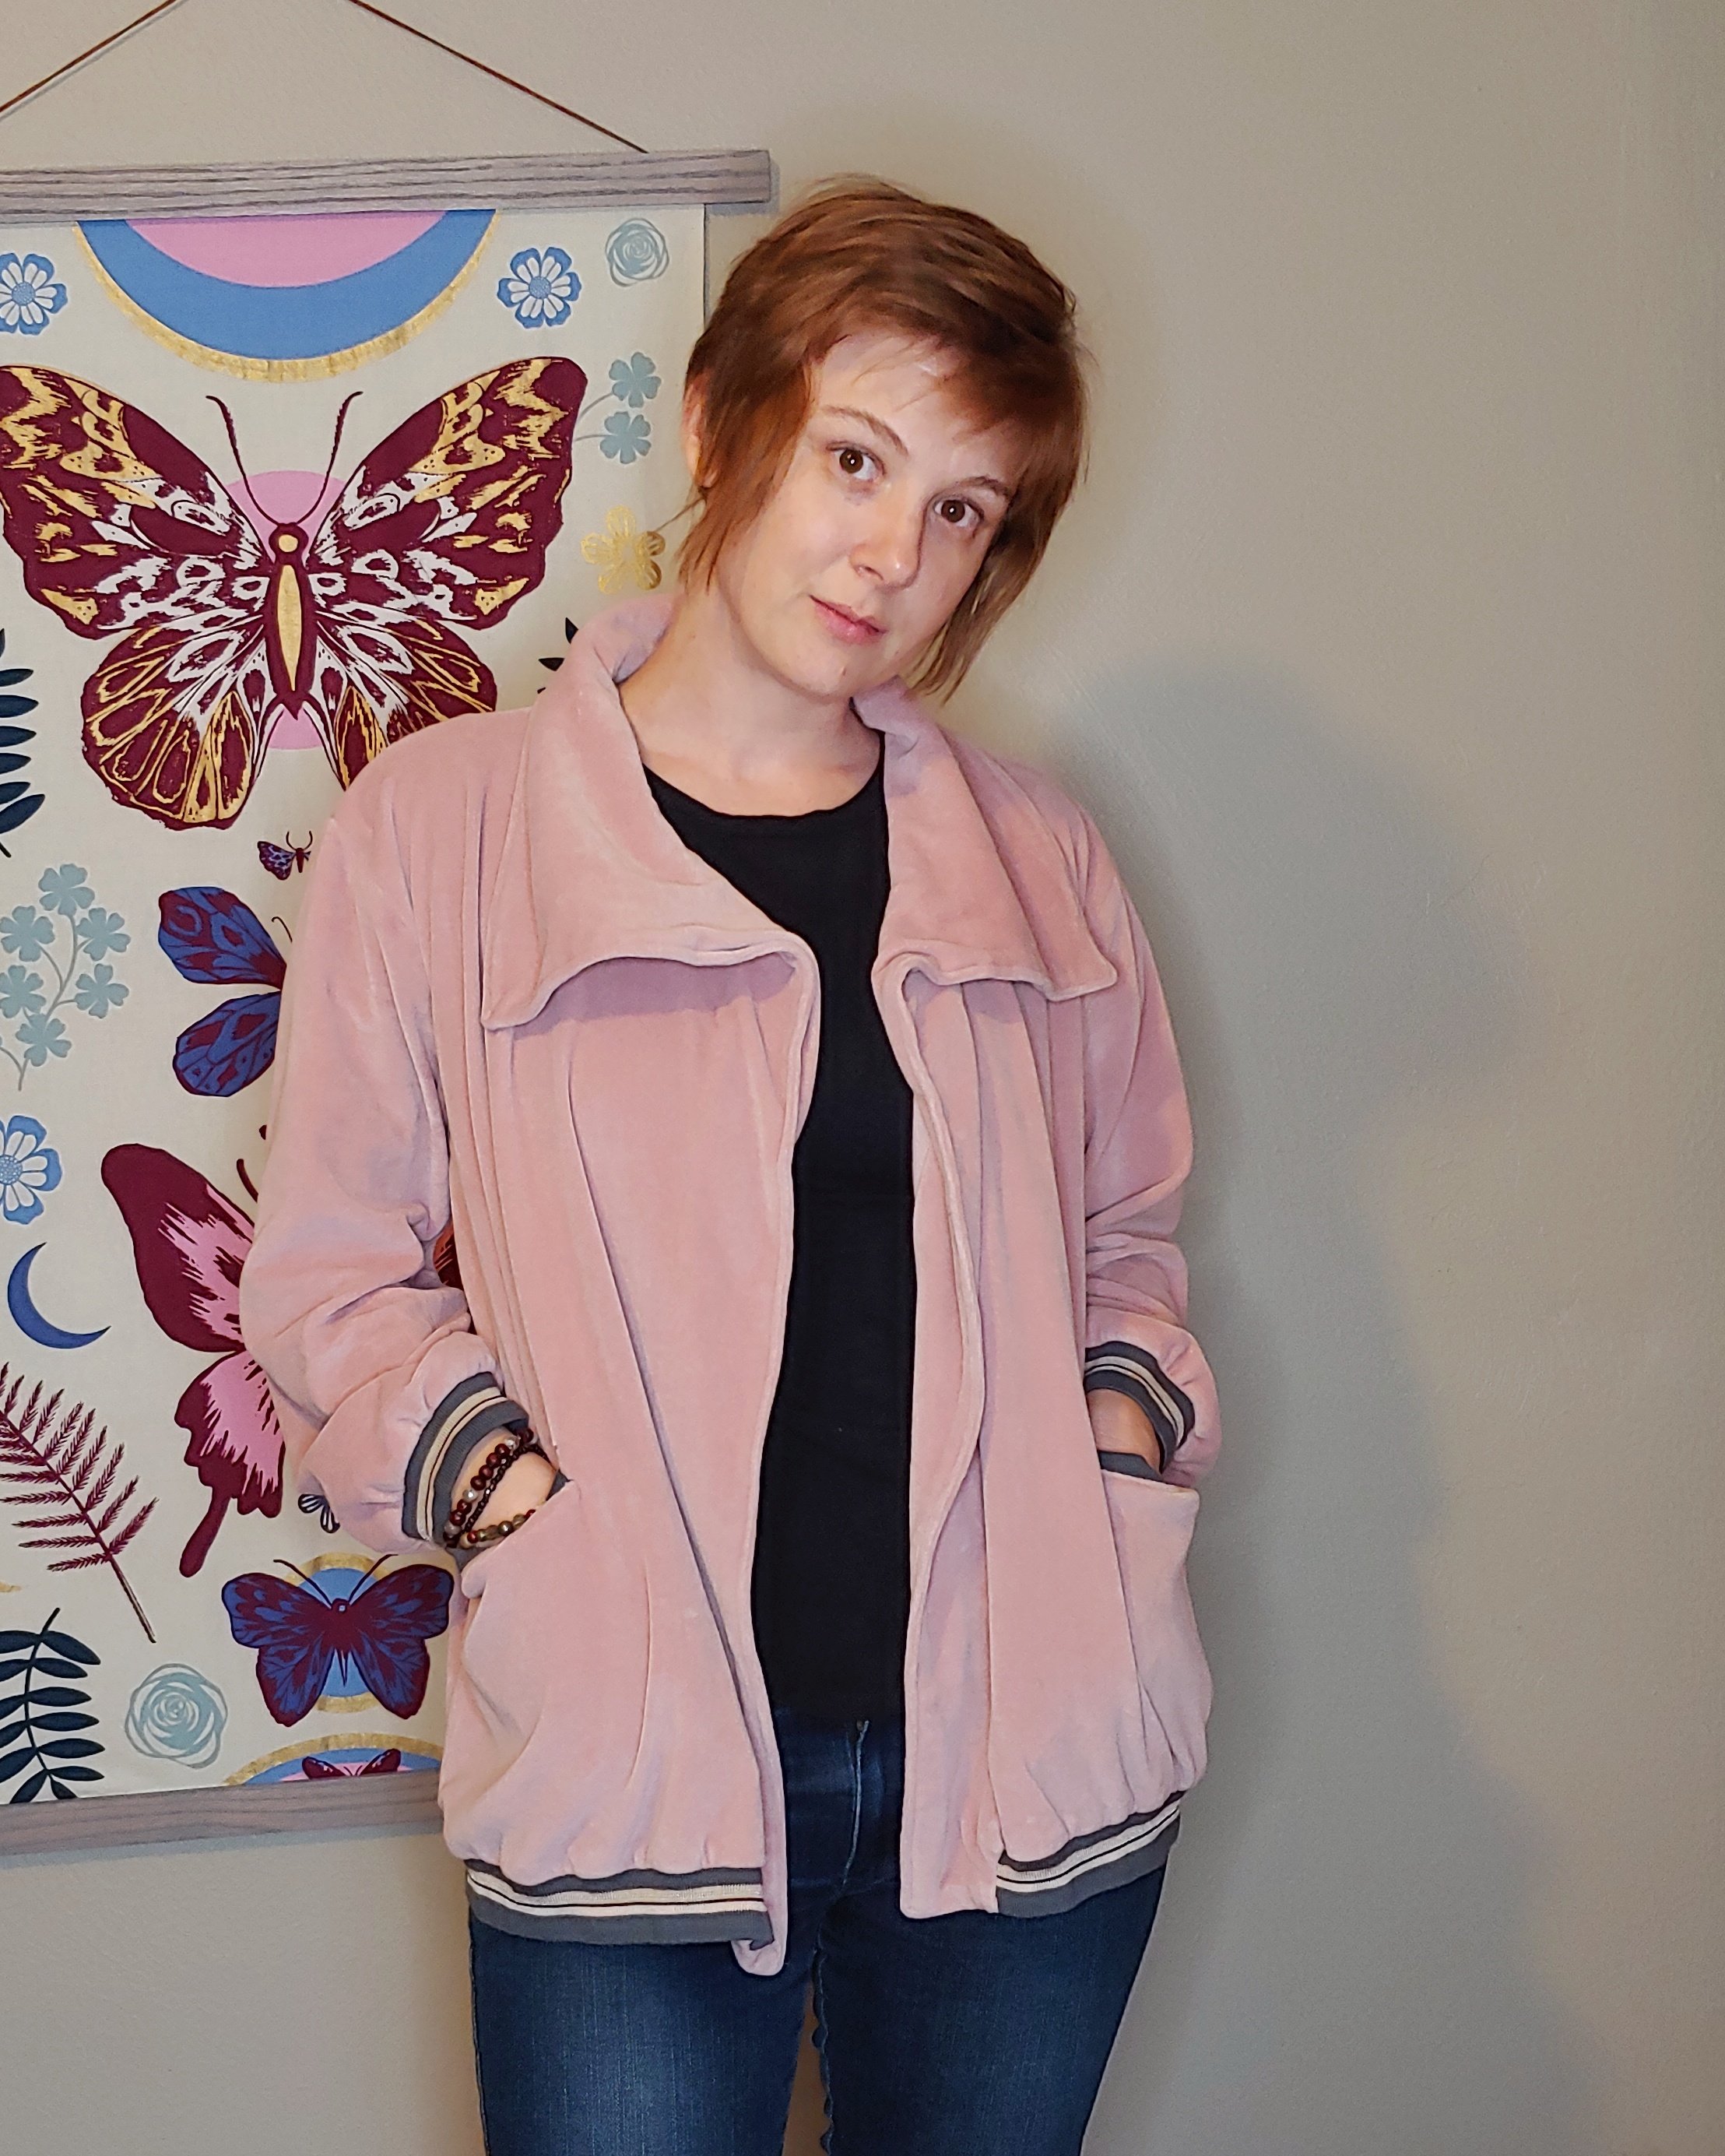
I’m not usually a Sporty Spice, but I had to try this fabric combo!
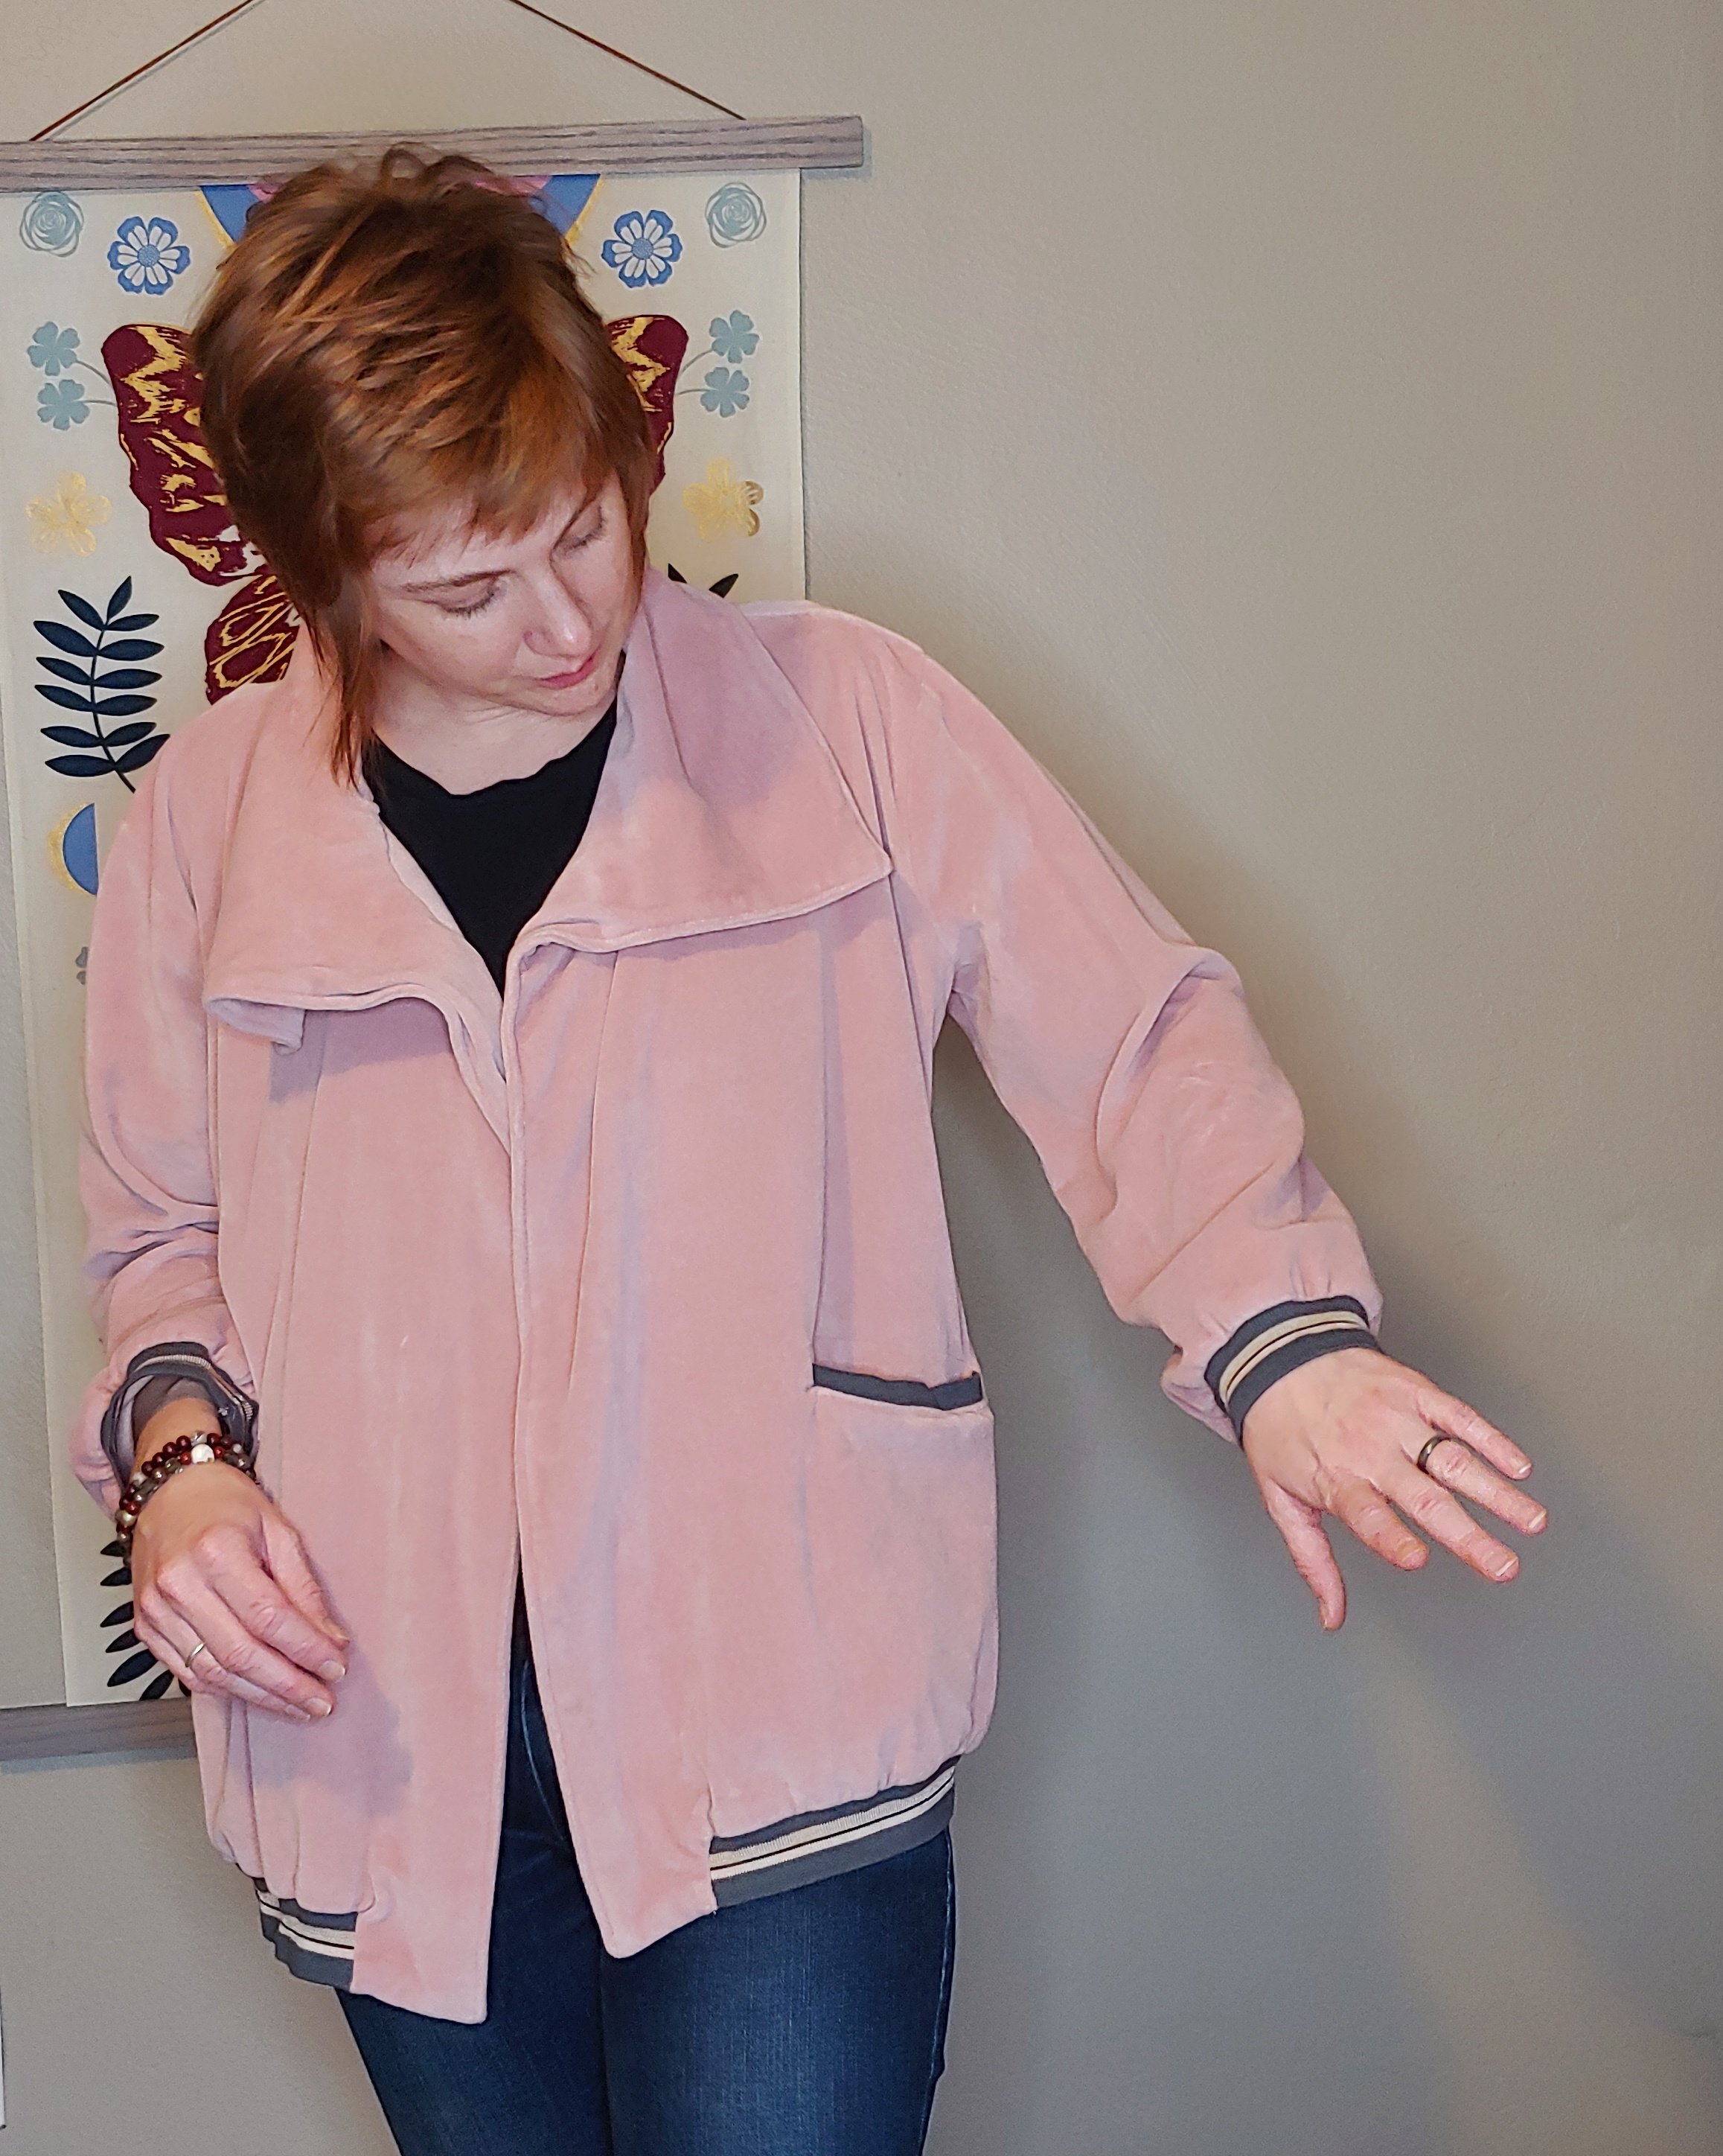
The allure of a cozy velour jacket, in dusty pink, with a coordinating grey ribbing called Ice and Cream was too much for me, I had to make this jacket!
“Dusty” is among my favorite color descriptors; you put dusty in the name of a colorway and you’ve got a click from me. The same goes for heathered, lagoon, or blackberry.
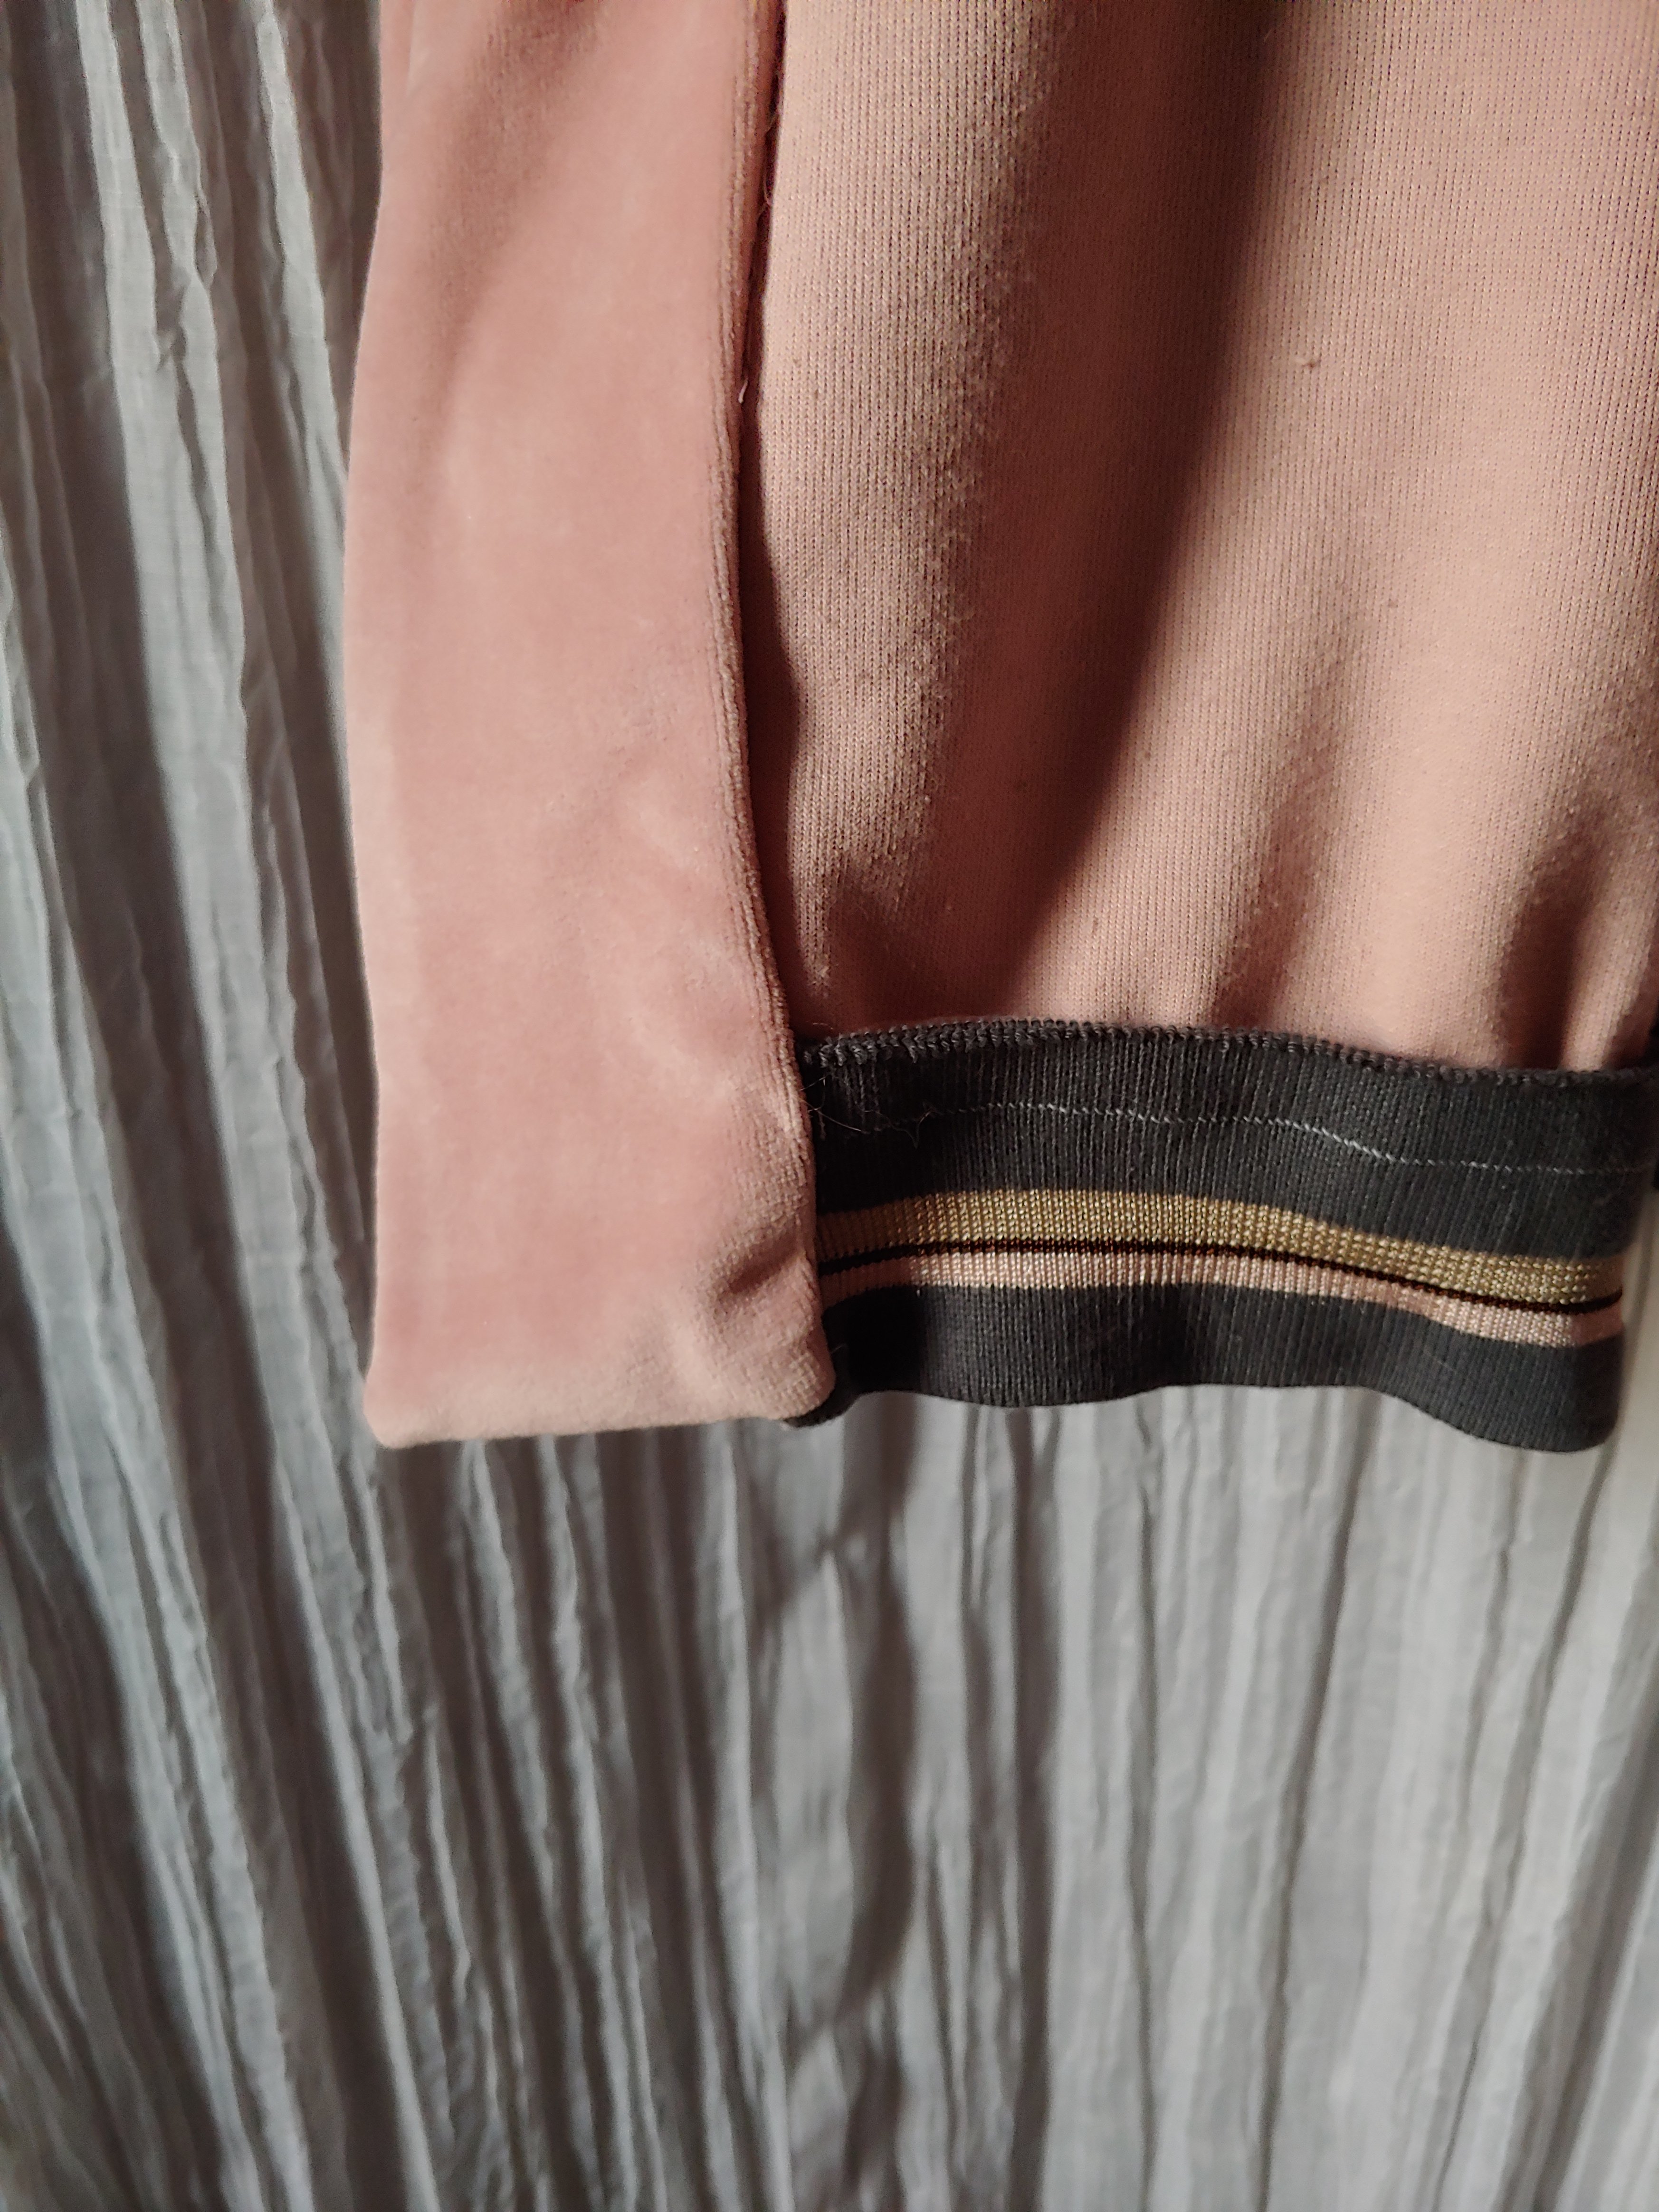
The ribbing is made by Merchant and Mills. They have a few different colors. It’s thick and very stretchy and comes in 42″ increments. I bought mine at Firecracker Fabrics, my favorite fabric shop!
The fabric is a pink velour knit with medium weight and a slight stretch. It’s also from Firecracker.
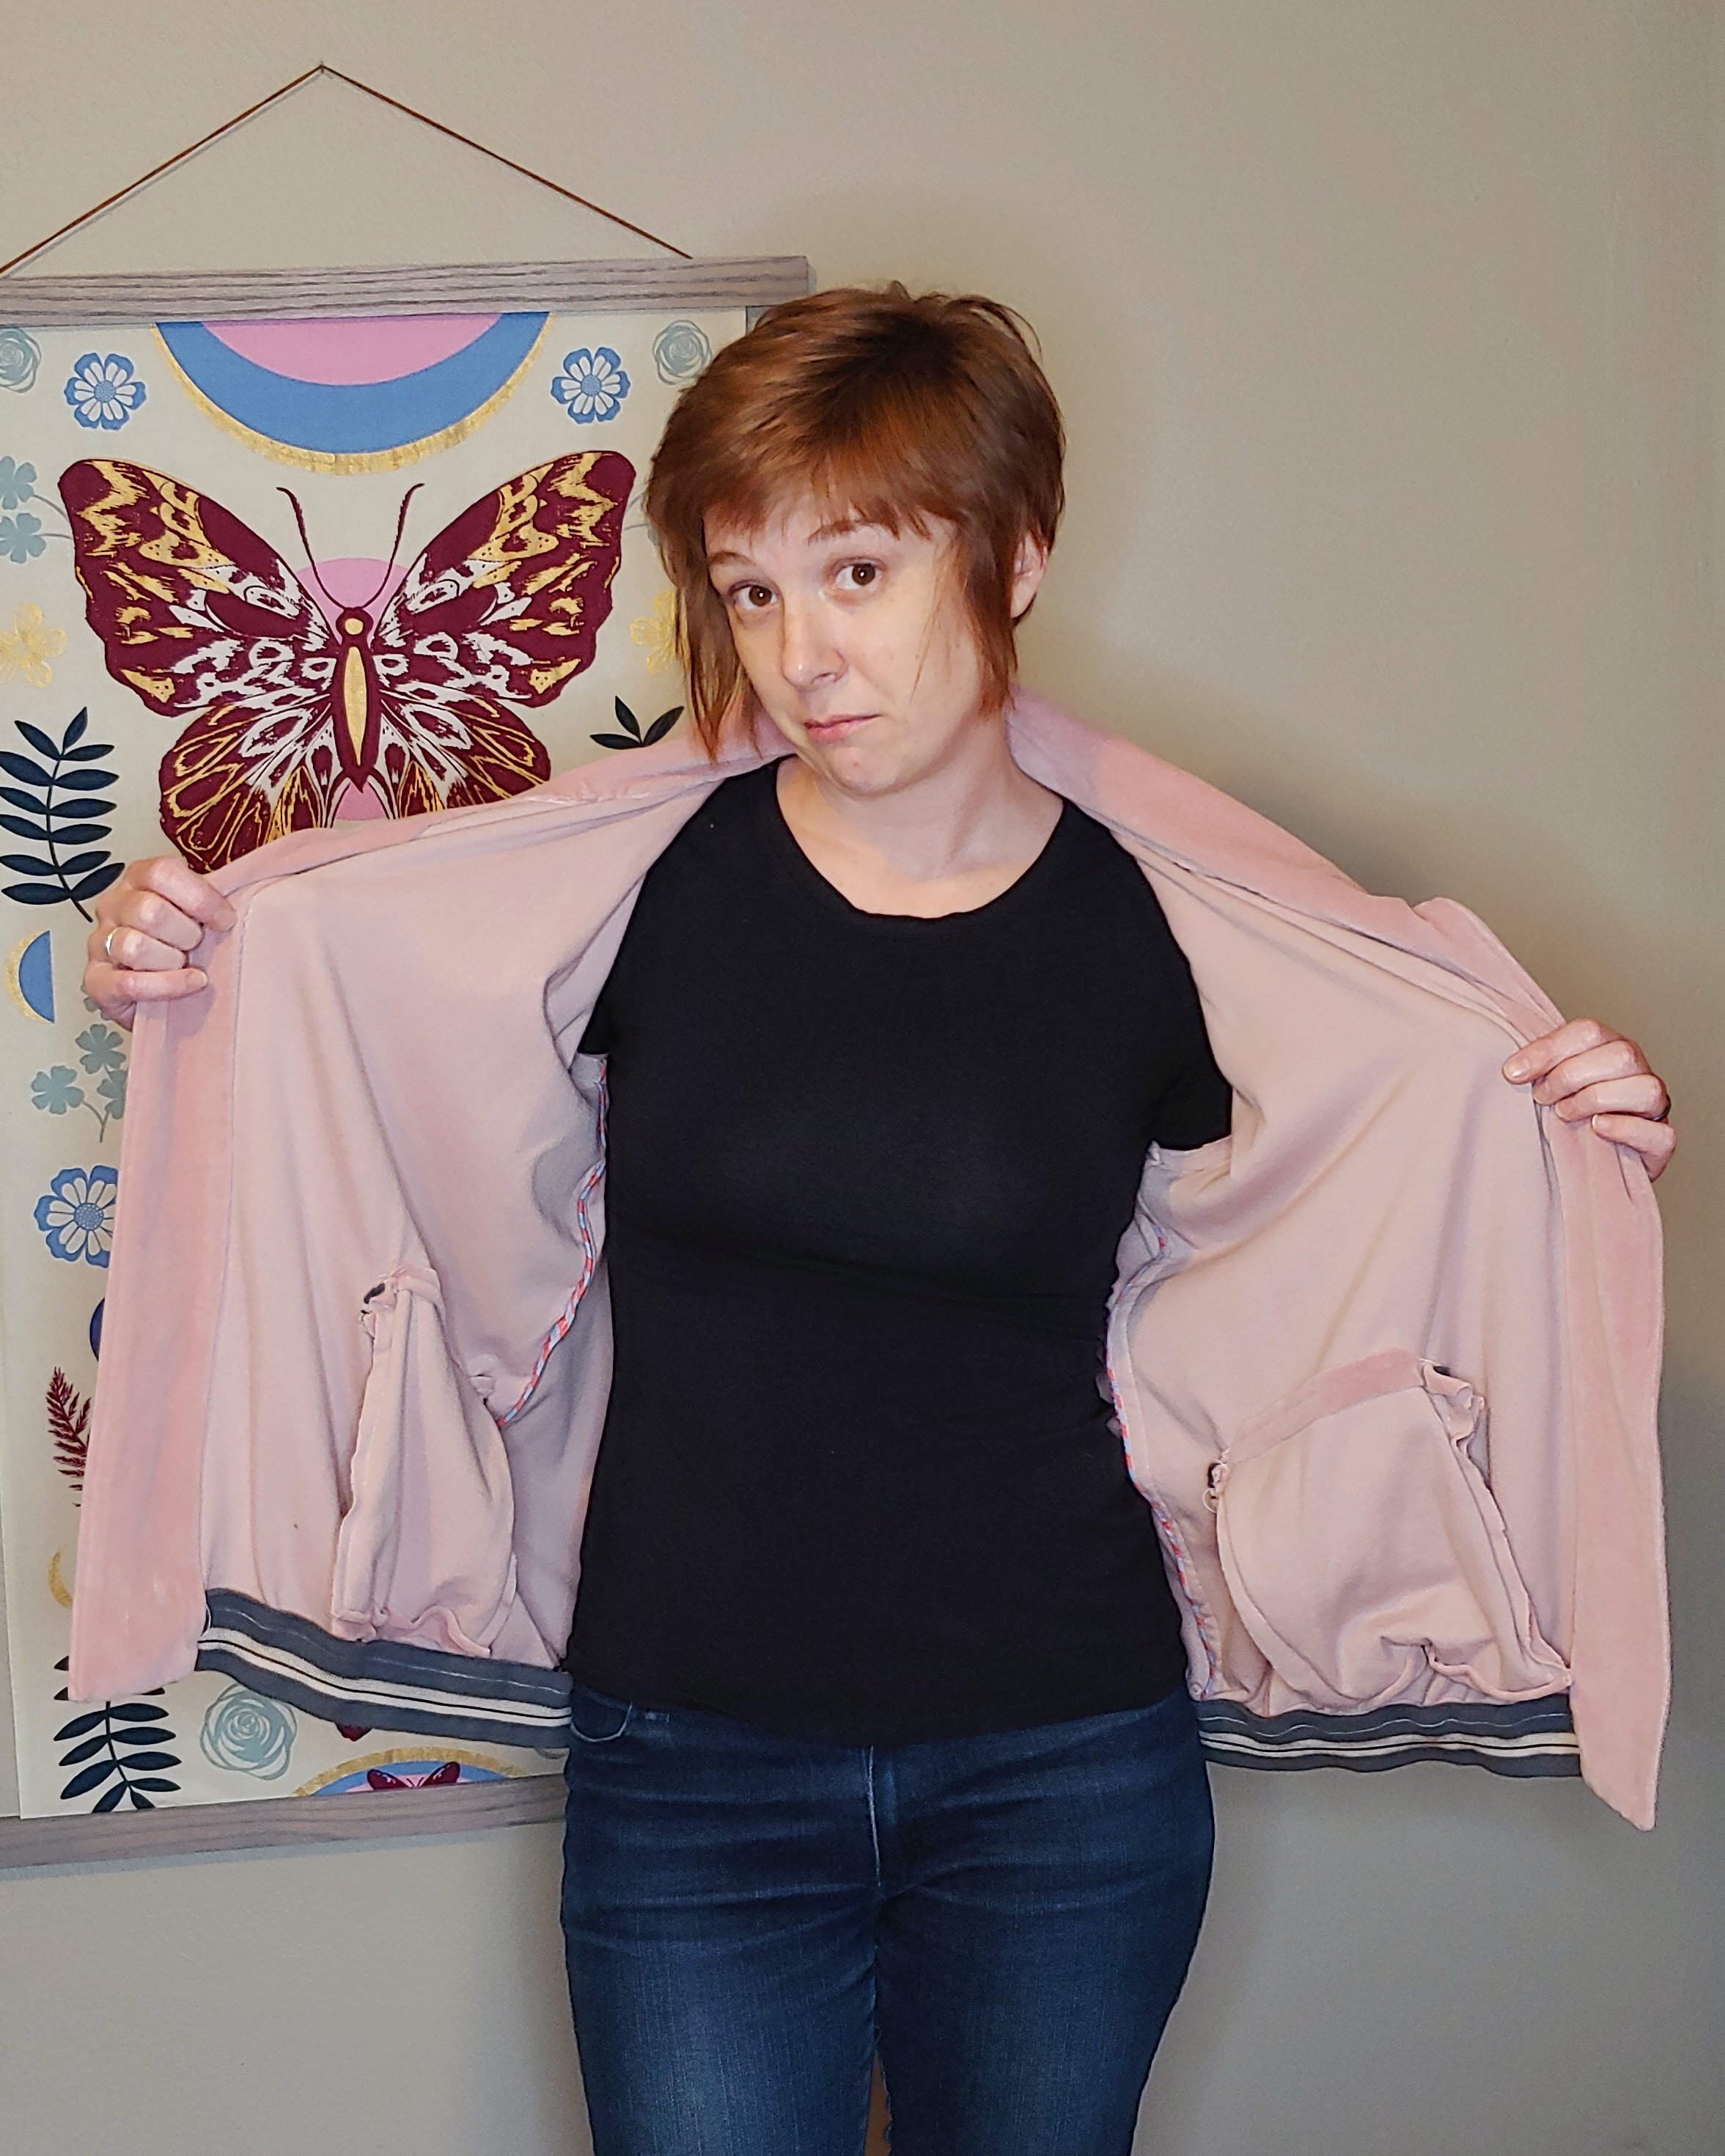
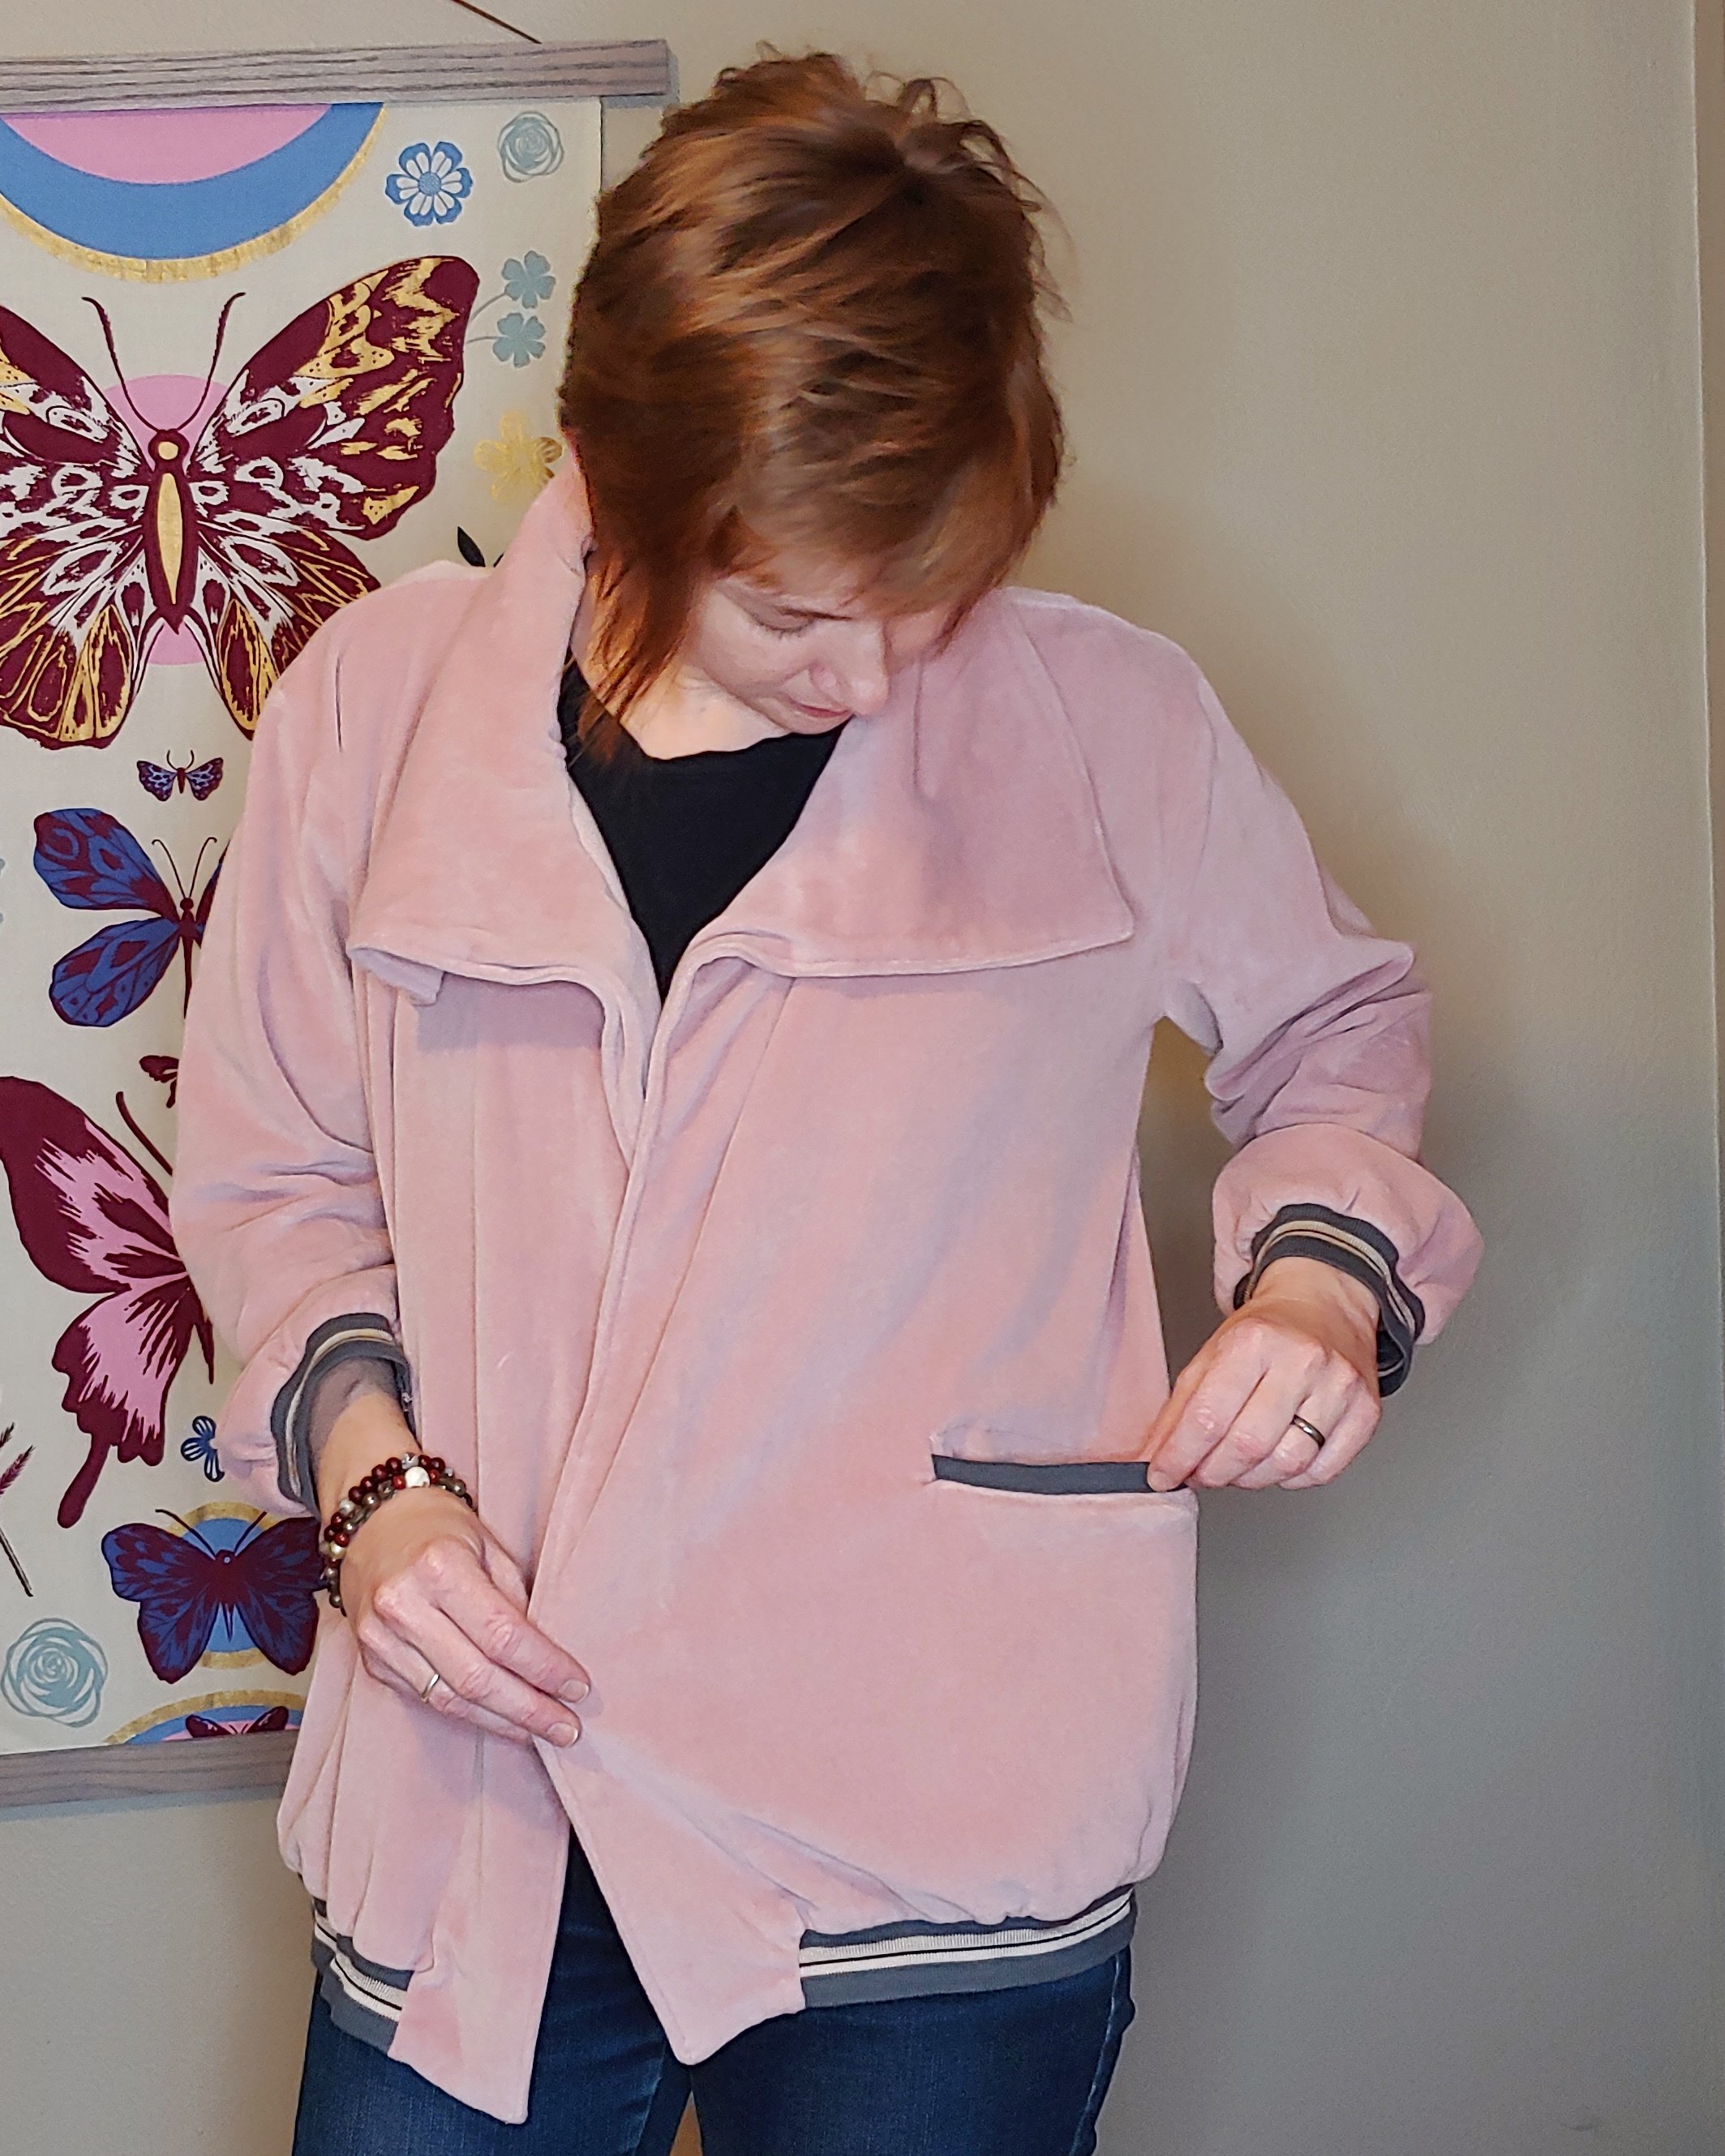
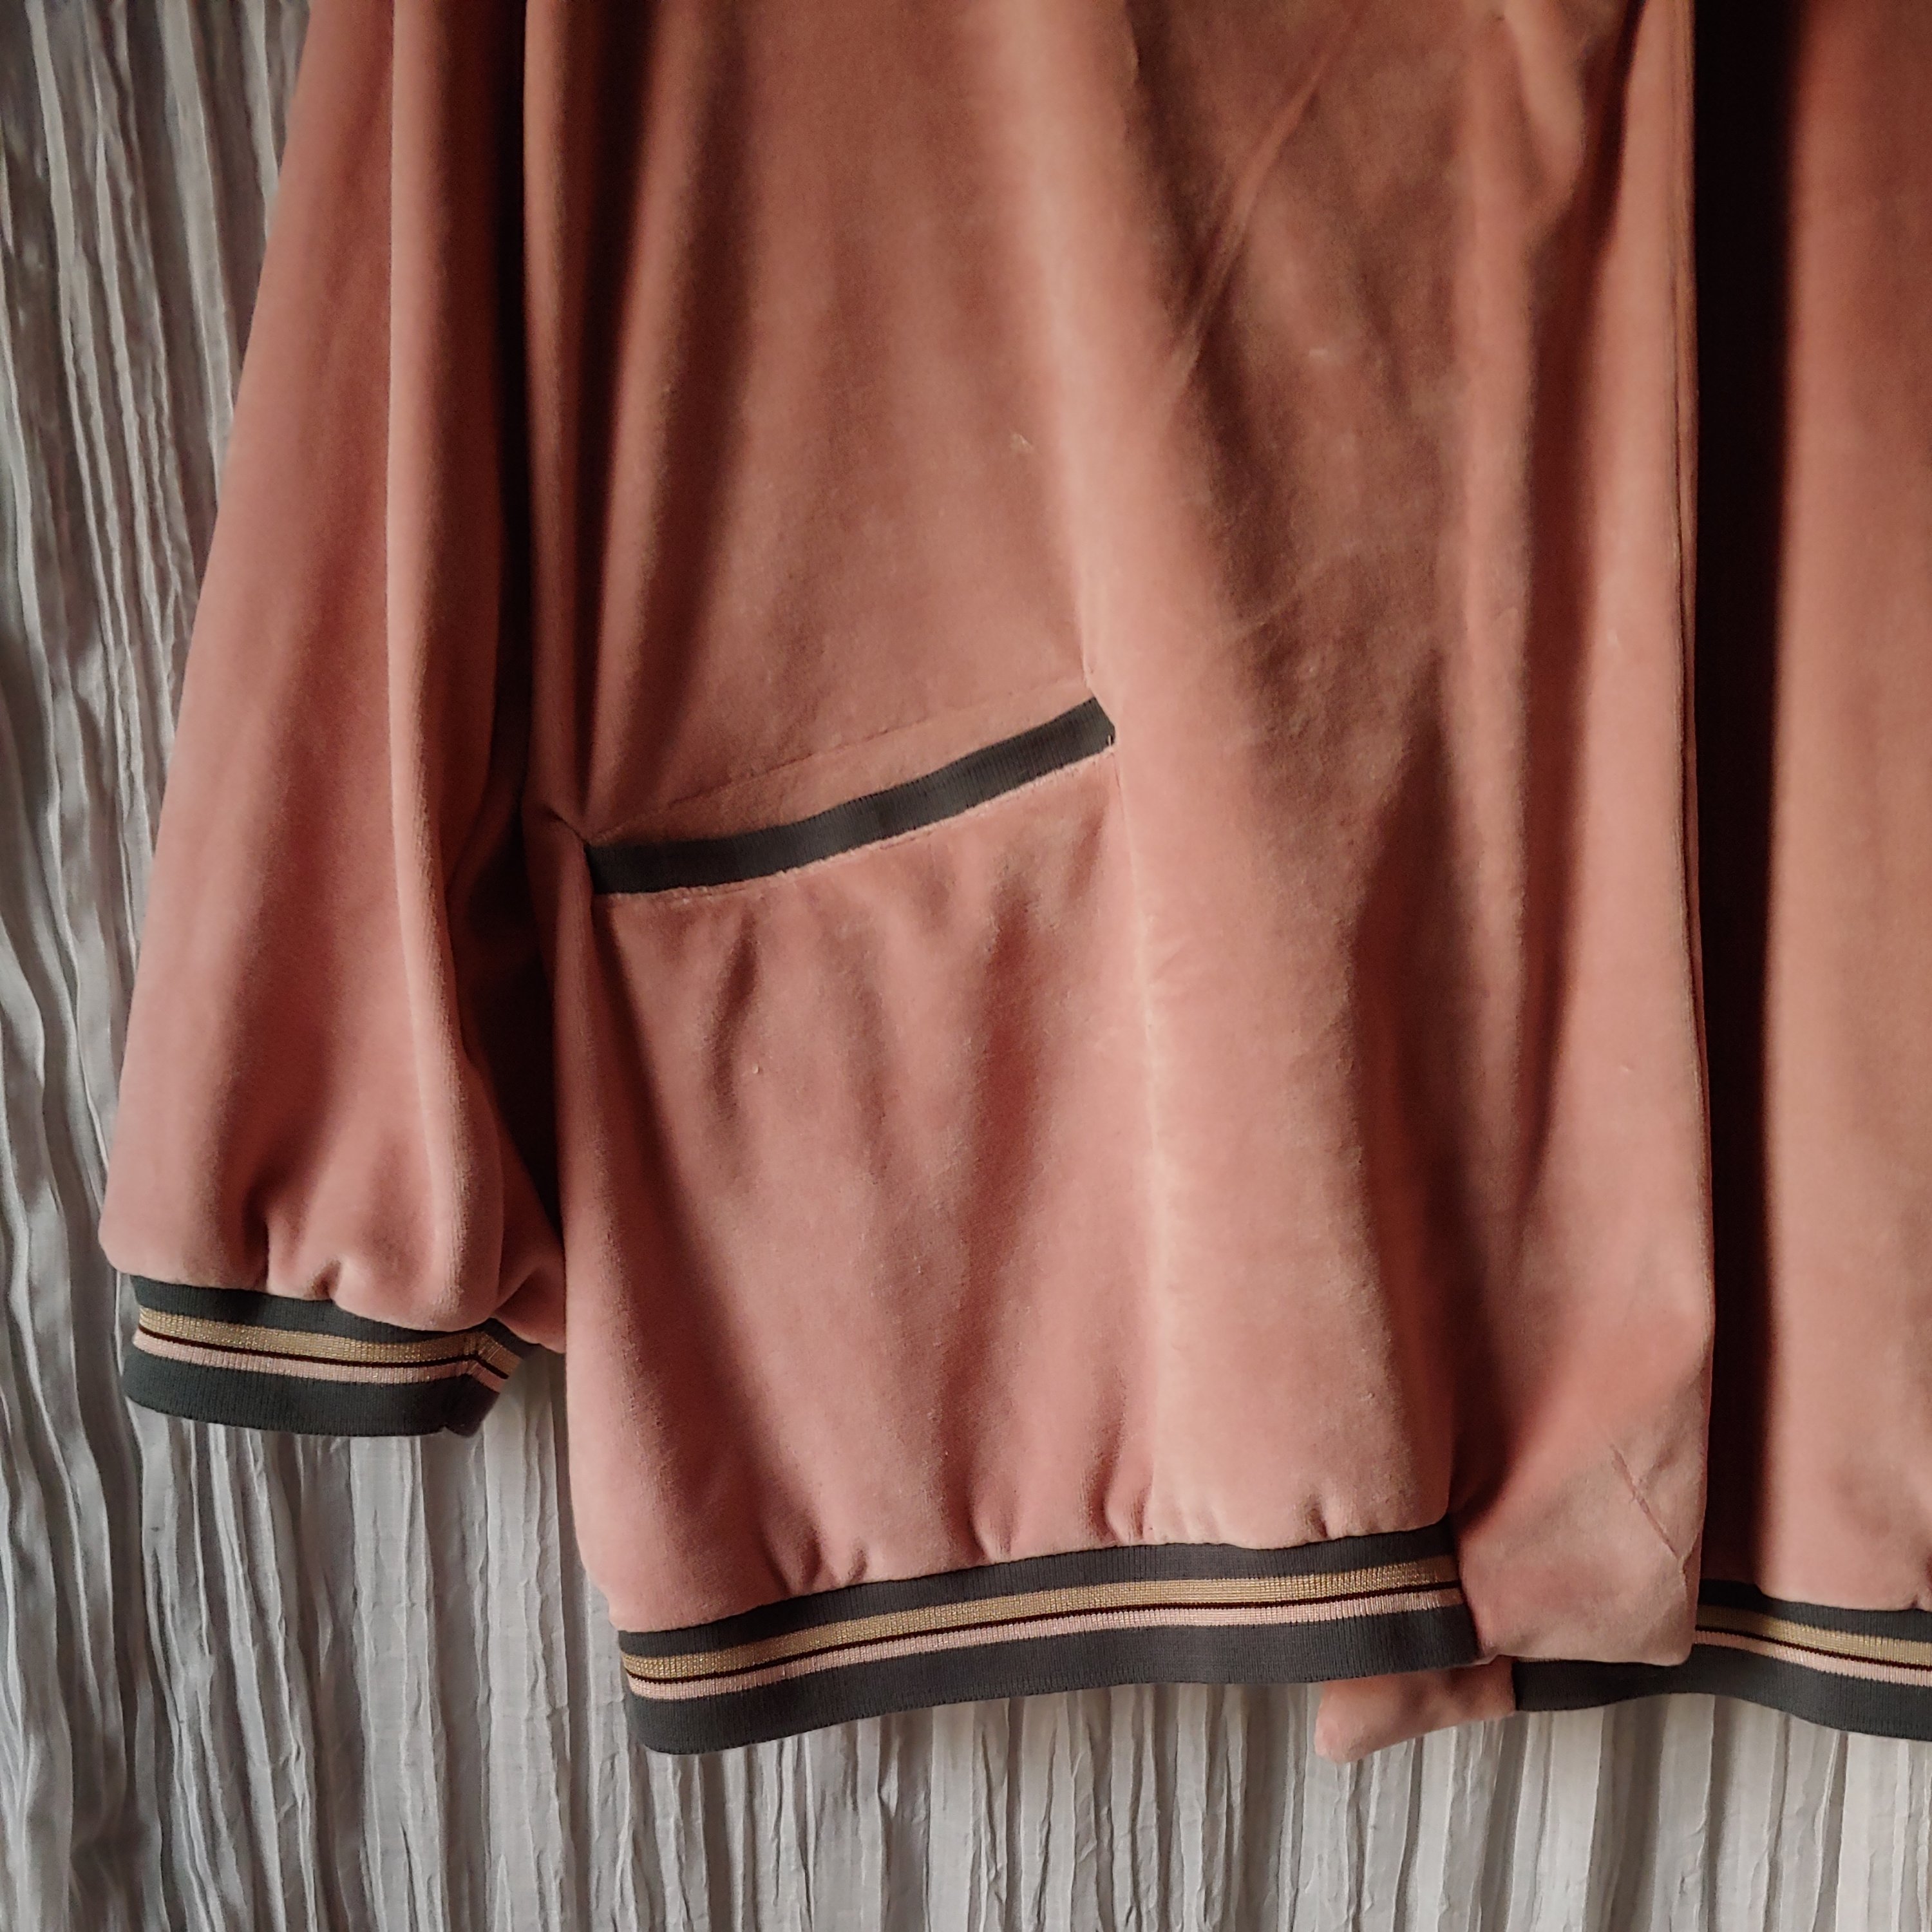
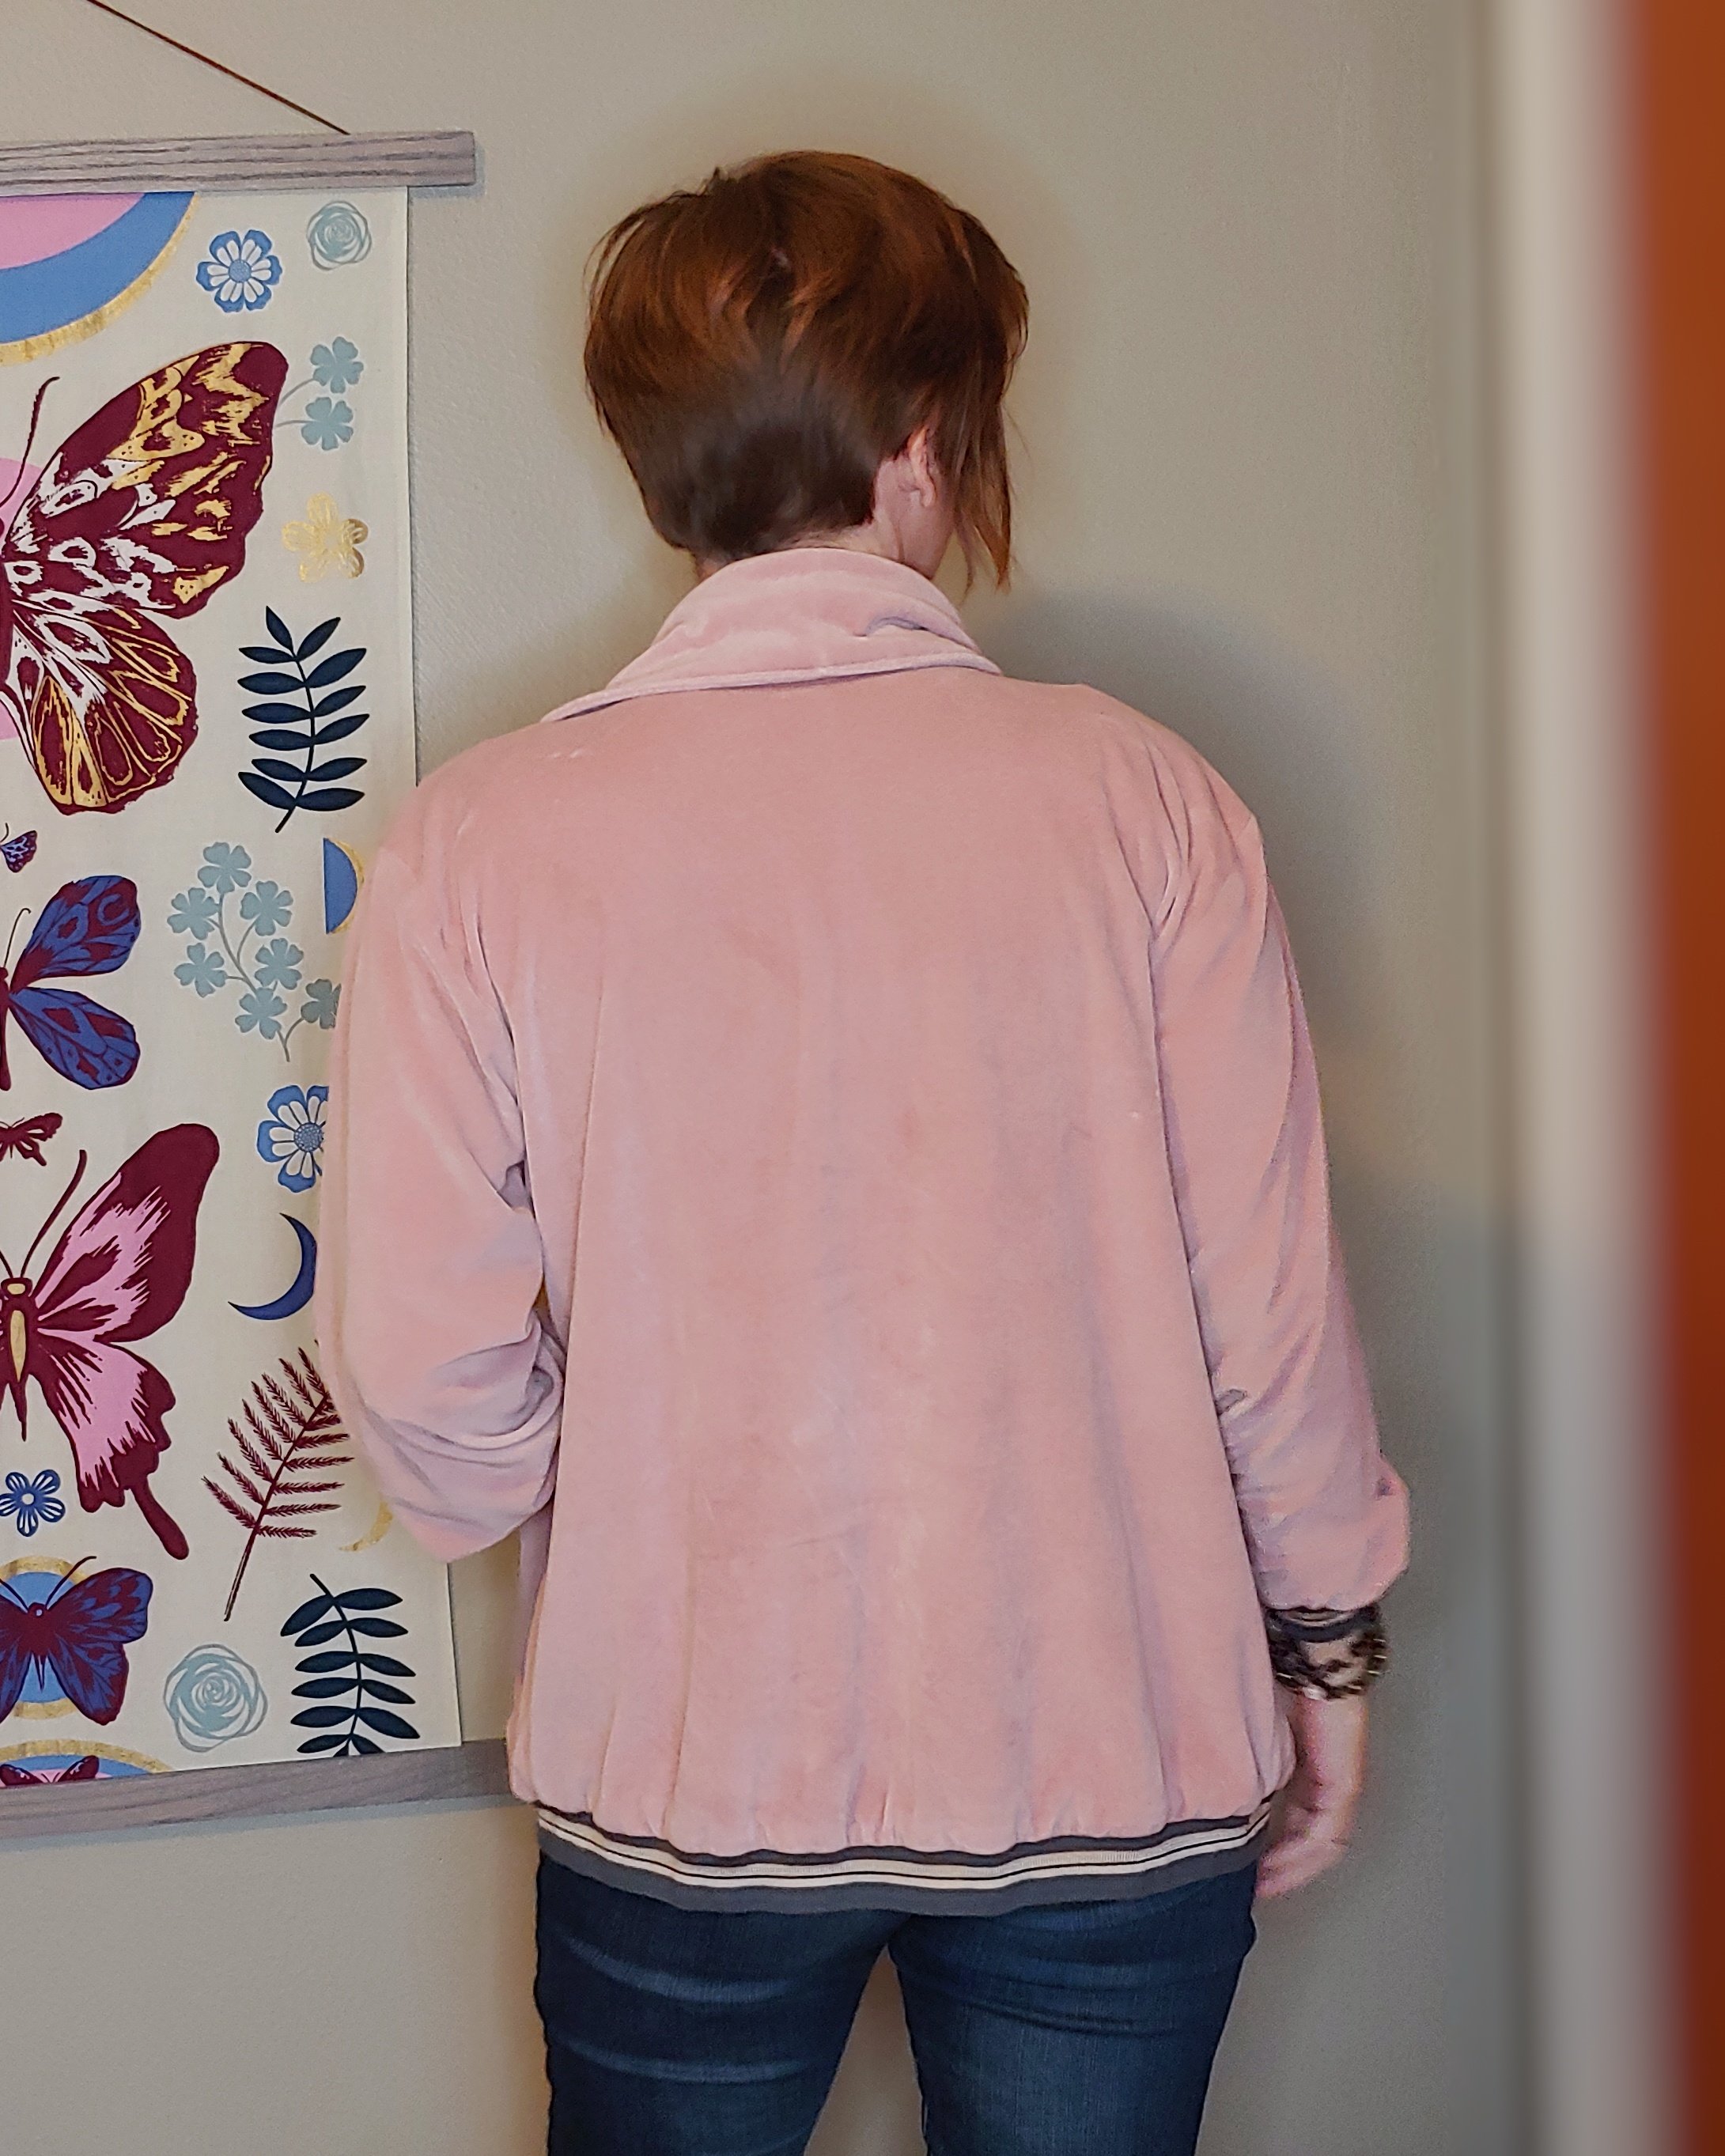
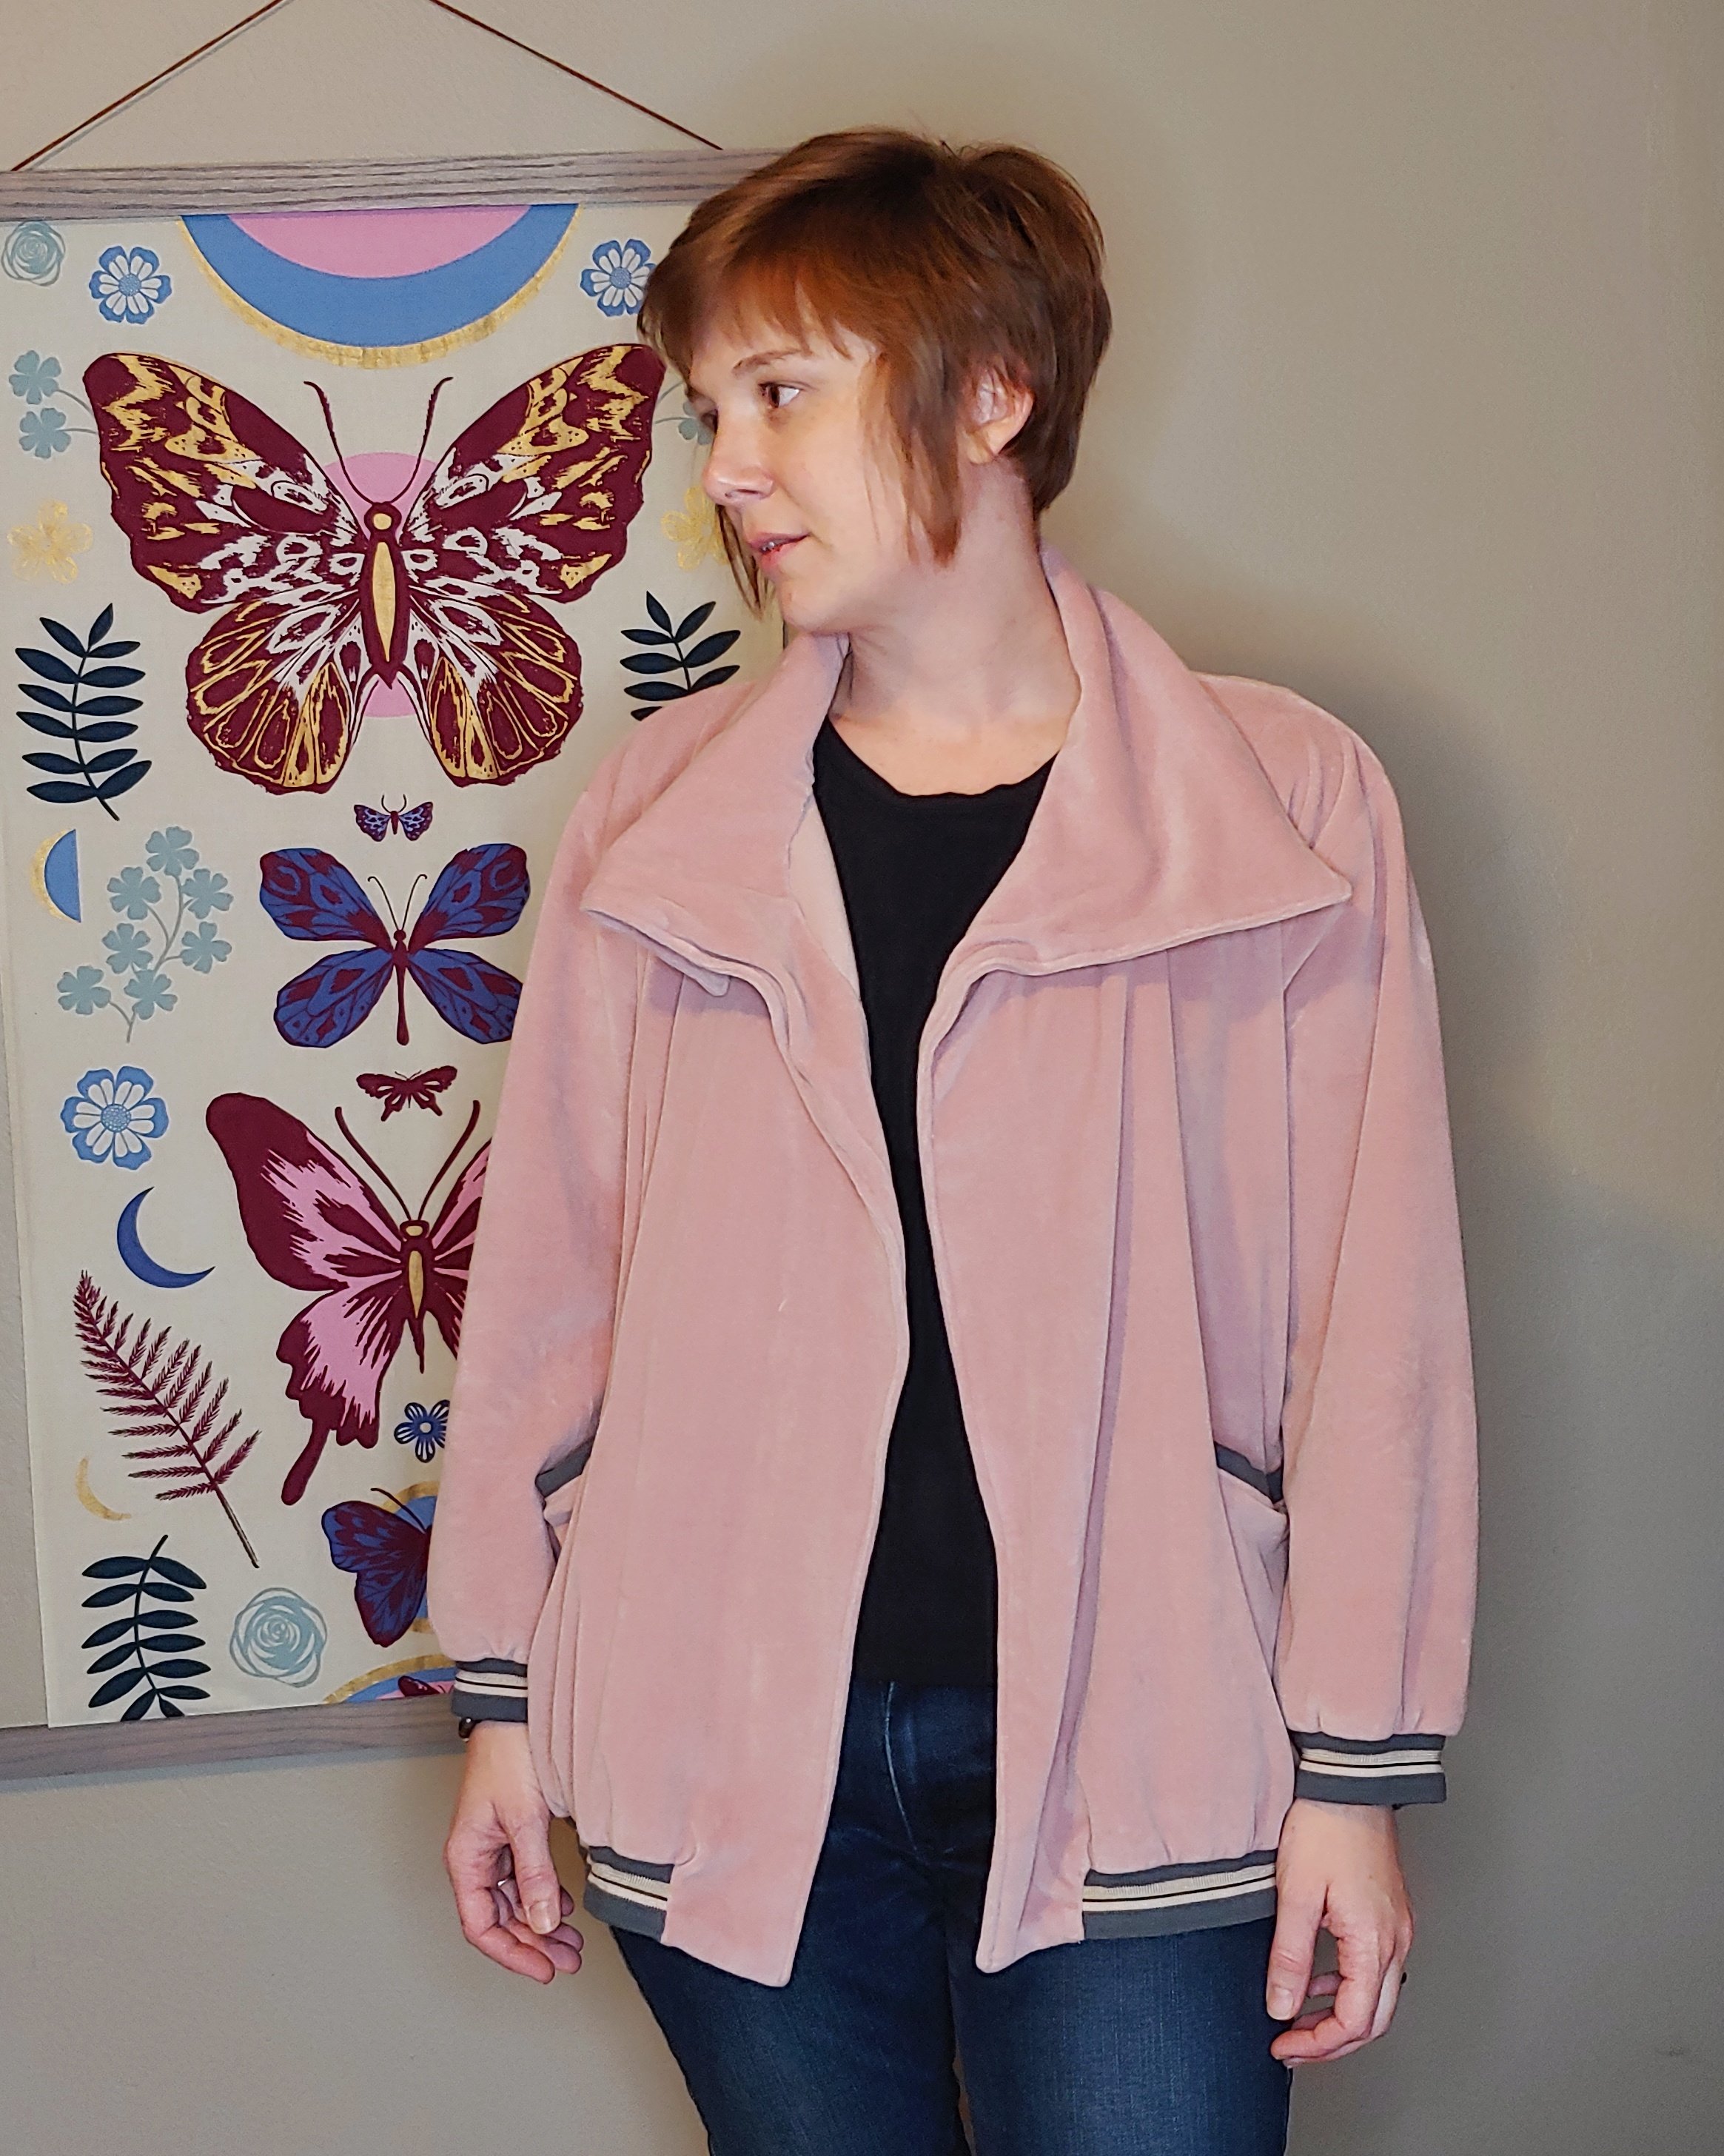
I used my own pattern for this jacket, the Captain’s Cardigan. It’s a oversized jacket with a large collar and facing along the front. It usually has patch pockets and fabric sleeve cuffs. This version uses the ribbing for the sleeves, part of the hem, and the welt pockets.
I was really indecisive with how to finish the seams and I ended up using three different methods. It’s a little embarrassing to look at the inside but I’m the only one who will see it, so I left everything as-is.
So the side seams are bias-finished because I thought French Seams would be too thick. But the bias was still pretty thick, so I Frenched one of the sleeve seams. It was worse than I hoped but about as bad as I expected. I pressed the heck out of all three seams.

After all of that, I realized it didn’t need to be finished at all. It’s a knit, and I should have trusted that. The rest of the seams are unfinished and are faring well through washing and wearing.
The welt-pockets were challenging, too! I think it was because the ribbing and the fabric are stretchy and bulky. I had to do a little unpicking and hand-stitching to fix them.
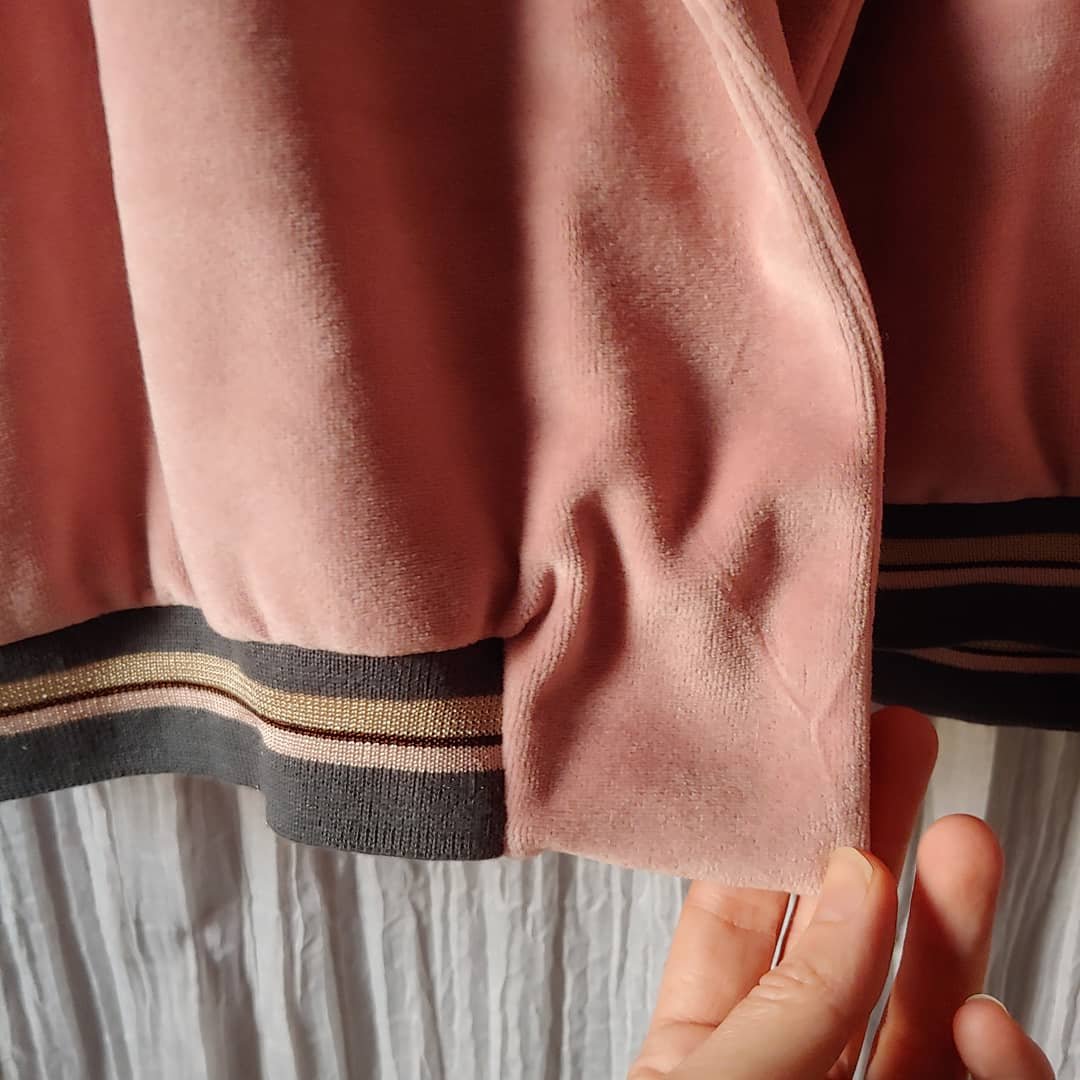
The exciting part of this project for me was the ribbed hem, because I had to figure out how to insert it into the front bodice. The outer front of this jacket is seamless – the facing is only on the inside. I wanted the ribbing to start a few inches from the center front, like a bomber jacket.
Attaching the ribbing worked like one-sided welt. First, I finished the corner and bottom of the facing by folding it to the outside and stitching along the bottom to, but not through, the seam allowance. I trimmed the corner and turned it back to the inside where it belongs.
Then I cut a line parallel to the facing with a 1/4″ seam allowance. I had to trim the hem of the jacket to accommodate the 2″ ribbing, minding a 1/2″ seam allowance. It was definitely a measure ten times, cut once kind of deal.

I stitched the ribbing along the long hem of the jacket first, stretching slightly. Then I clipped the corners of the fabric to the end of the stitching, pivoted the ribbing, and sewed the short ends.
It turned out really well! I wasn’t confident in this jacket at first, but I’ve gotten a few compliments on it. It feels like a different style than I’m used to, but I think it fits in well with my other clothes.

Thanks for reading <3