One of the last garments I bought before learning to sew were a pair of Kut from the Kloth skinny jeans. They were (and are) a great pair of jeans. So when Black Friday rolled around last year, I snagged another pair at a steep discount.
I ordered the exact cut and size as before. What I got was a completely different fit. They were far too large and long. Granted, there had been about 4 years between my purchases but seriously?!
I’ve made the DD Safrans before. They’re flattering and comfortable. But they’re high waisted and that’s not what I’m after right now; mid-rise cotton pants were the object of my desire.
Finding the perfect pattern seemed daunting enough, and I’d still have to diagnose fit issues.
With trepedation shrouding all of my pants options, I jumped into the deep end and drafted my own pattern.
I followed this tute to make the initial sloper. I was super surprised by how few measurements I had to take.
This tute has you drafting the front and back on the same piece(s) of paper (in my case, it was too many pieces of copy paper taped together). This is cool for setting up the framework, but mine ended up overlapping each other on the side seams, which forced me to trace them.
I hate tracing patterns…rawrrrr.

I was expecting this project to take months of laborious adjustments, muslins galore, and handfuls of hair as I pulled it out in frustration..
But it didn’t! It took about a month from measuring to making my first pair but I took some breaks in that time frame.
My first muslin came out 2″ too big around the waist. I took this in via the back darts and the side seams. My biggest concern was the crotch, which came out perfectly waaaaaaaah!
(Undyed muslin is quite transparent, so there will be no muslin pics this time.)
Once I had the fit, it was time to convert the sloper to a pattern. The first thing was the waistband. My waistband is 1.5″ wide, so I measured down from the top of the pattern and drew a line parallel to the waist. I cut at this line to make the waistband.
Next came the pockets. I measured my Kut jeans to get the minimum size of the front pockets. I made my front pockets bigger, because RTW never has big enough pockets and I have the power!!
First, I drew the front pocket on the pattern piece, as it would look when finished.
To draw the pocket pieces, I unearthed my old light tracer. At one point, I was tracing over 3 layers of paper! It was well worth the extra effort, all the pocket pieces match and lay flat.
I also added a front fly extension, fly shield, and patch pockets for the back.
This is the first time I have not added seam allowances to my final pattern, so I have the freedom to adjust it without having to remove them. I finally bought a seam allowance tool to make marking my cutting lines easier!
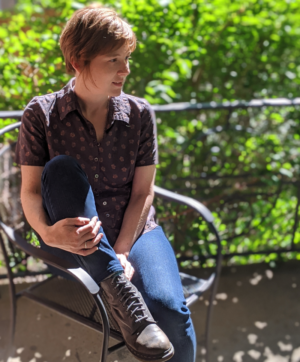
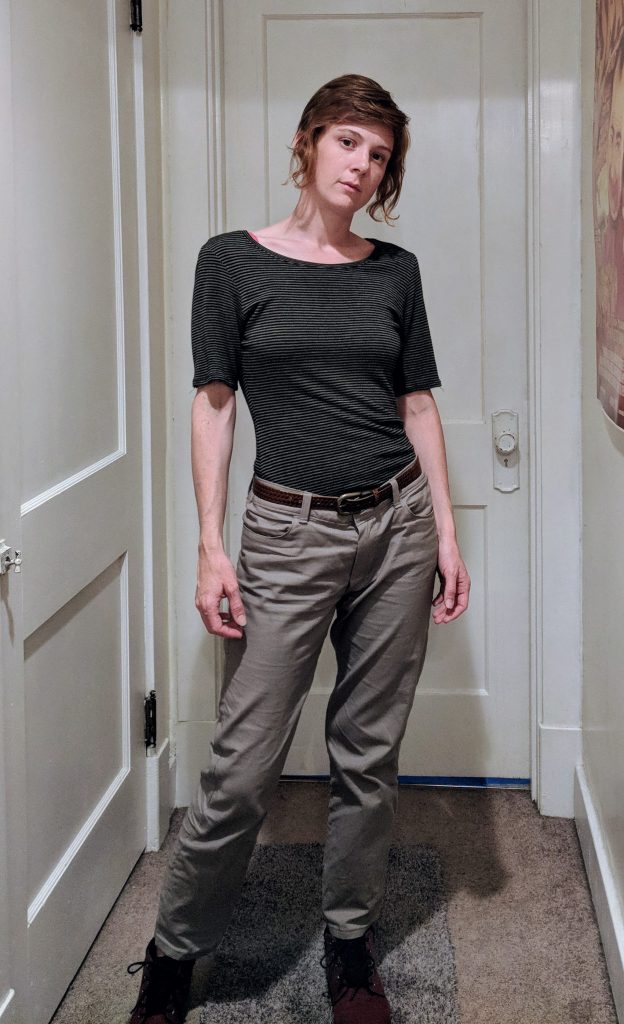
I made my first pair with some Robert Kaufman Kona Cotton in Smoke. It’s a nice light fabric with no stretch.
I used my machine to embellish the back pockets with triangles.
The back pockets are set a bit higher than RTW, which I did not intend, but my phone doesn’t get pushed out when I sit down and that’s pretty nice. They make my butt look a bit weird, though. It’s a tossup.
I keep thinking I need to take them in another inch. But as soon as I sit down or move much at all I remember – that extra room is for movement! I will make them about 2″ longer, so they don’t creep up my legs when I sit.
These pants are so ordinary and I am in love. I can sit, crouch, reach, lift…just about everything you need to do in pants. My zipper works, my pockets are functional. I can’t wait to make more!
Cue movement montage…


…and a parting celebratory Xena.