
Tutorial with tips for flawless results!
Mitered corners seem intimidating, but they’re simpler than you think. They create crisp, neat corners that are a beauty to behold. Here are my tips for making perfect corners:
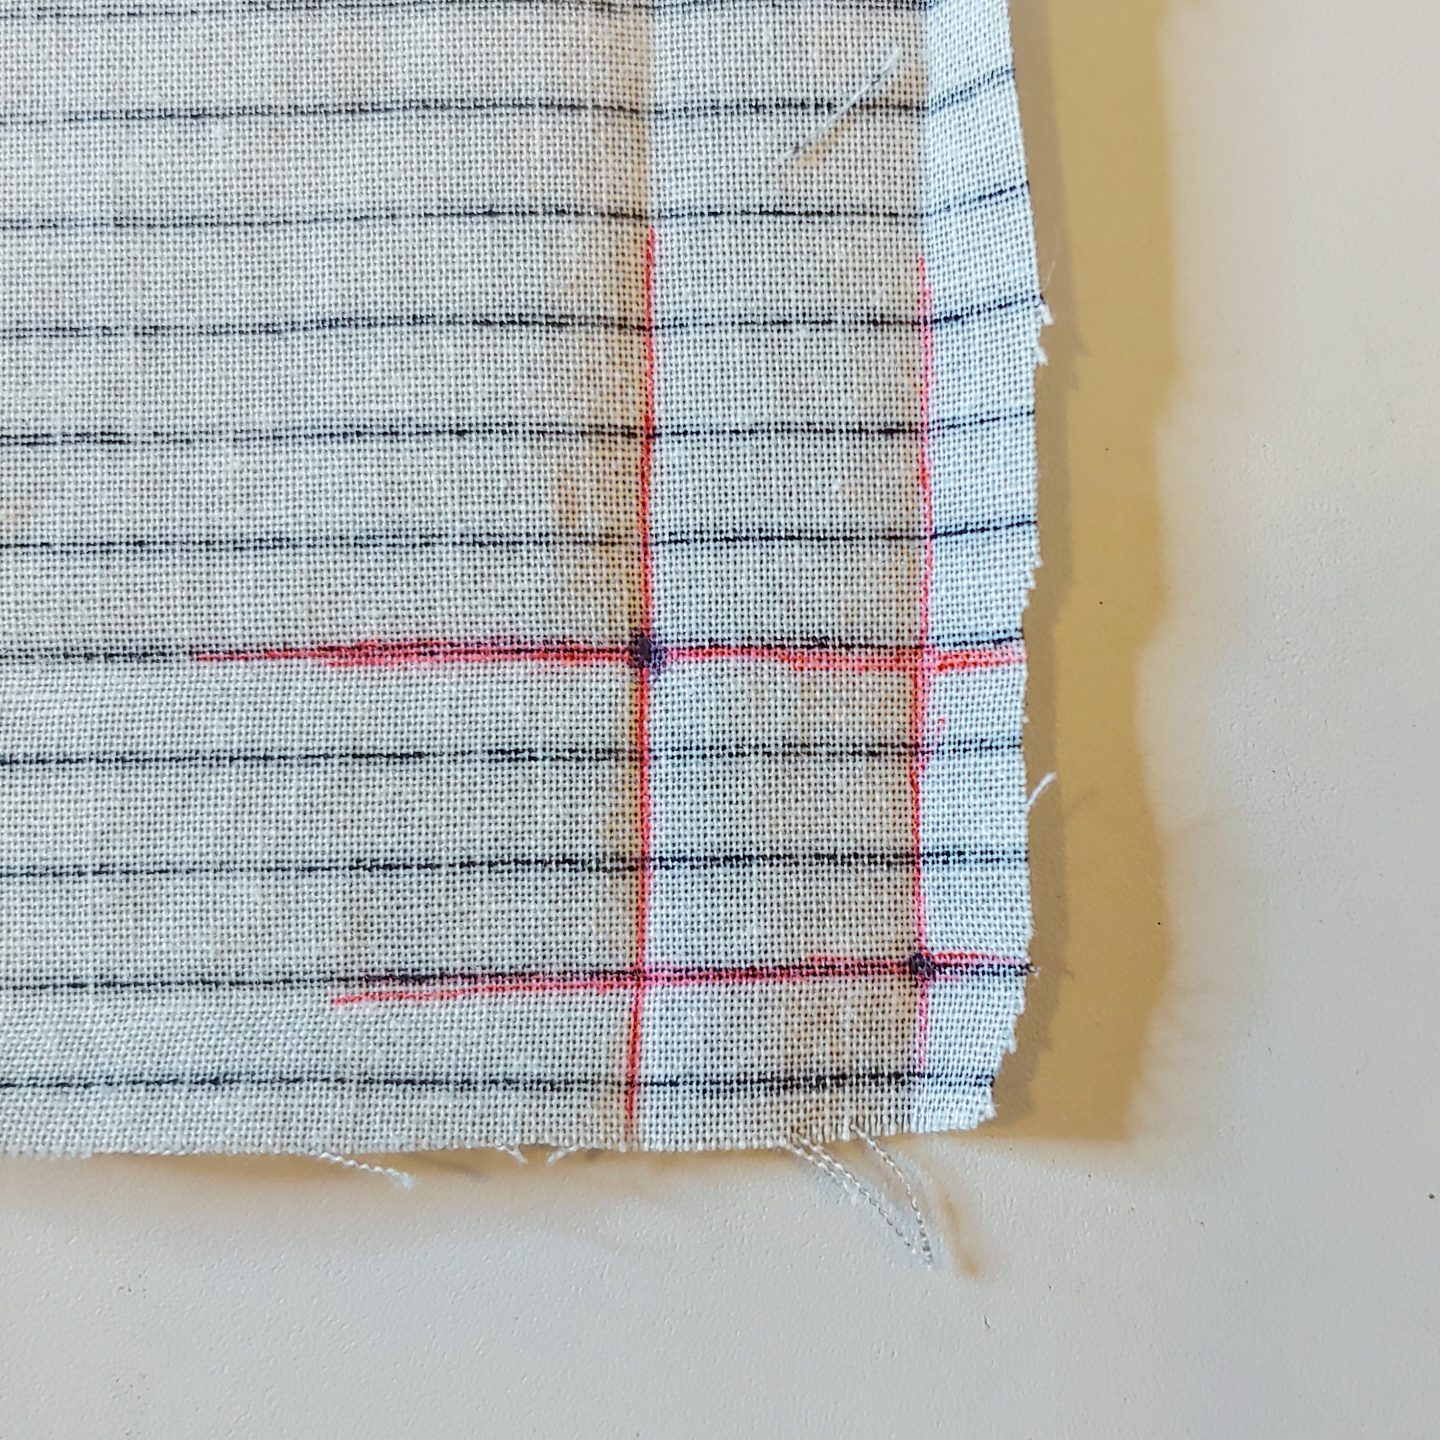
1. Fold and press two joining edges. In my example I’m folding at 1/4″ and again at 1/2″. Fold them just like you would normally. If you really want perfection, measure as you fold!
2. Unfold gently and find these two points – the innermost and outermost fold intersections. In the picture, I drew over the folds in red and marked the two points with black dots.
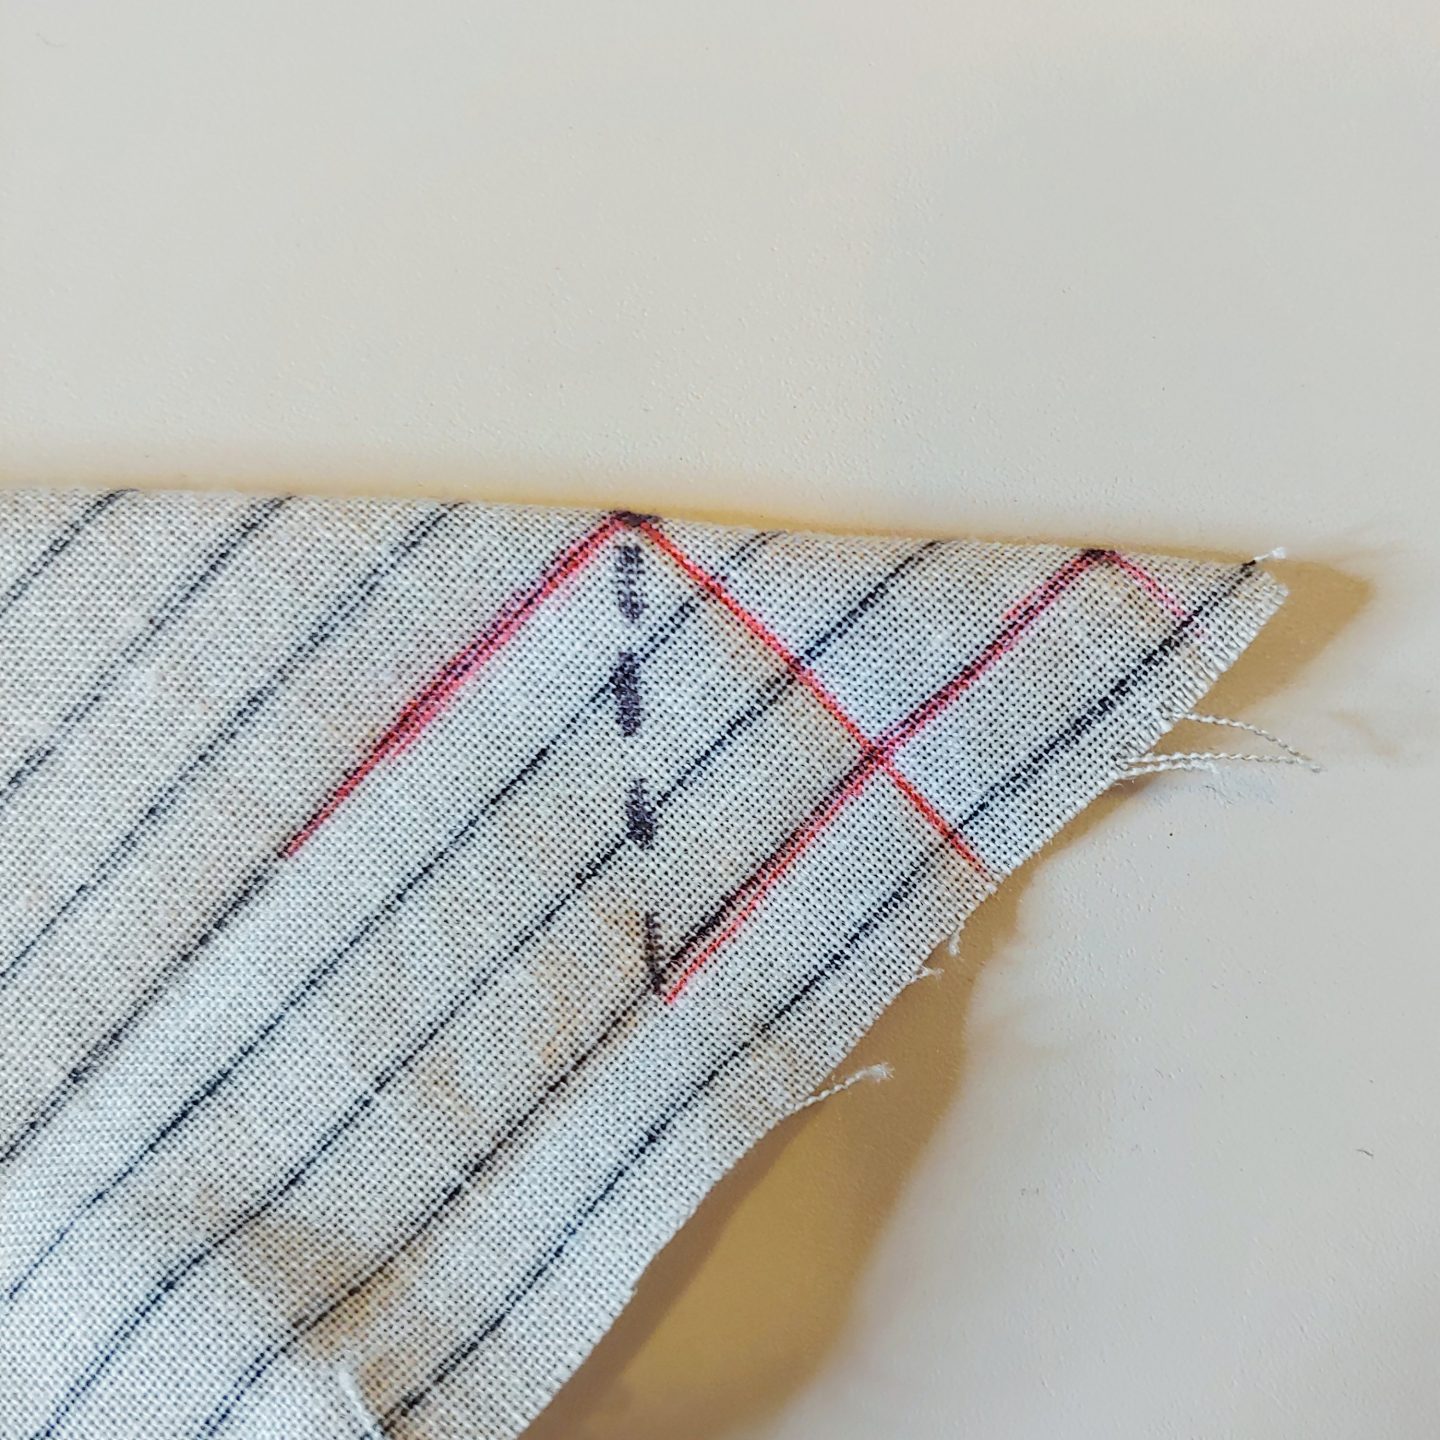
3. Refold at the corner creating a wedge shape. The two points from Step 2 should be along the fold.
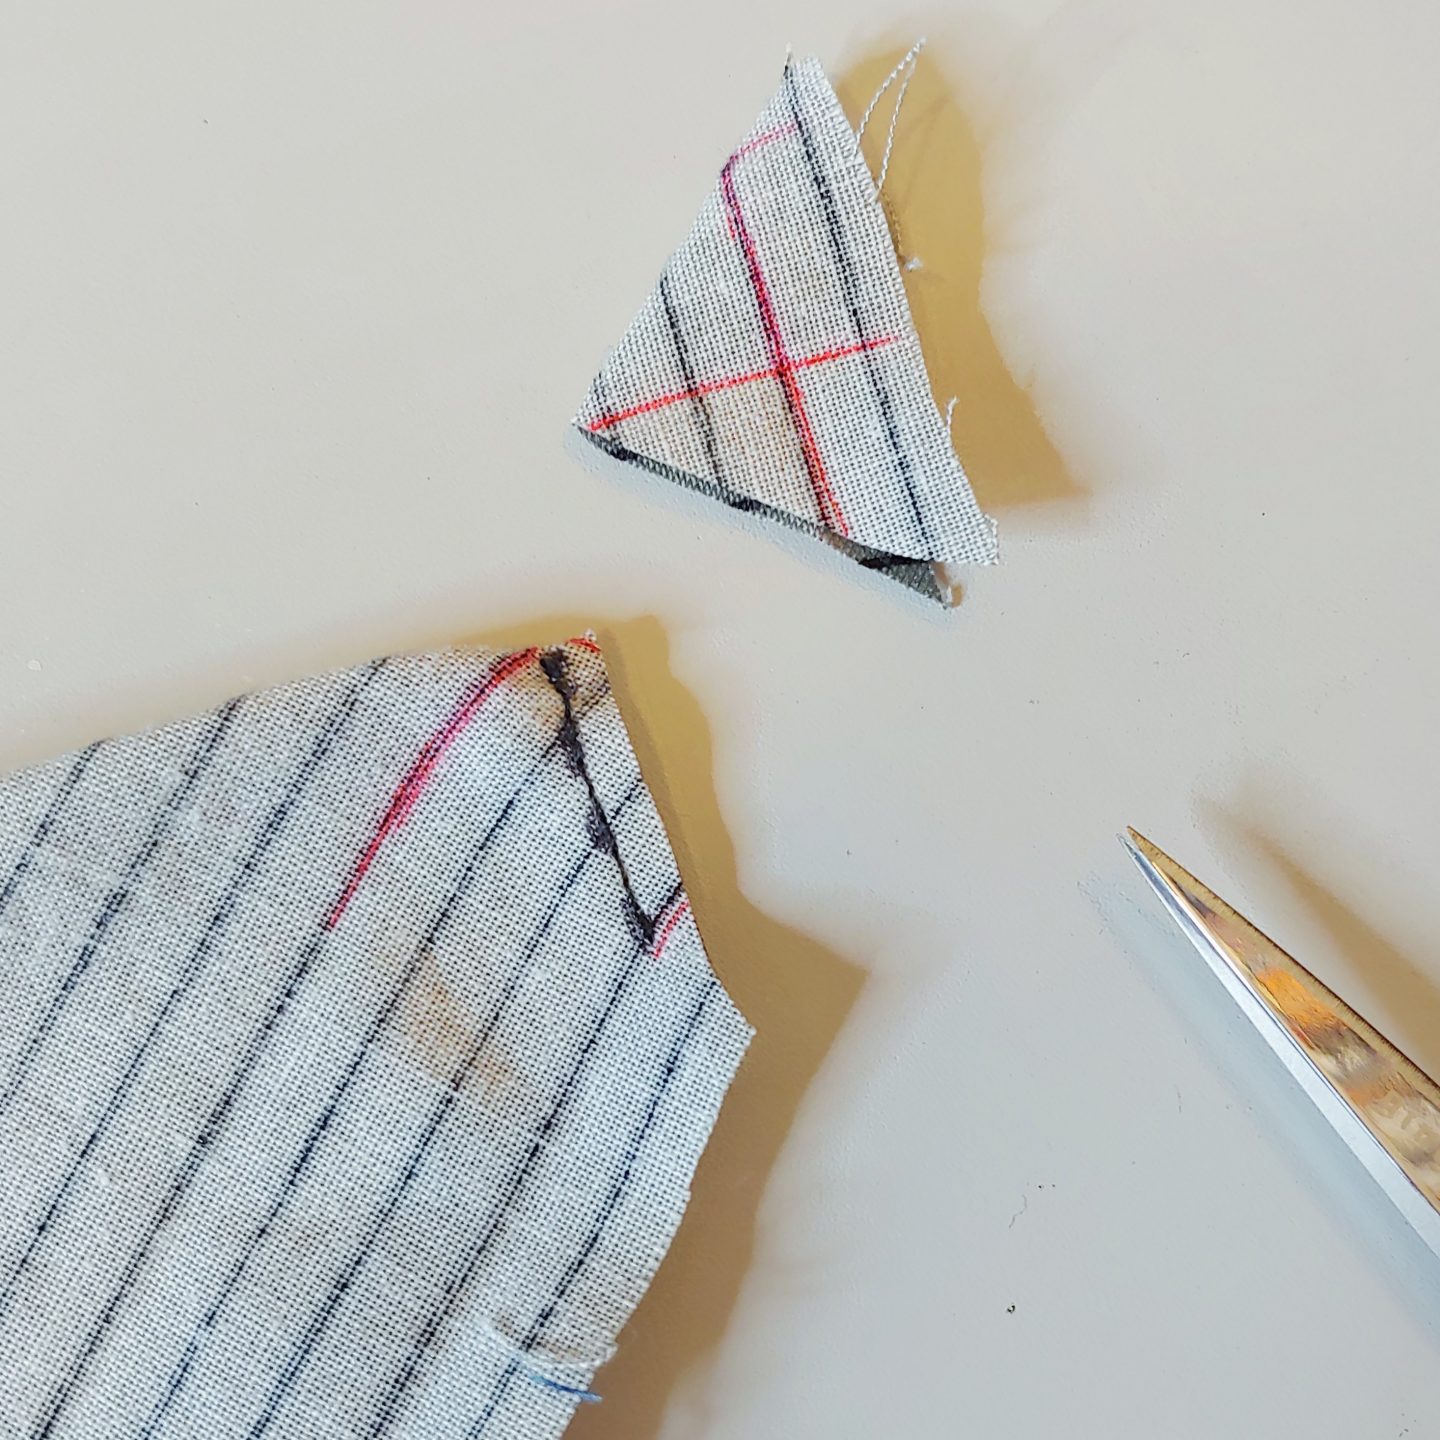
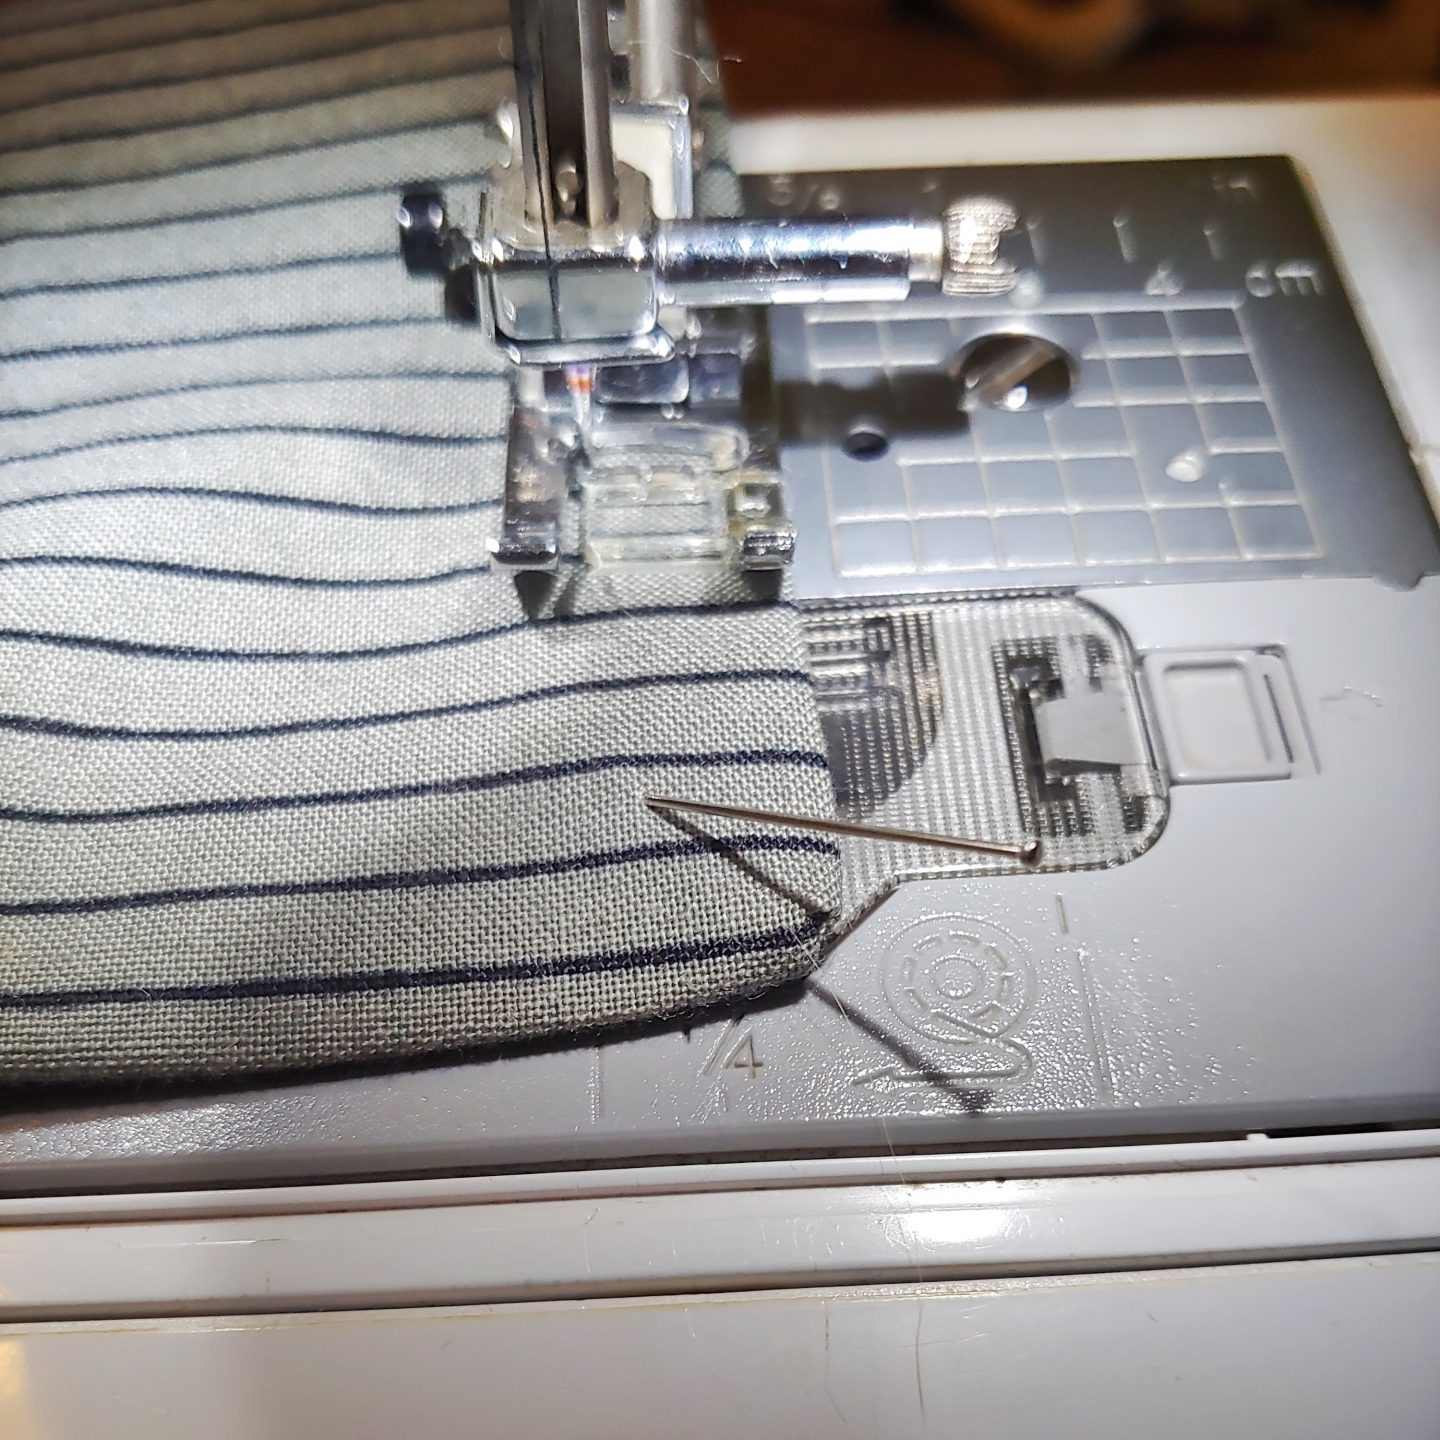
4. Sew straight down from the inner most point, stopping at the first fold-line you made.
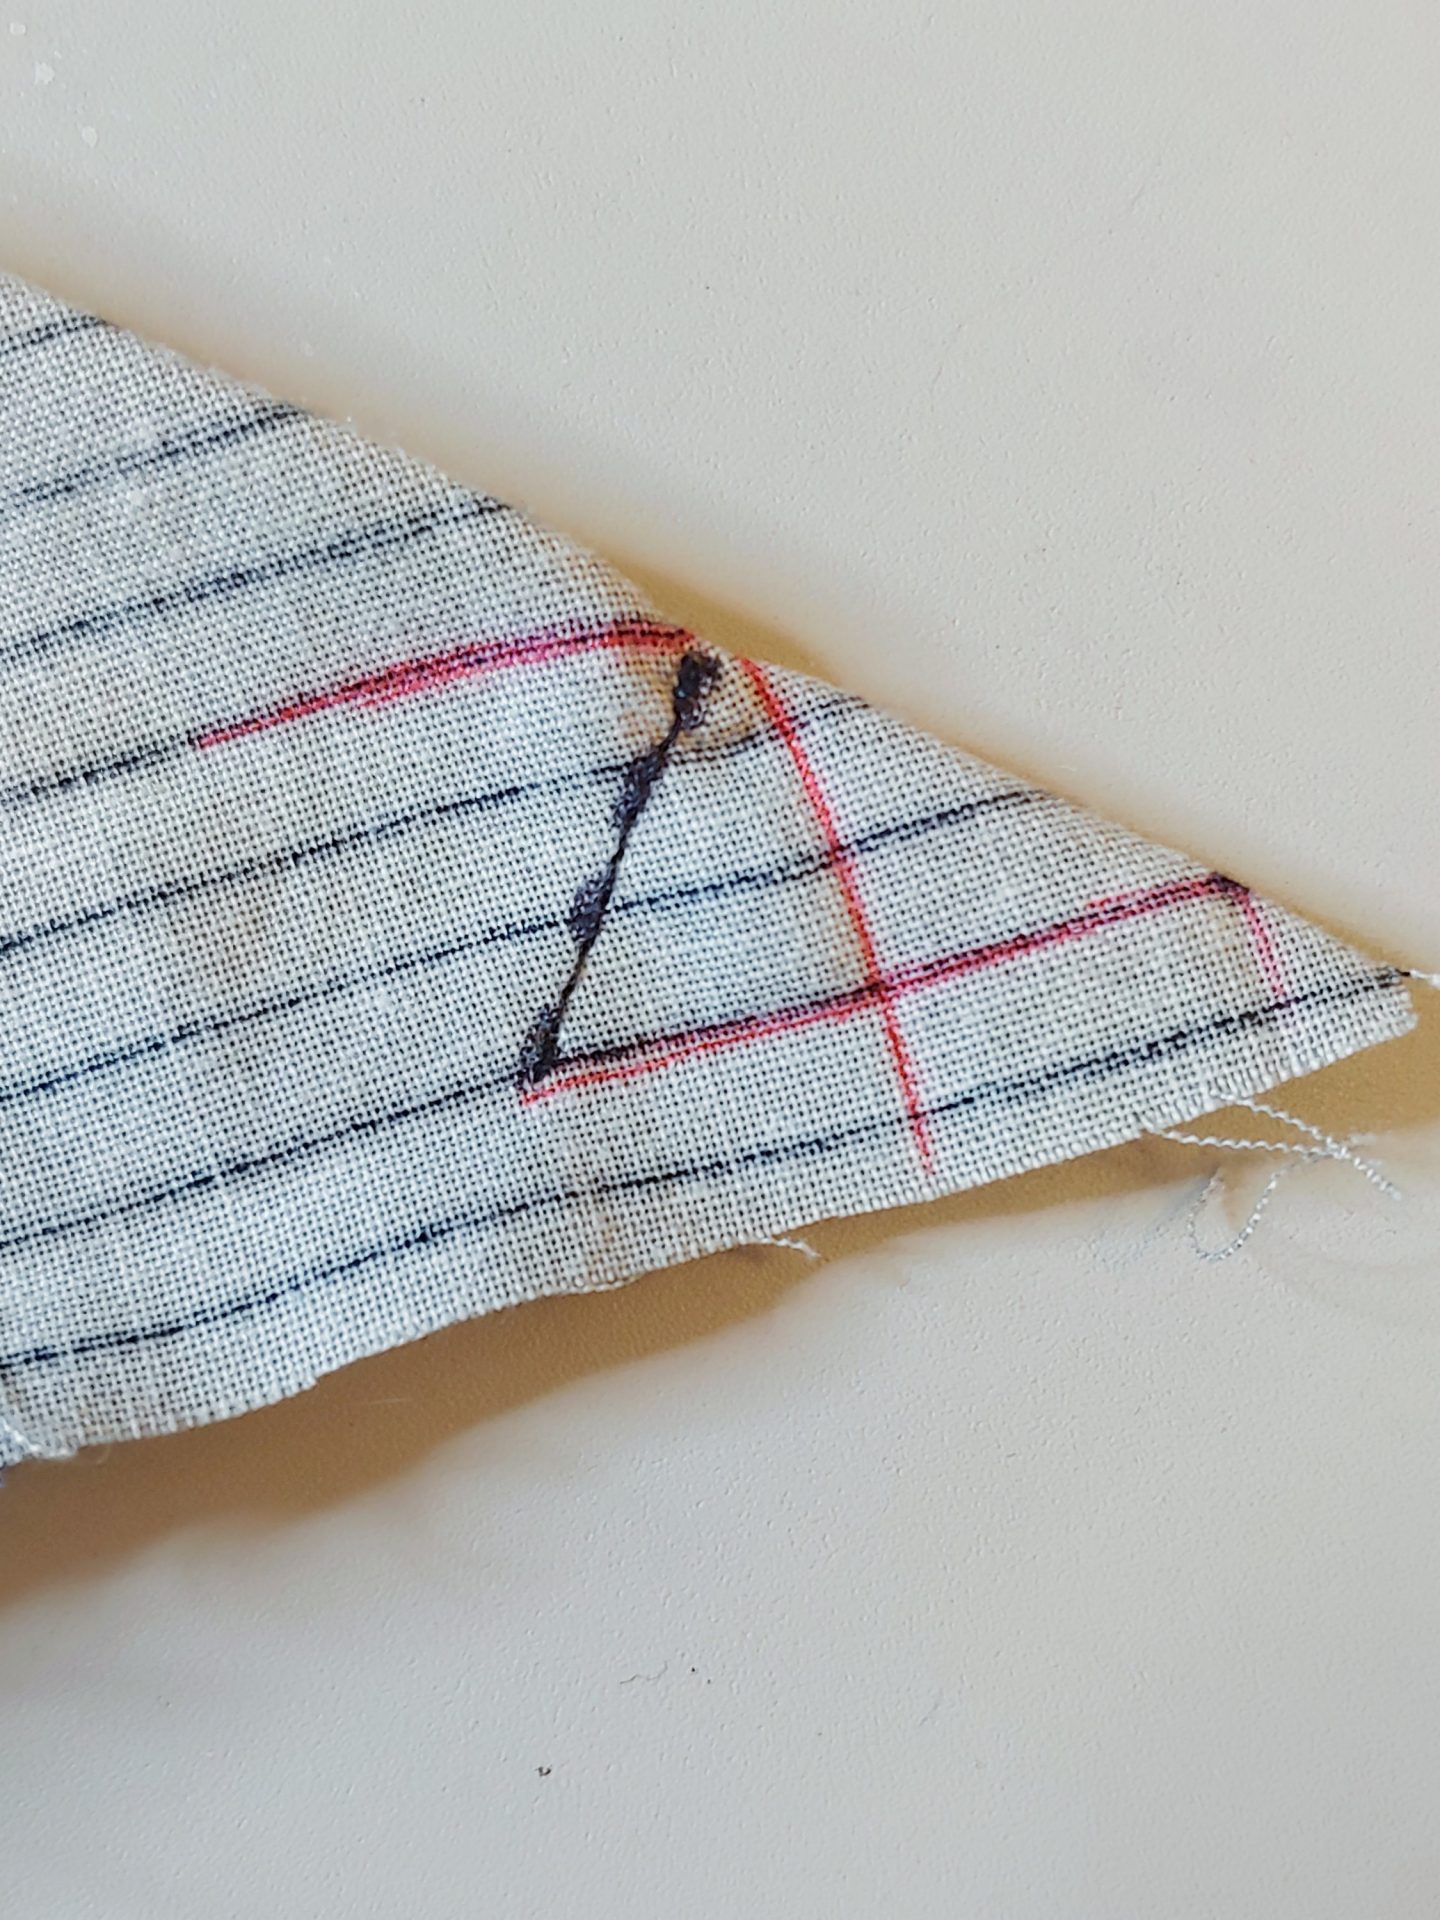
5. Trim the excess and snip the corner.
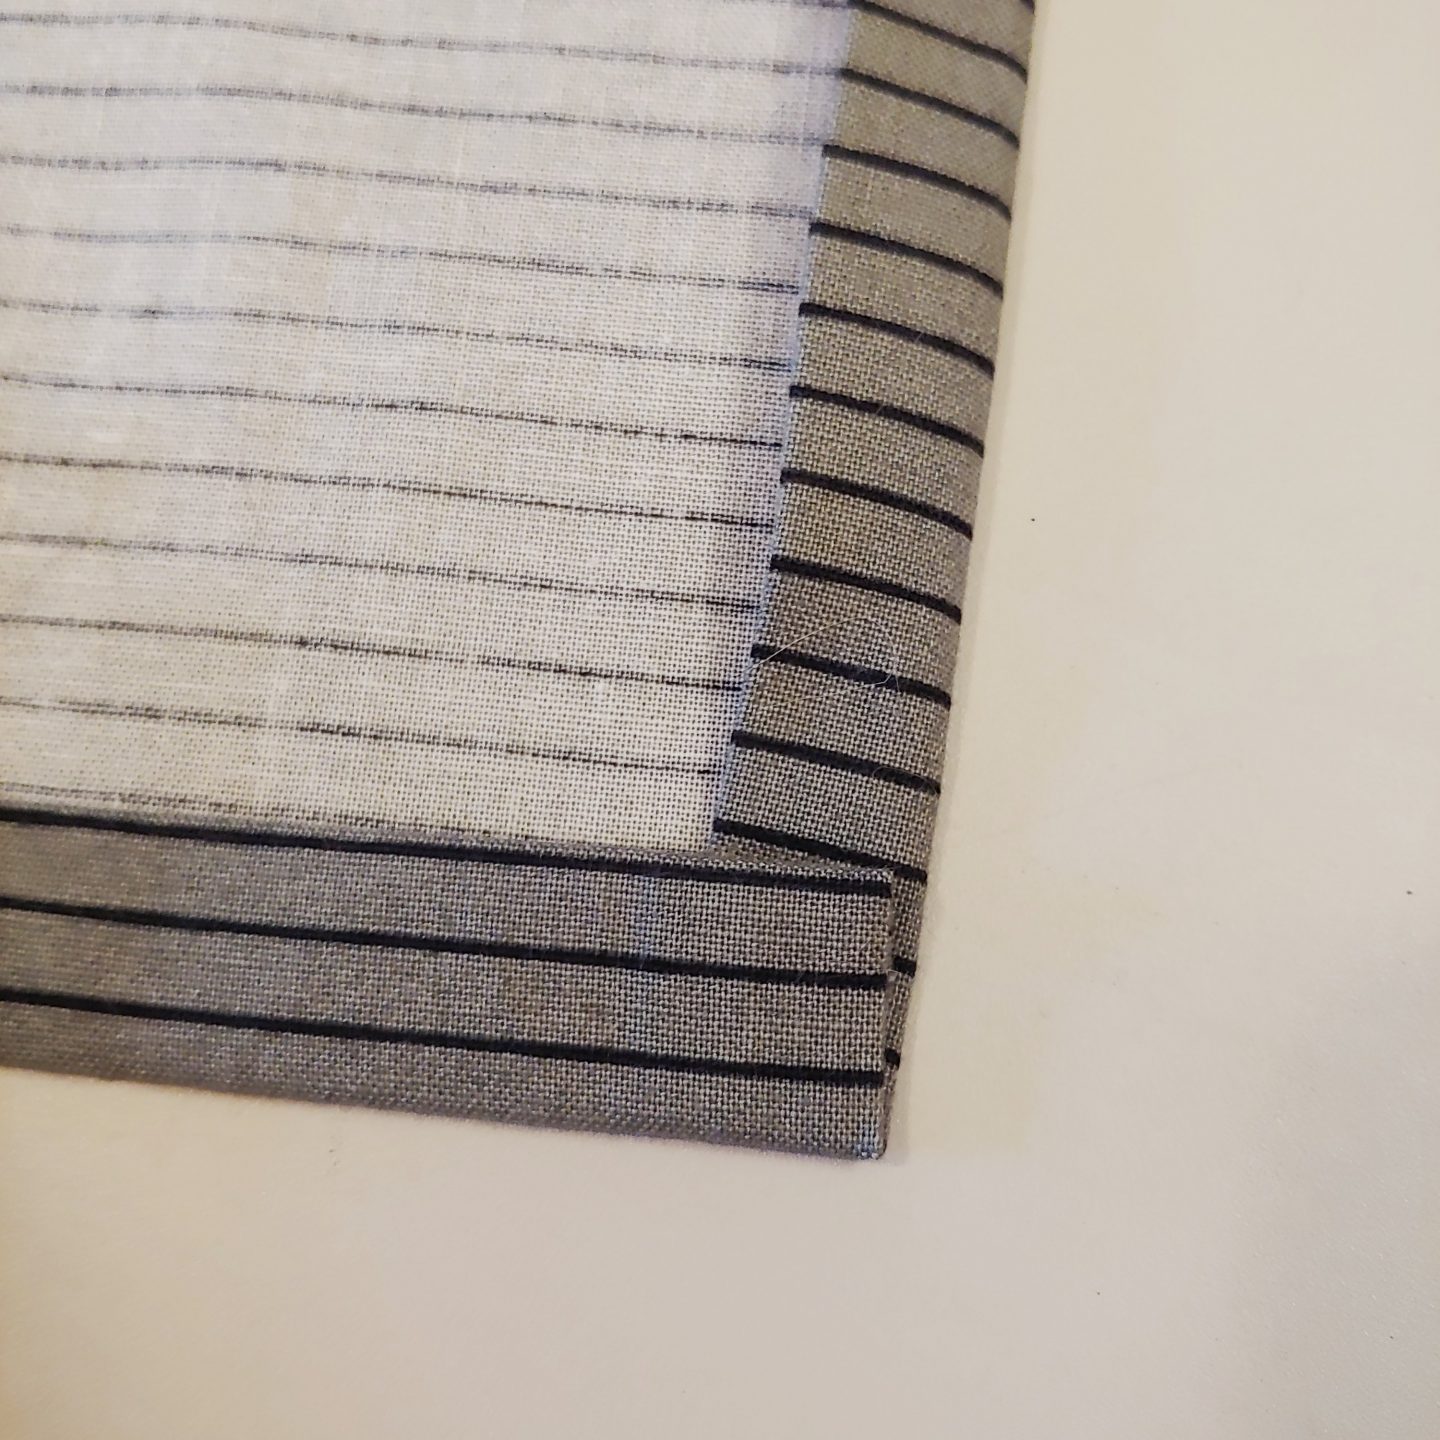
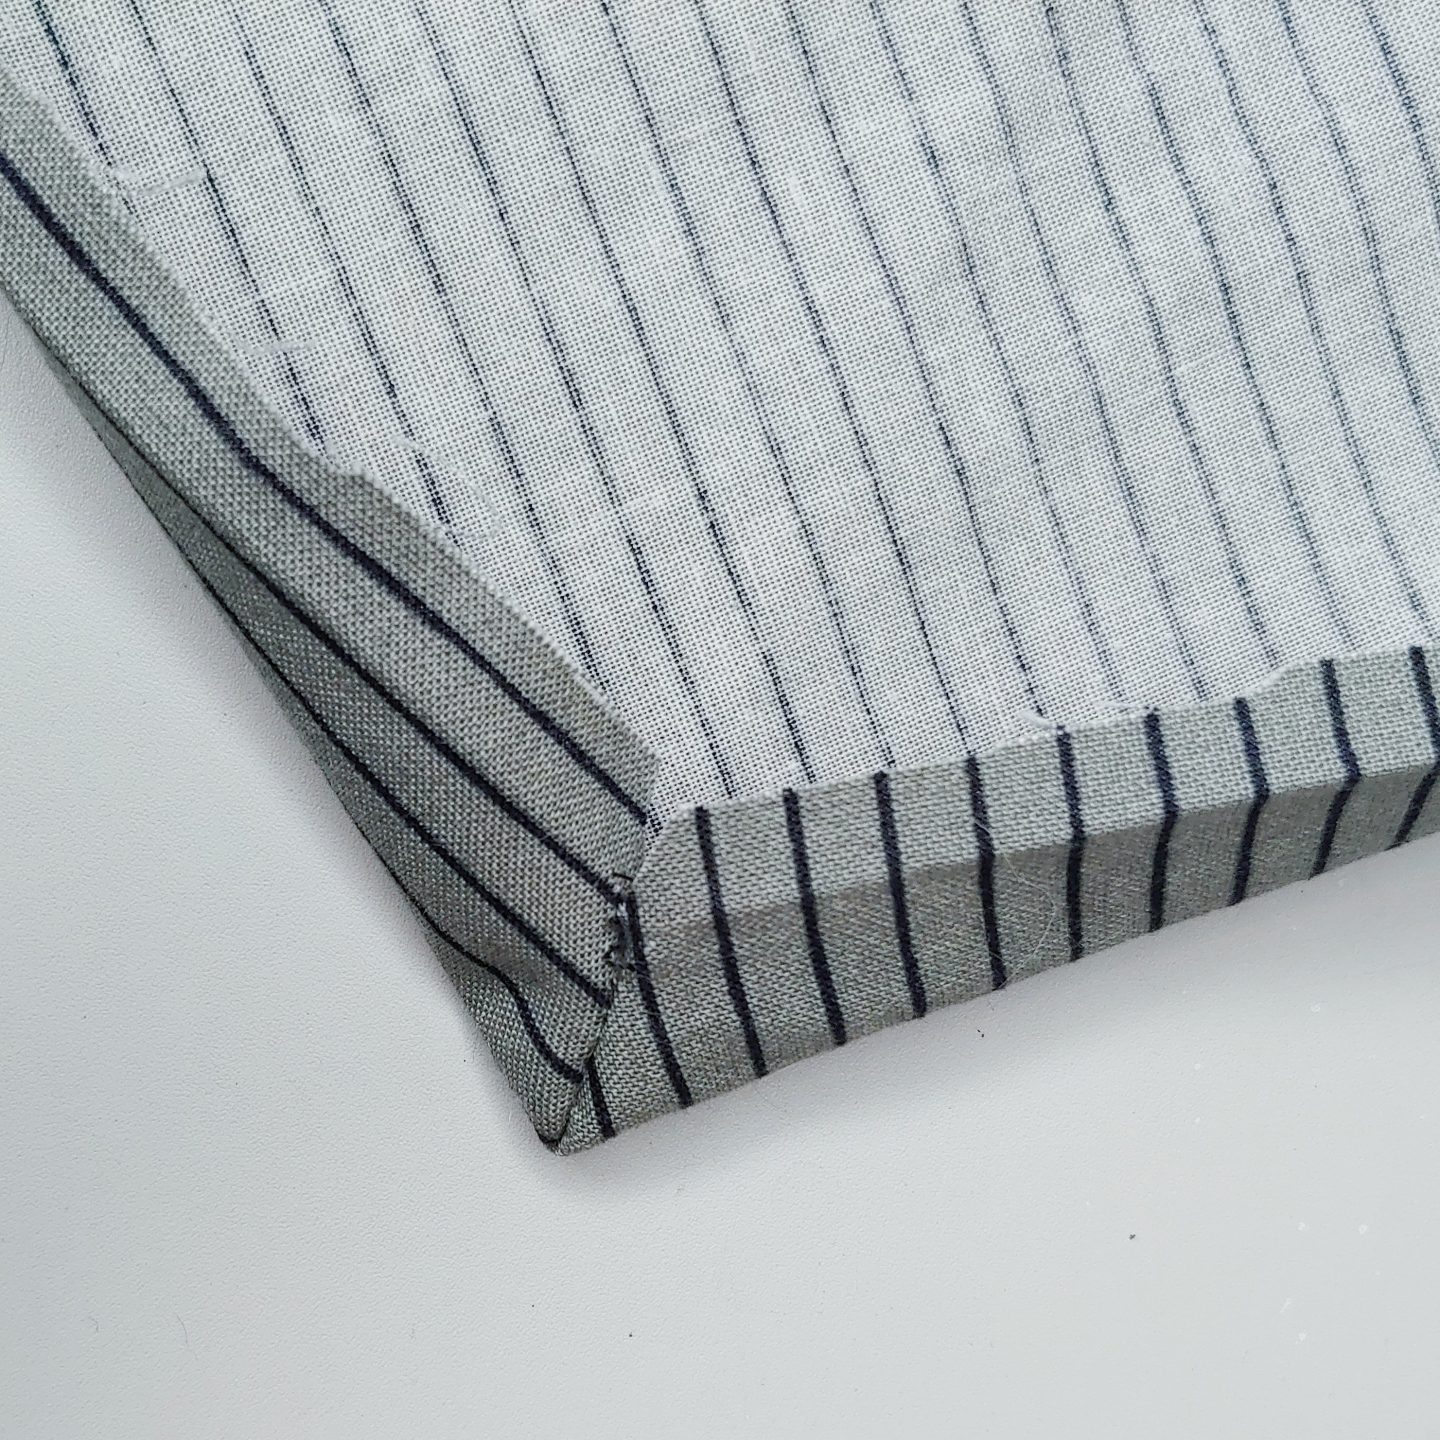
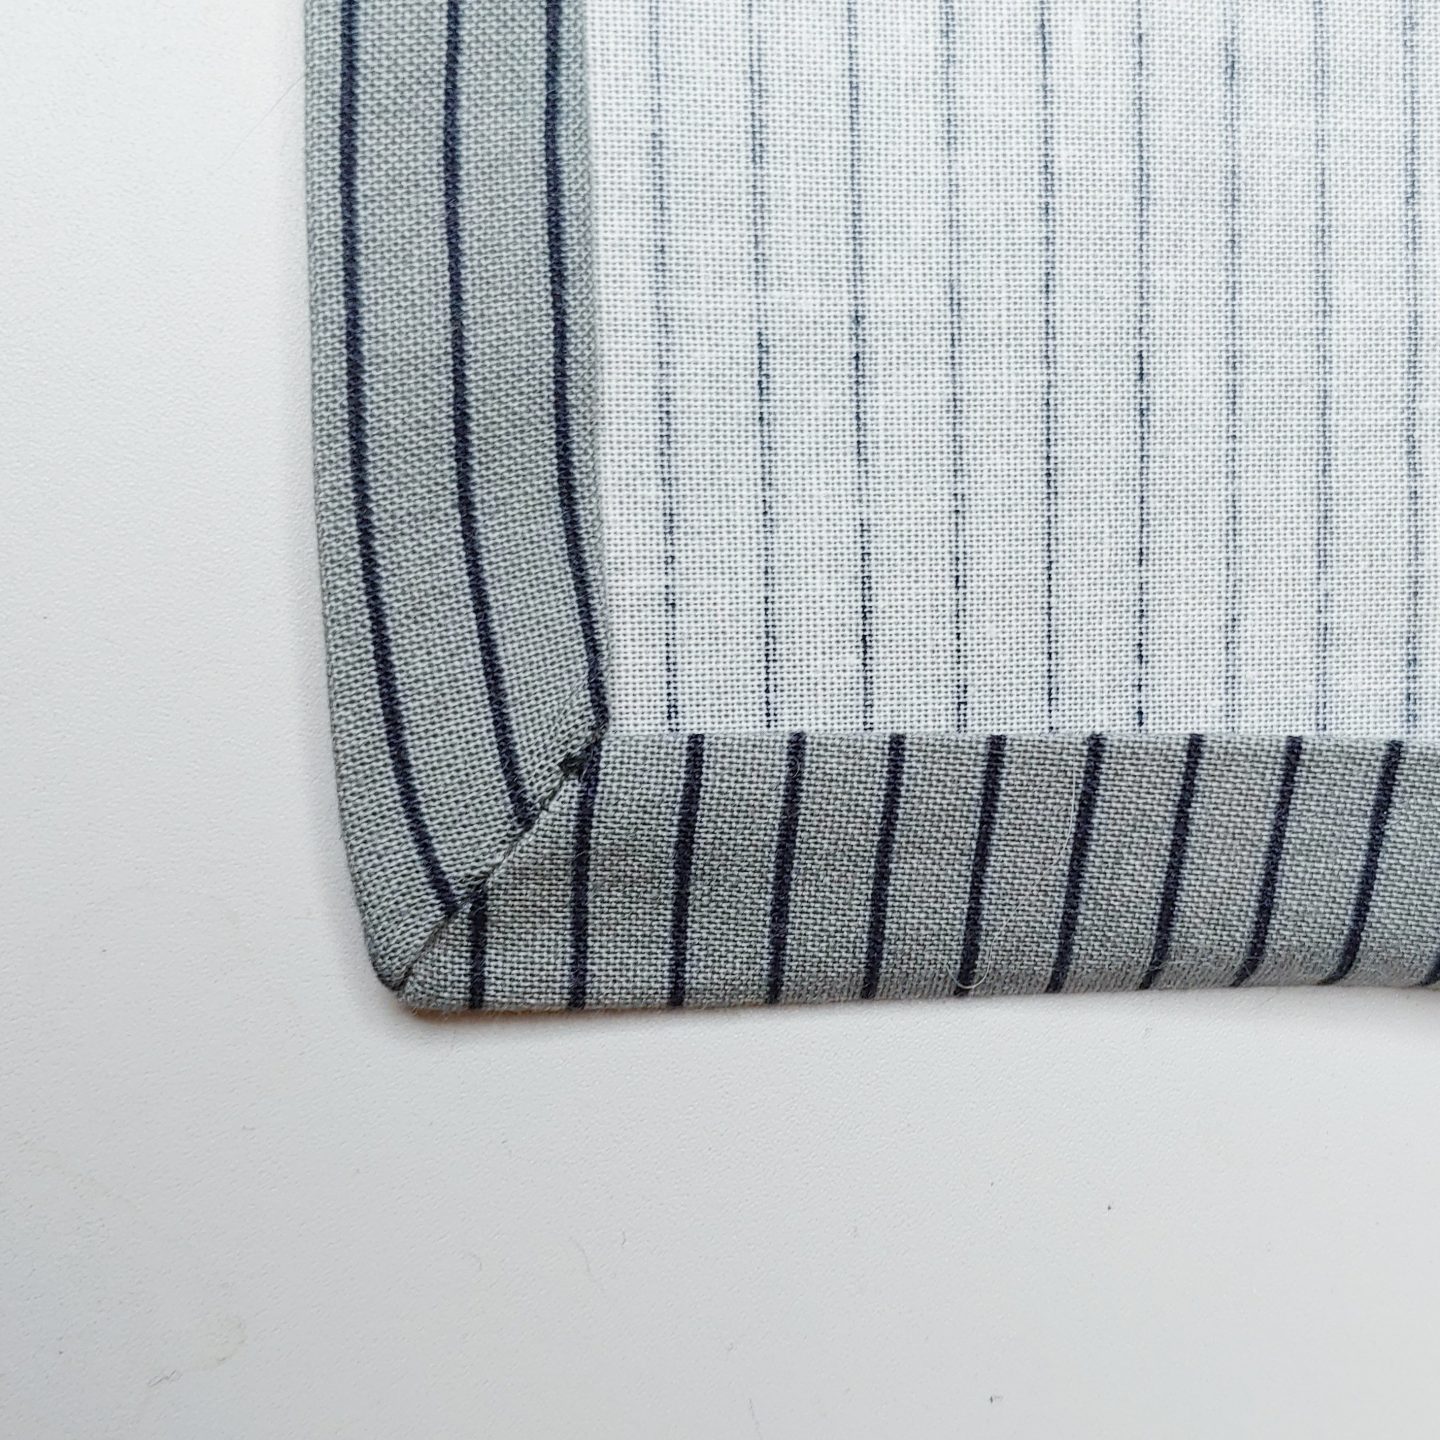
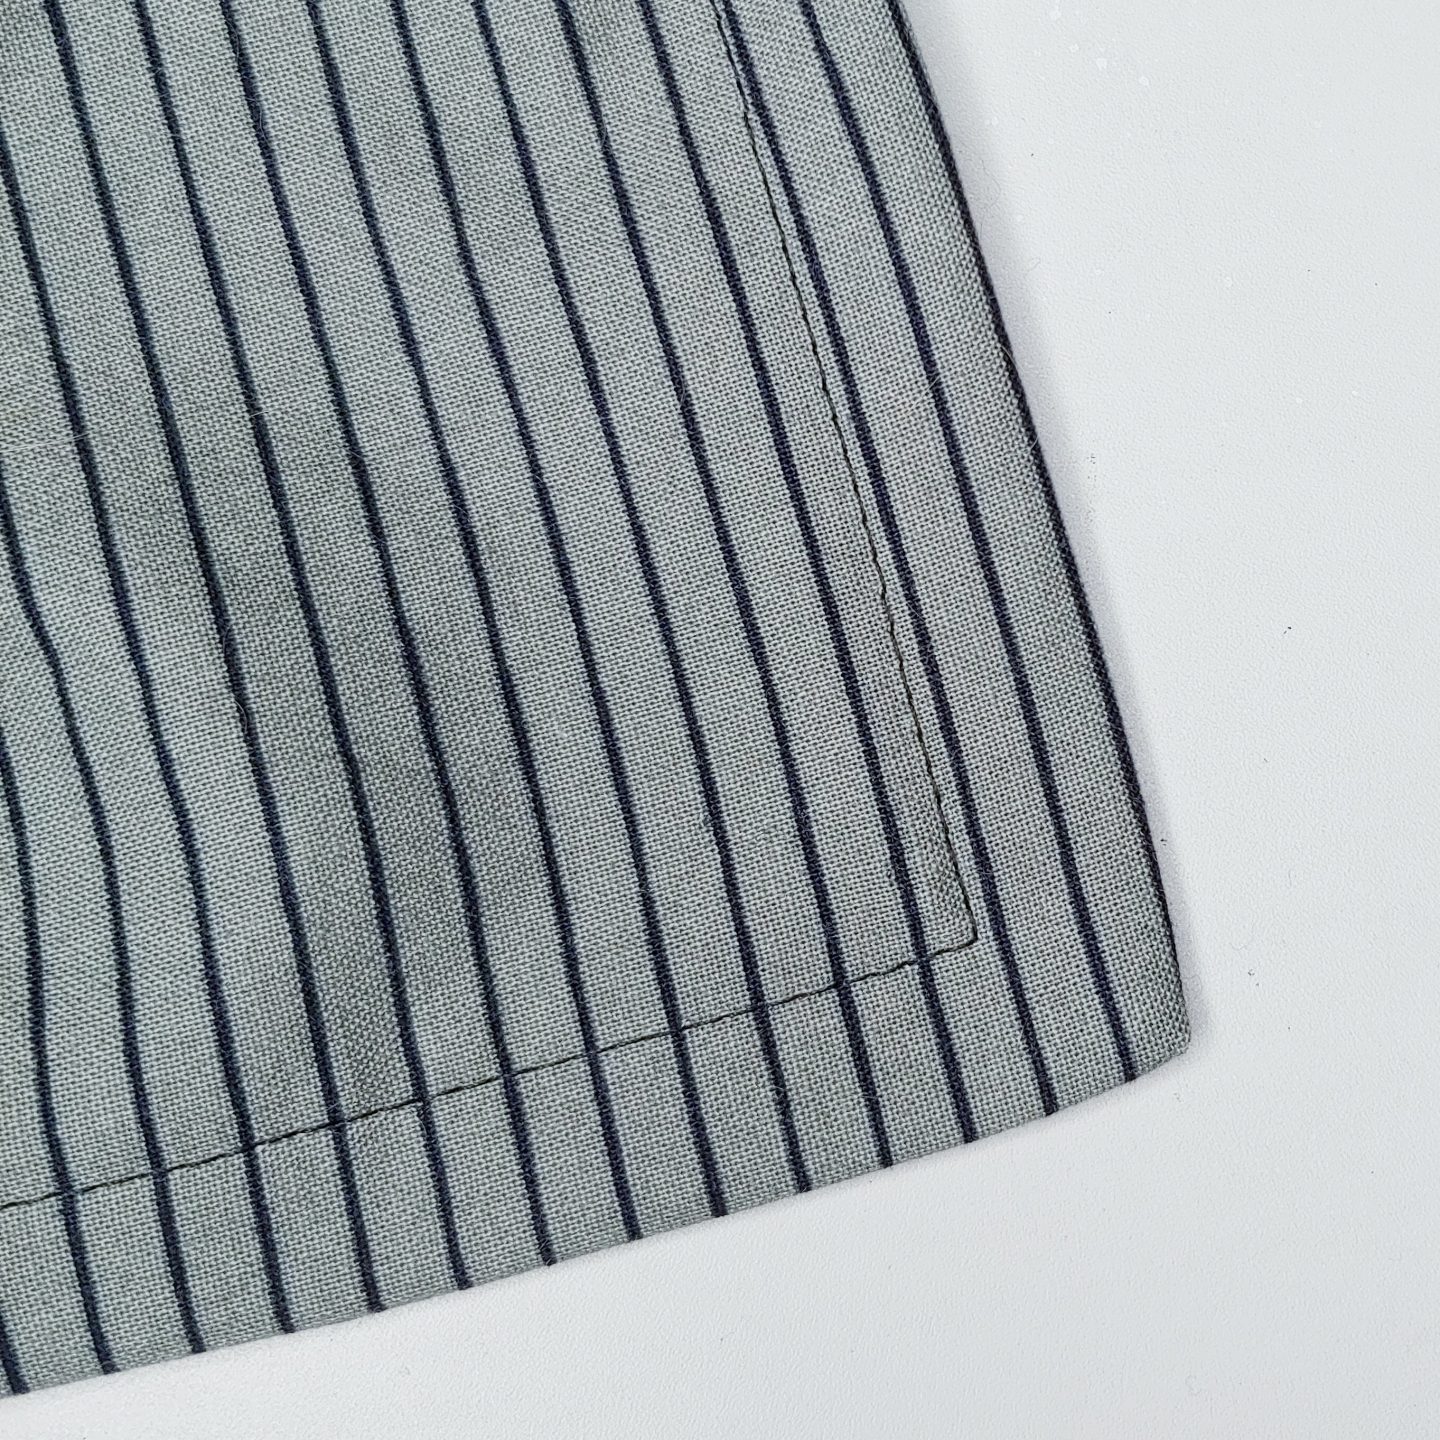
6. Turn the new corner and tuck the remaining fabric under. Repress the folds of the hem.
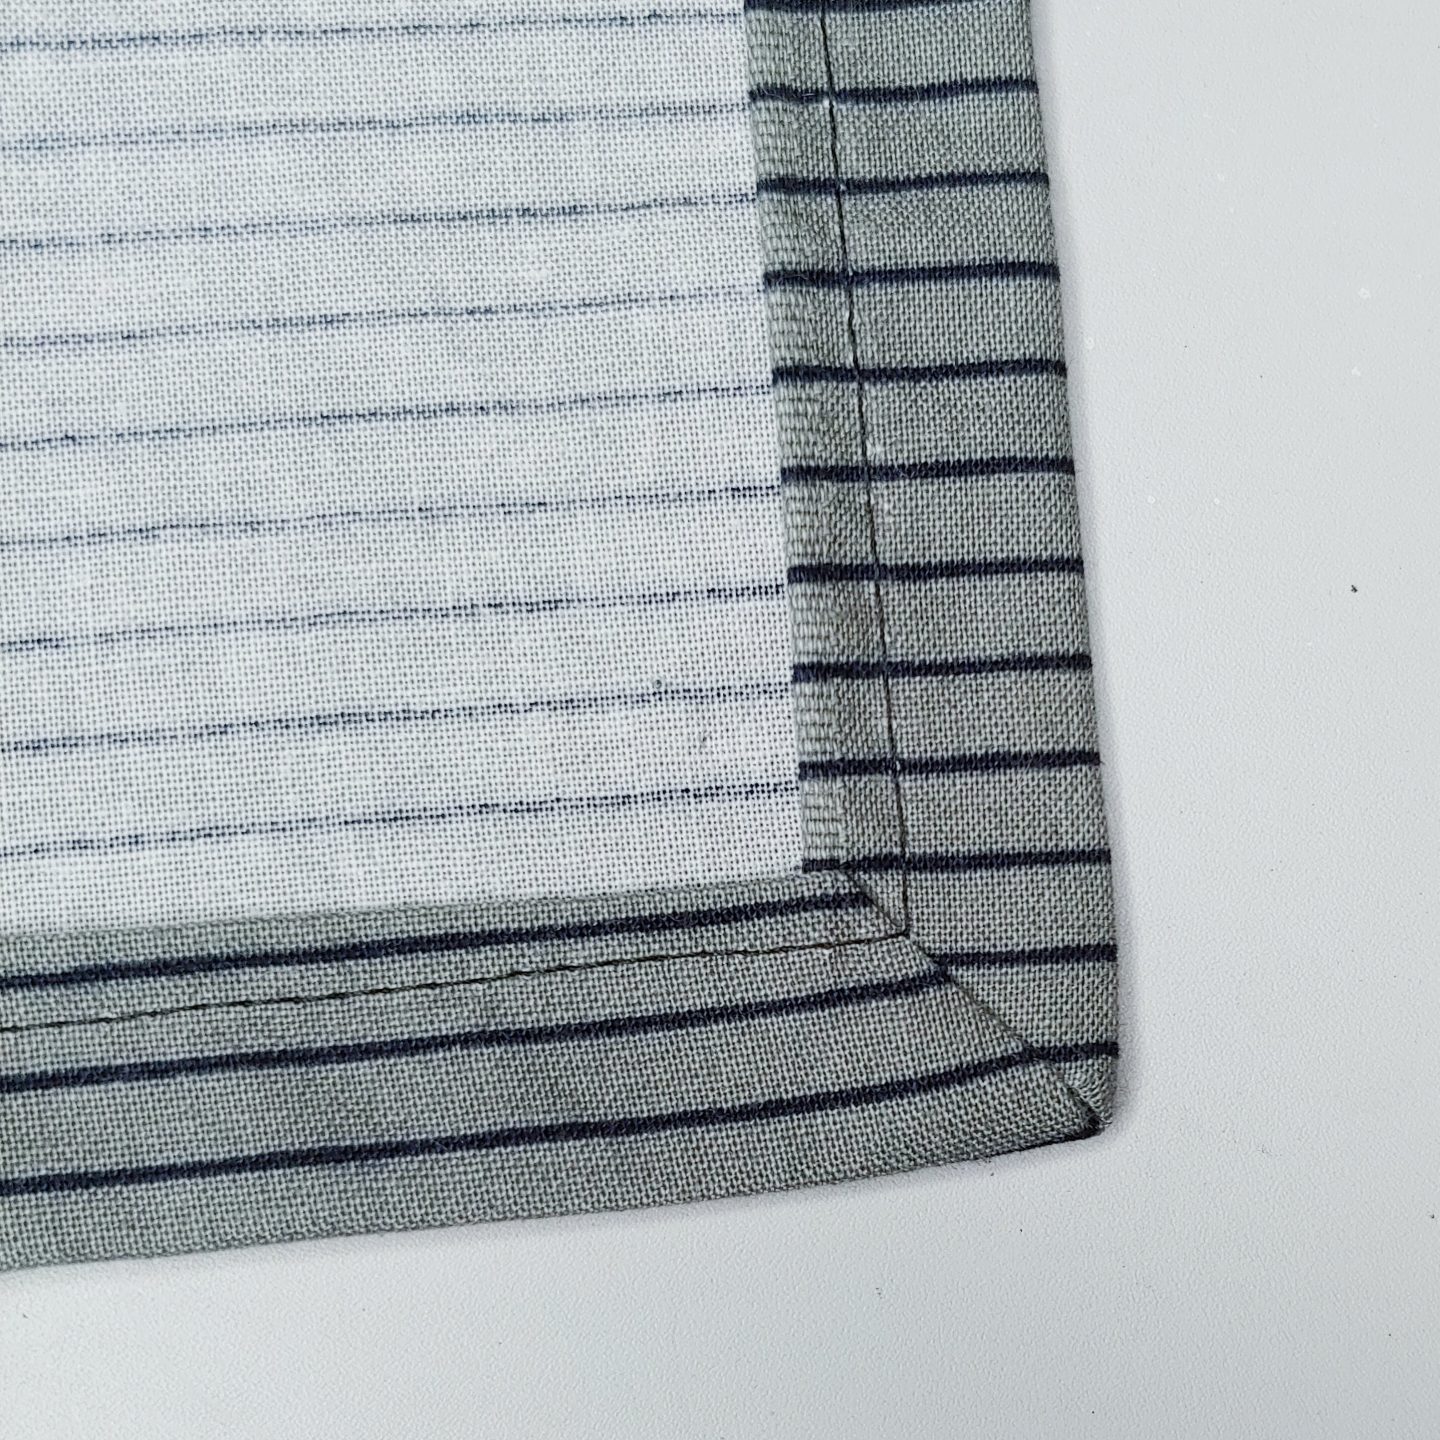
7. Sew the hem normally.
Sewing Tip: when you get near the corner, stick a pin into the corner seam to mark it. This will help you see the seam better so you can pivot accurately. You could also mark it with chalk.
Thanks for reading and good luck with those corners <3