
I love facings, they elevate any neckline or armscye you want to finish. While bias tape and double-folds can be finicky, a facing will always lie flat.
Note: I make my facings 2.5″ wide (including a 1/2″ SA). I will use this measurement in my example.
I’m using a V-neck Front Bodice pattern piece in this tutorial but the technique can be applied to many different necklines, armscyes, and hems.
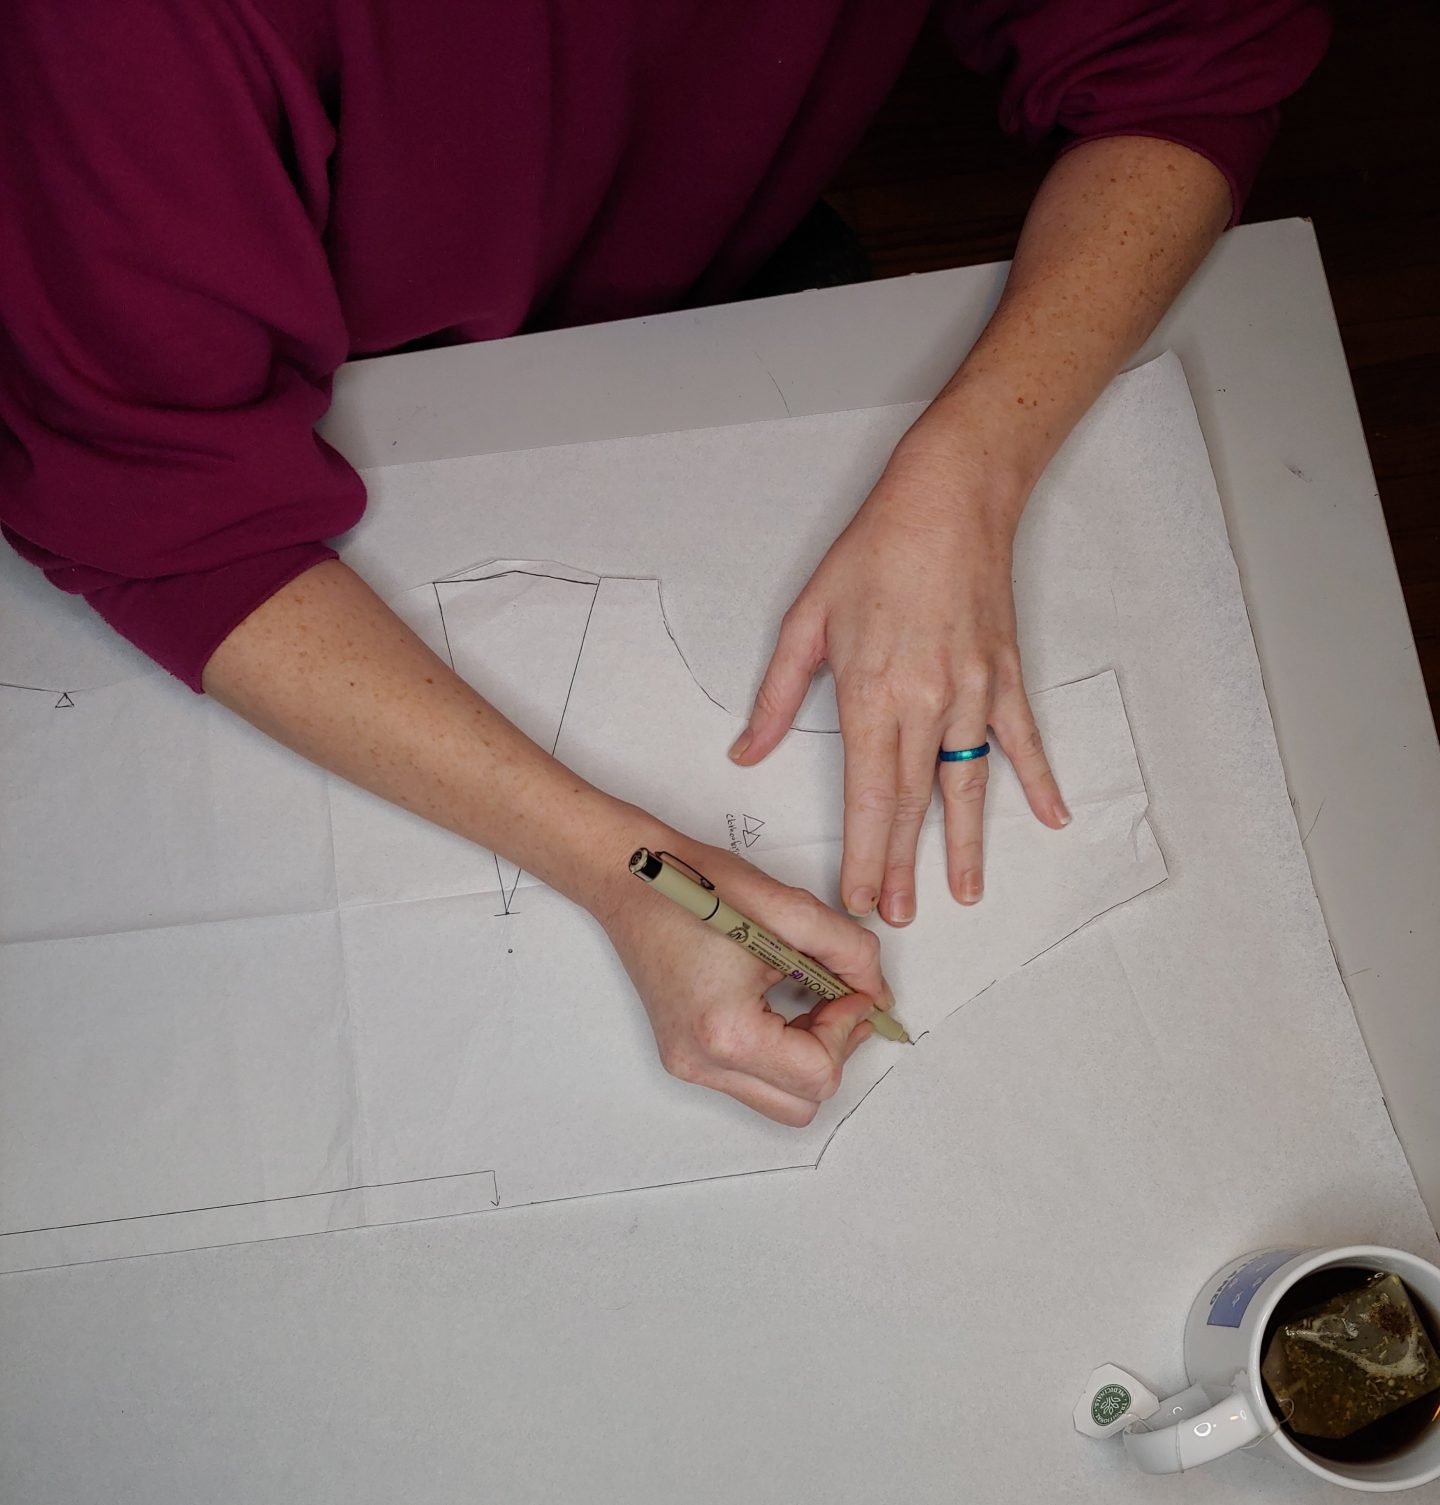
2. Trace the first 1/2″ of the Shoulder Seam and Center Front. Remove the pattern.
3. Align a ruler with the line you drew on the Shoulder Seam. Measure and trace a line 2.5″ from the neckline. Repeat for the Center Front.*
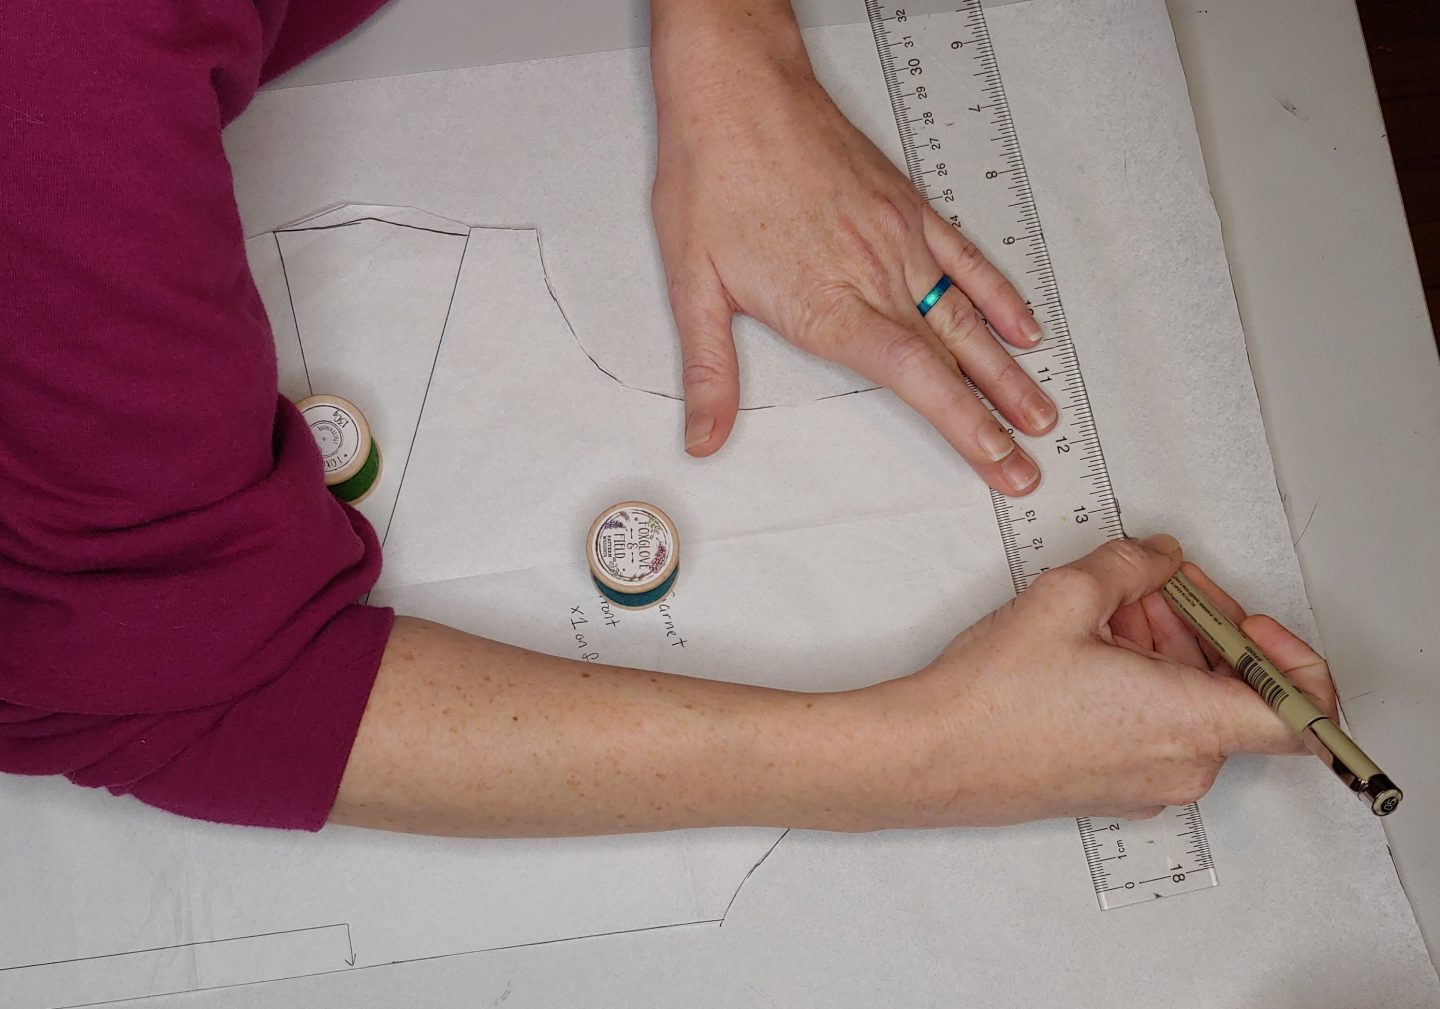
4. Align the ruler with the neckline again, and draw a mark at 2.5″ (toward the garment). Repeat every 1/2″ until you’ve marked the entire outer edge of the facing.
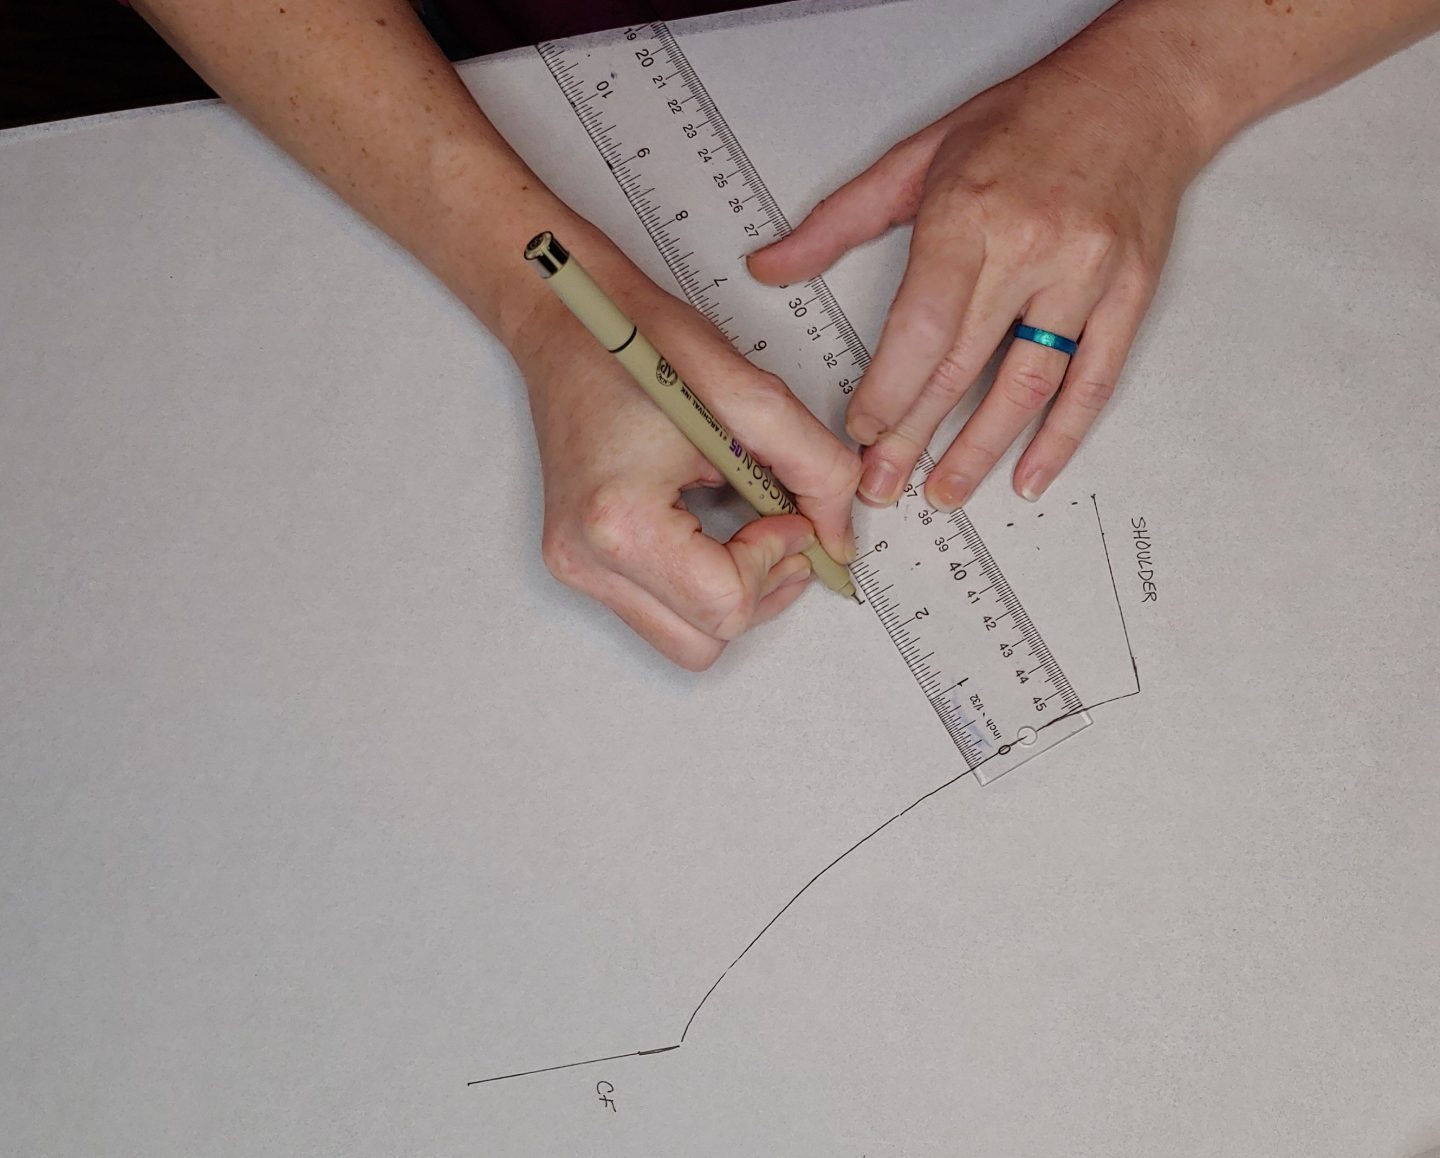
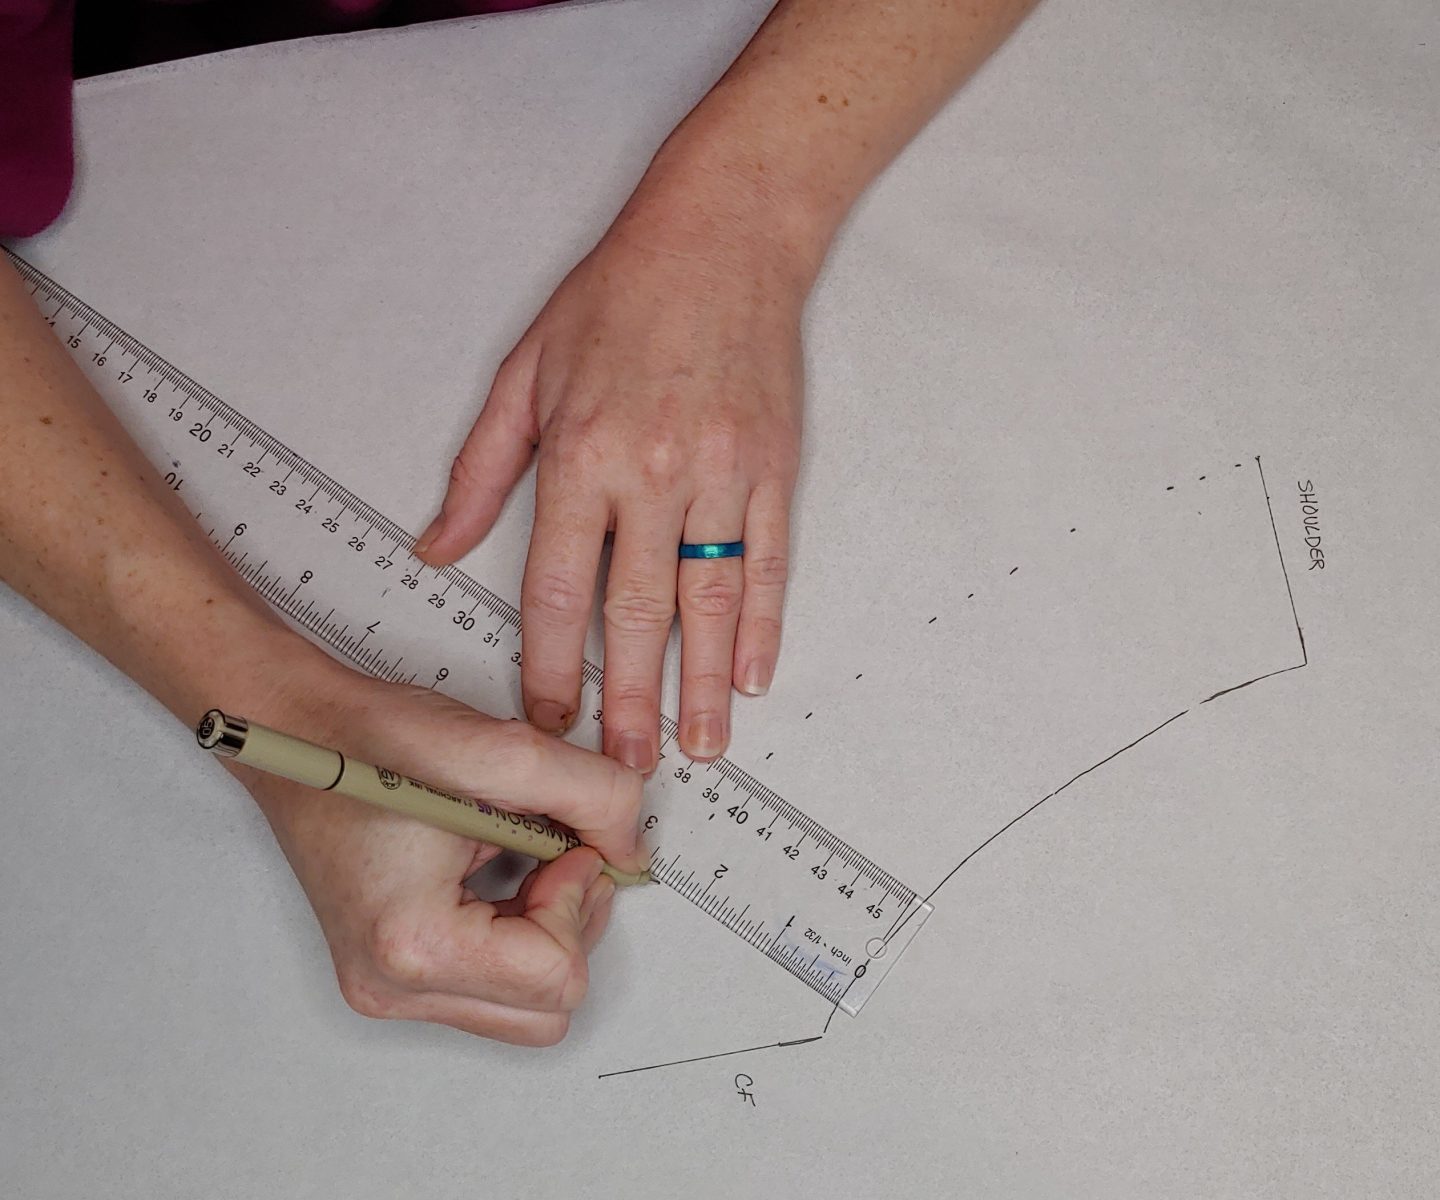
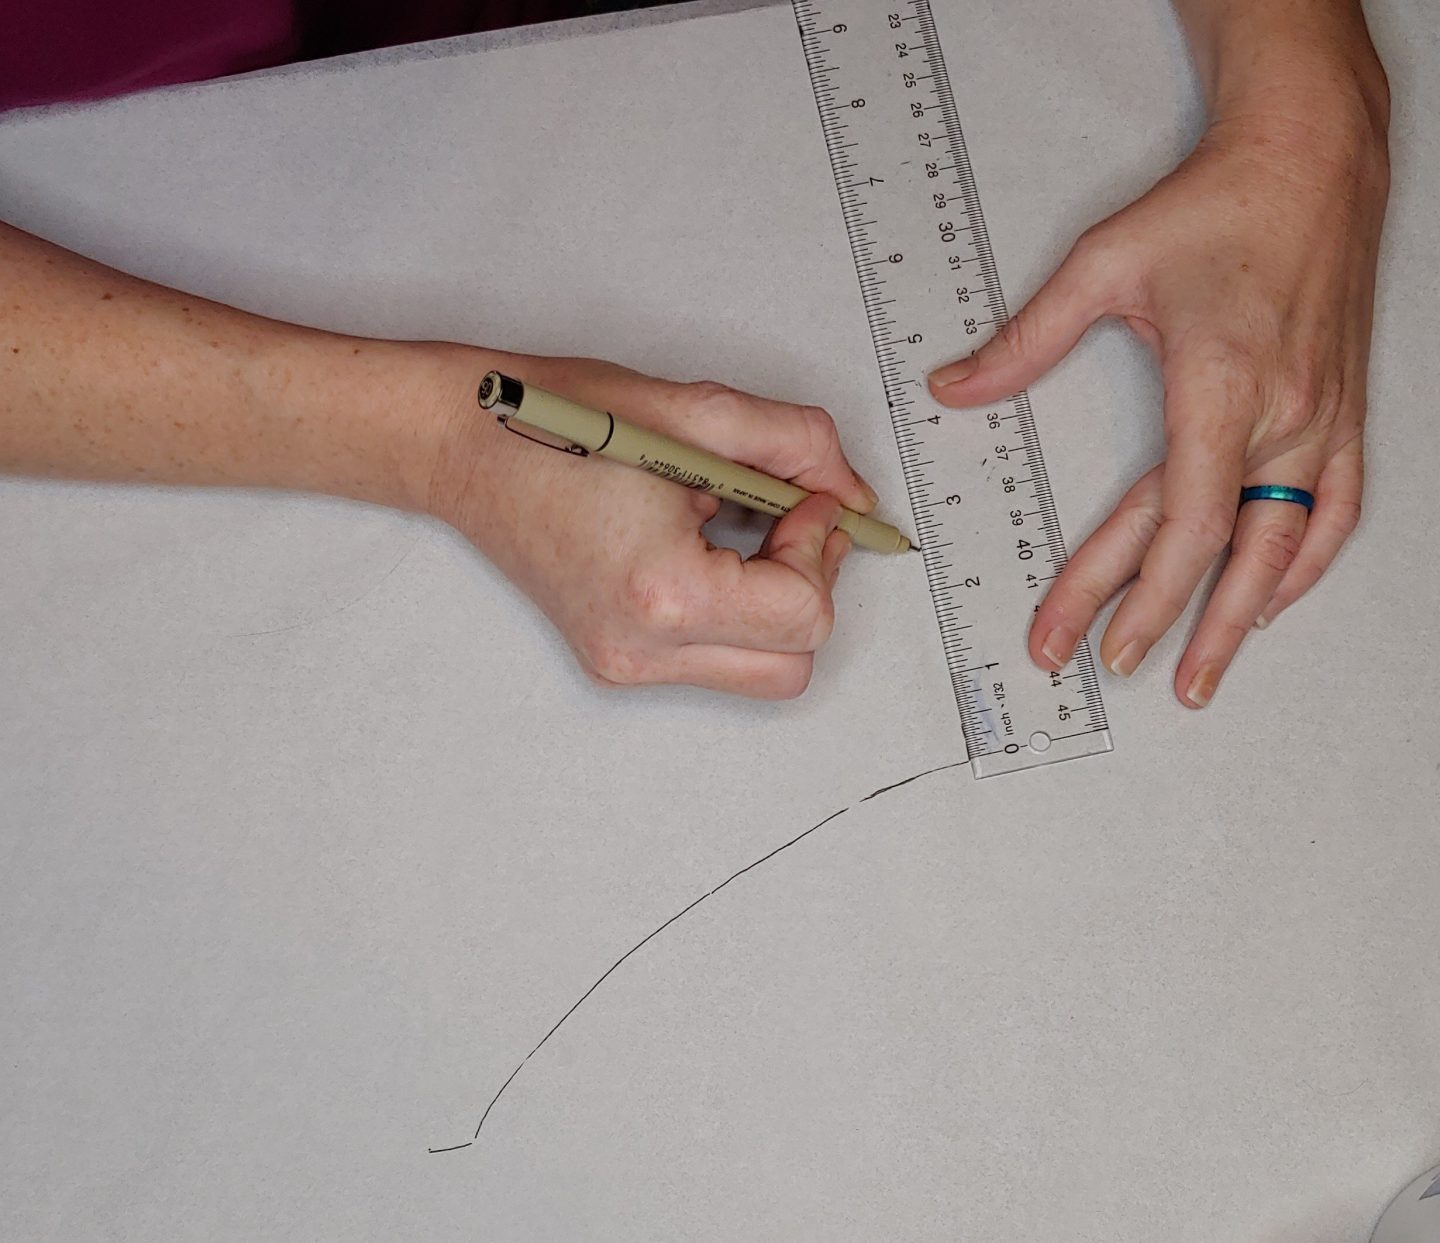
5. At the Shoulder Seam and Center Front, align the ruler at a 90 degree angle and draw the first 1/2 of the outer edge.
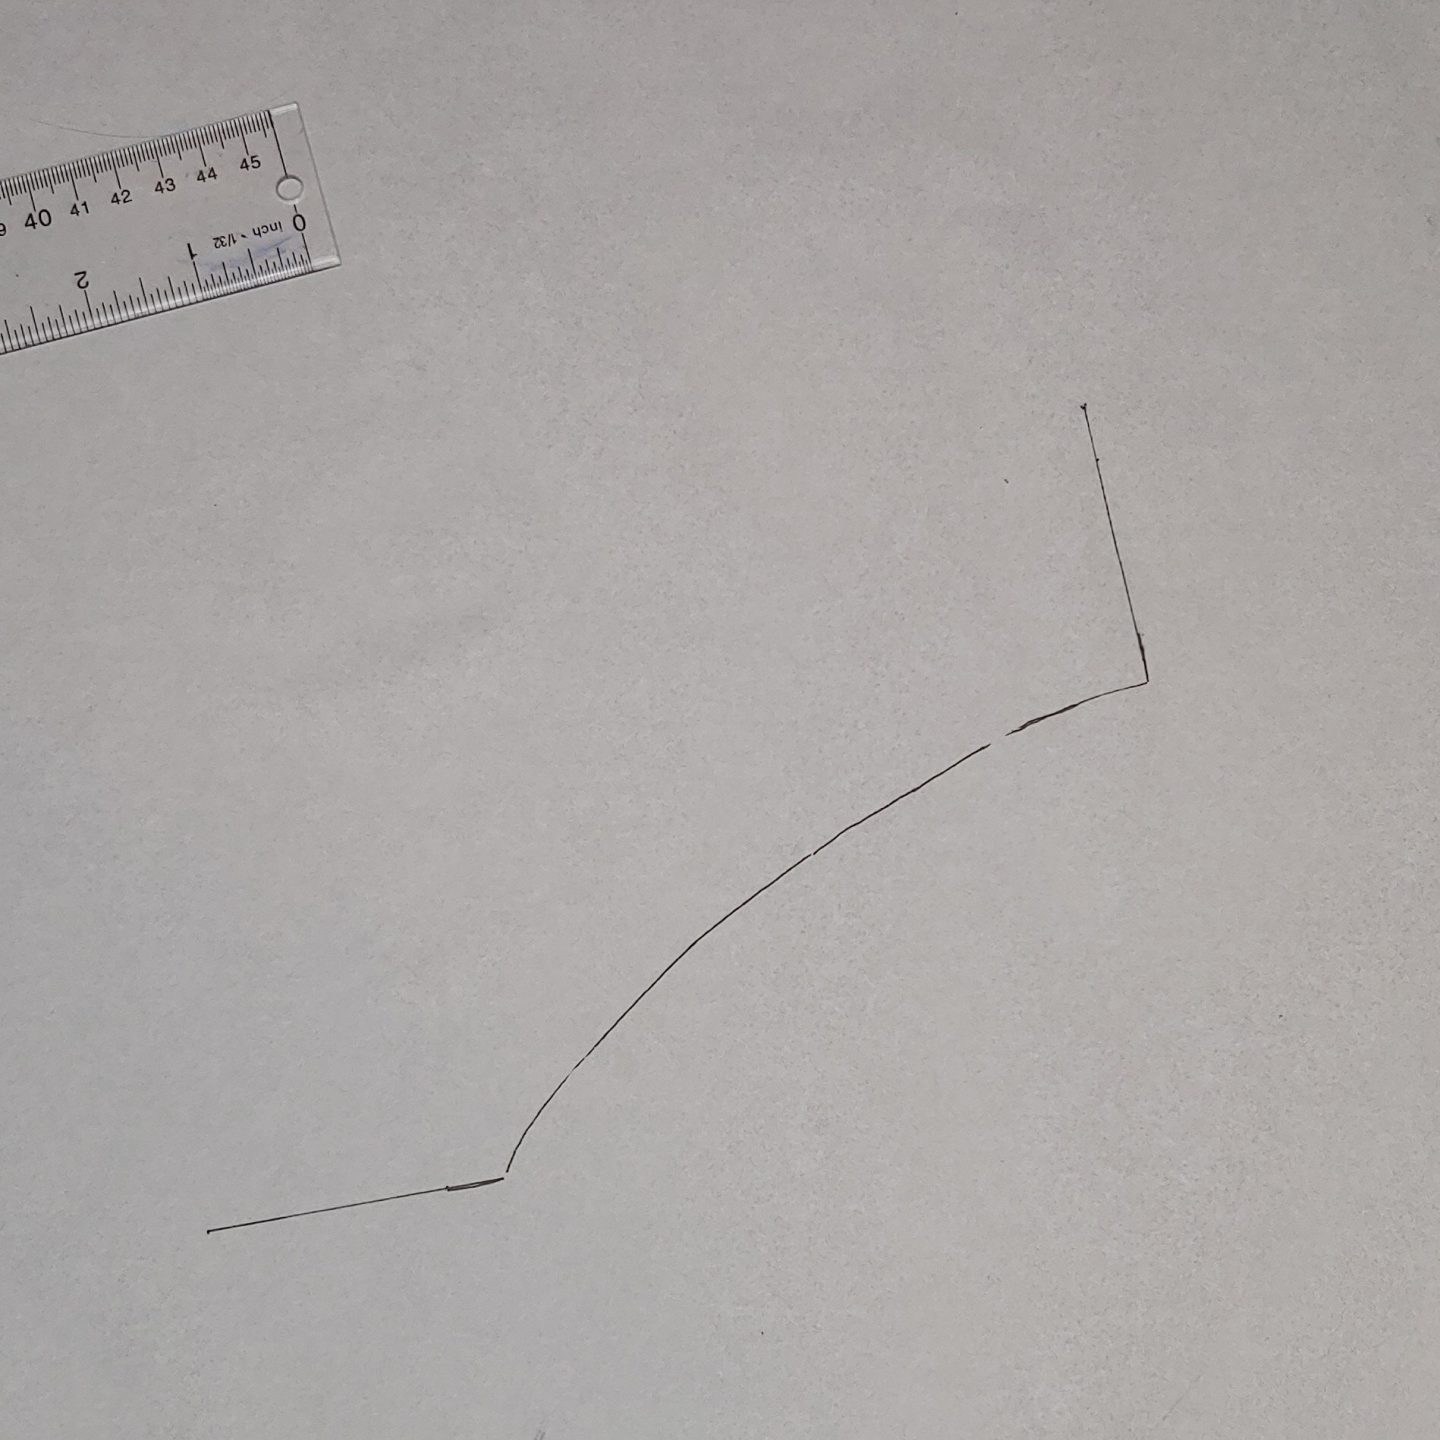
6. Connect the dots by hand or use a French curve ruler.
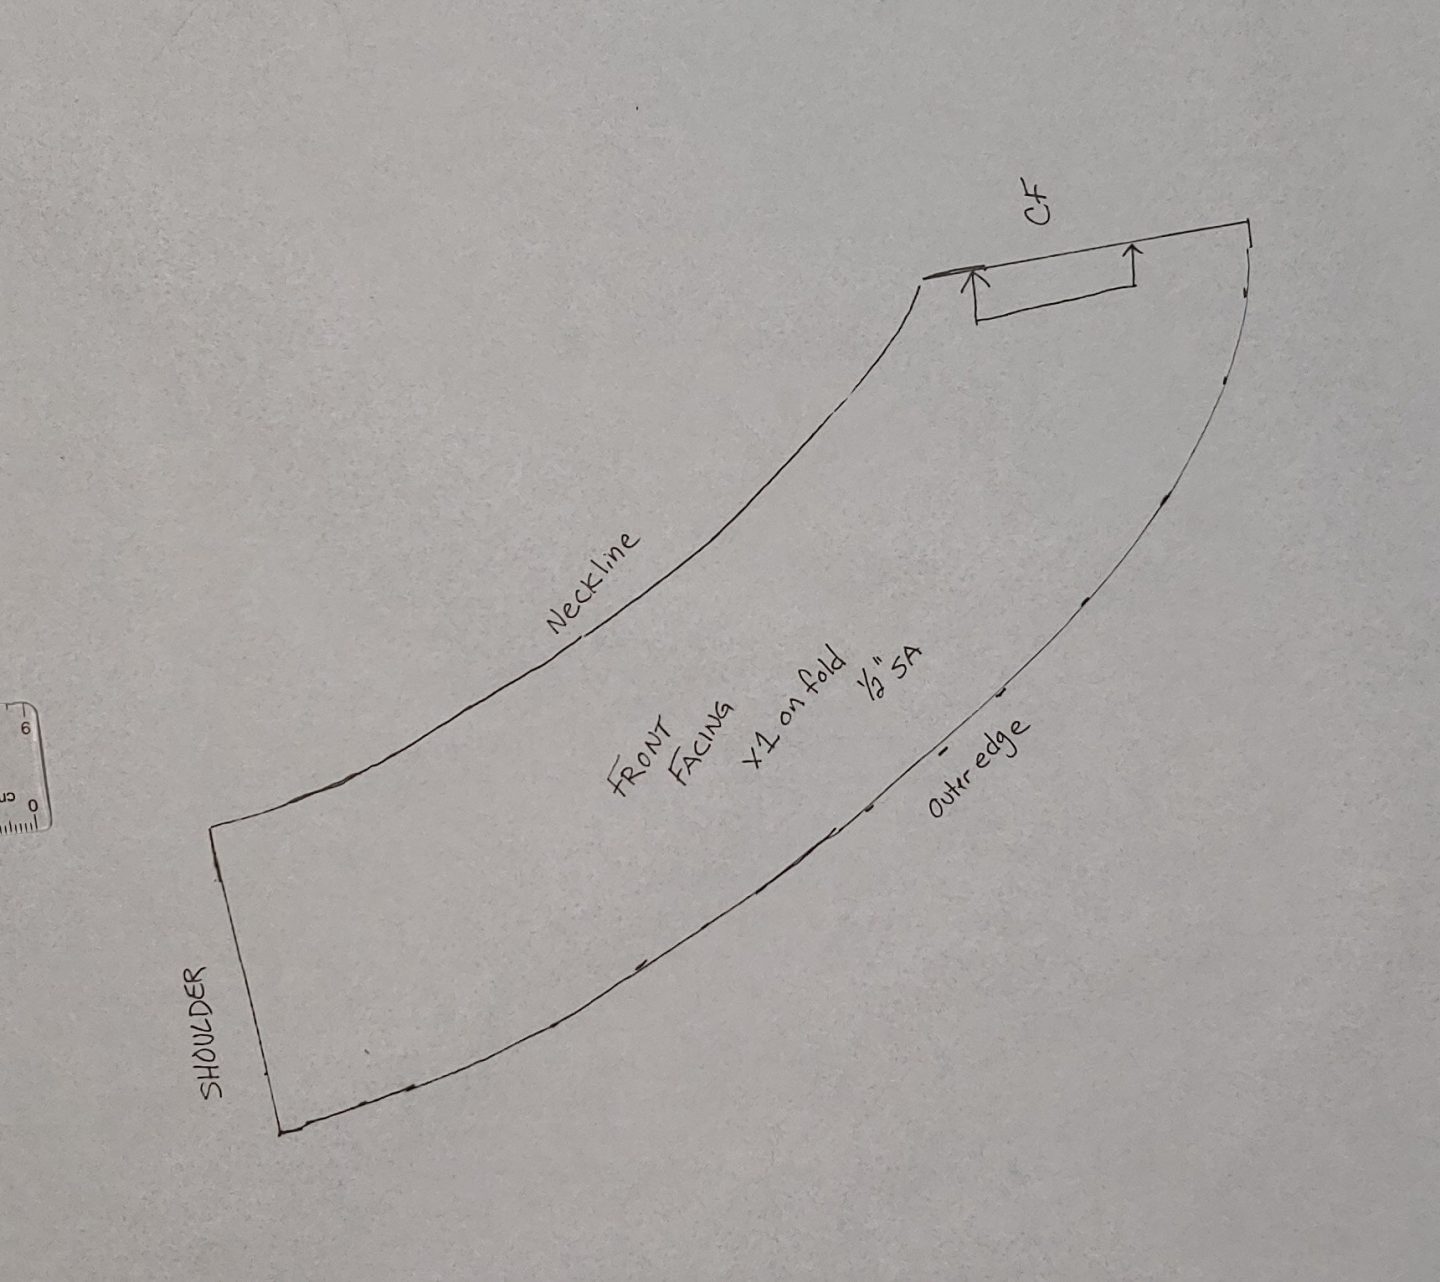
7. Mark the Center Front as “cut on the fold” and label your new pattern piece.
8. Repeat for the back! Be wary of any seam allowance you may need to remove along the CB (or CF) if it’s not also cut on the fold.
*If you need to finish the whole Center Front with the facing, i.e. a cardigan, trace all the way down the Center Front and stop 1/2″ from the hem (to reduce bulk).
Apply a lightweight interfacing to all pieces to keep the facing flat. Finish the edge with pinking shears and a zig-zag stitch. You can also finish it with a small hem if the facing will be visible – I use pinking shears and a narrow single-fold hem in those instances.
After attaching the facing to the bodice, press the seam allowance toward the facing and stitch in place at 1/8″. This is called “understitching”. Fold the facing inward and press again carefully. A tailor’s ham is extremely helpful when pressing necklines!
I recommend stitching the whole facing in place by hand, but tacking it in place will do in a pinch. My preferred stitch is the Herringbone. It’s flexible, so it can move as you and the garment move without breaking. And its practically invisible from the outside. I use it for all my facings and some hems.
Now, go make some facings!
If you enjoyed this post, let me know!
Check out my new Level Up page for more tips and how-to guides. Subscribe for a free measurement guide and follow me on IG for behind the scenes, outfits, and more! Links for both are below.
Thanks for reading <3