
Now armed with a princess seam sloper, I’m drafting a blazer jacket!
At first I was set on some kind of notched collar. I’ve never sewn one before let alone drafted one, which made me a little apprehensive.
Then I saw a stunning Armani collarless jacket. But less fancy collarless jackets looked incomplete when I searched. They just looked like boxy cardigans. Boo.
So I learned that my blazer needs some kind of collar. And I didn’t care if it fastened in the middle.
So naturally, perhaps predictably, I pulled out my Bowie book and flipped to the Life on Mars suit.

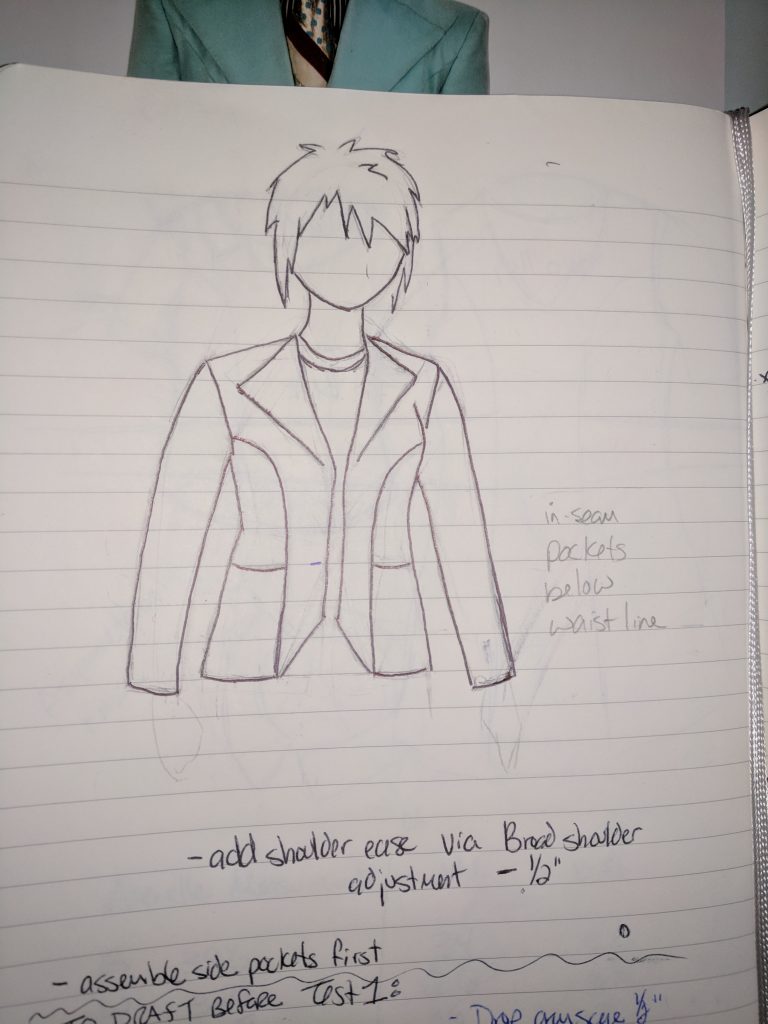
His iconic blue suit doesn’t have a notched collar. It does have a giant collar with multiple pieces and lovely seaming. The “V” in the center is just…wow!
It also has in-seam pockets on the side pieces of the princess cut.
I felt really inspired to sketch.
Drawing is a lifelong hobby of mine, but I’m no good at clothes or croquis (like, really really bad at them).
Maybe it’s a good omen, because this sketch came out great! I even inked it instead of burying it in shame.
I used up my stashed muslin on the princess seam sloper, so I ordered a bunch of muslin and swatches of suitings from Mood.
I have a much easier time pumping the brakes and testing things out when I’m drafting. Seeing the fit is the fun part!
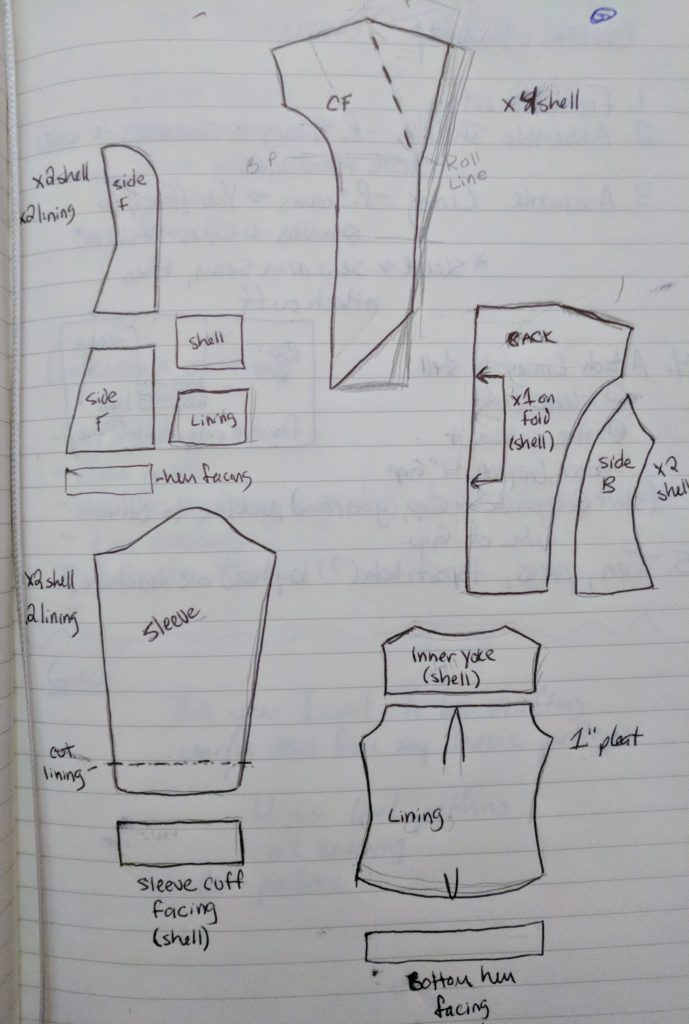
I sketched out all the pattern pieces and how they might look first. I’m a terribly visual person. Seeing things on paper makes it much easier for me to think and plan.
The collar on my sketch was just how I wanted it, but how to translate that into a pattern? I didn’t draw to scale and my drawing is around 3″ tall.
On my pattern piece, I drew the “roll line” for the lapel, going from the neckline edge to the bust point on the CF. Next I drew the lapel on the Center Front piece as it would look on the final jacket. This helped me visualize the lapel placement.
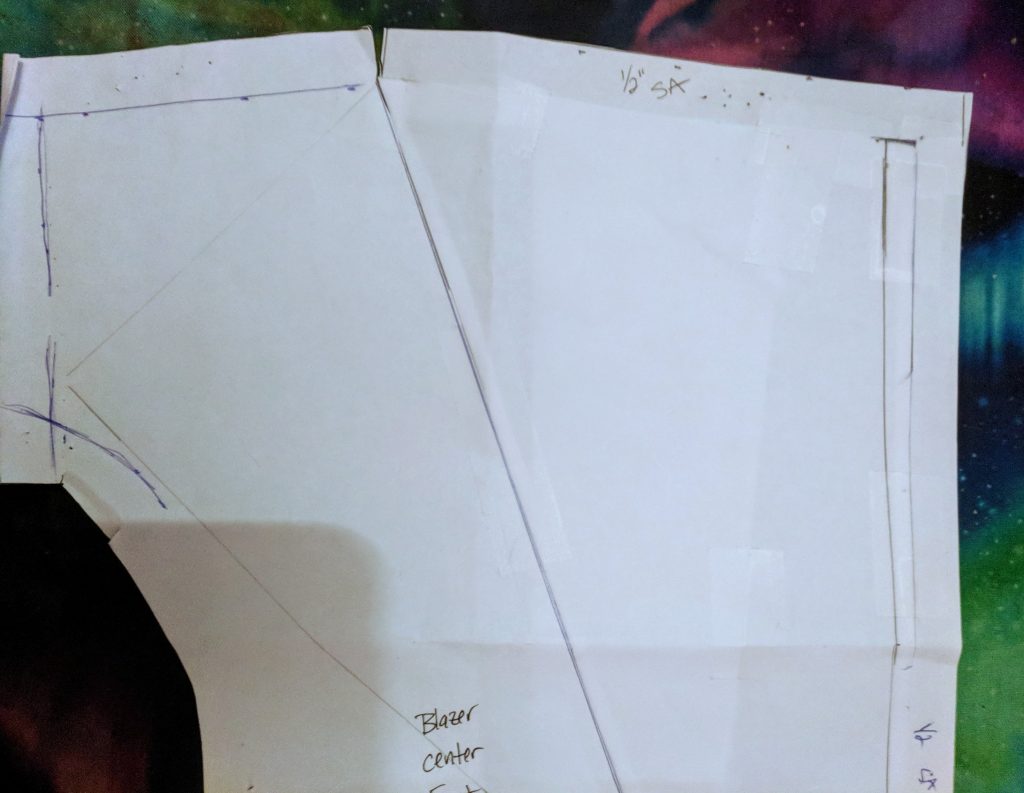
Then I got a bit clever. I traced the lapel, ending with the roll line. Cut the ‘new’ lapel out, aligned it with the roll line on my pattern piece, and taped it in place at the roll line.
Now it functions like a little flap and I just flipped it to the other side and voila! The lapel is all drawn and folds how I want.
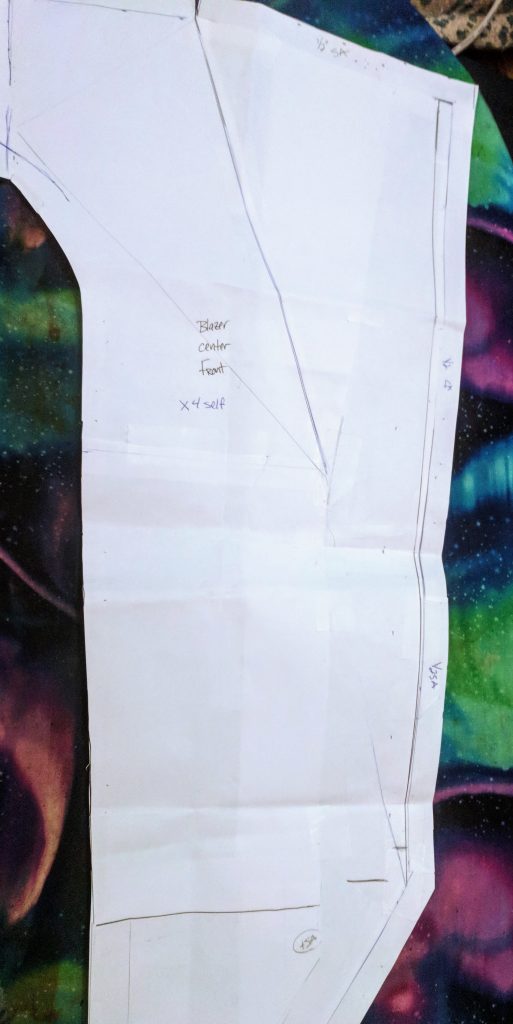
Next, I added 6 inches to each piece so it will reach my hip. For the lining pieces (side and back bodice) I only added 5″, as there will be a hem facing.
The lining back has a 1″ pleat with no princess seams. I used my OG back sloper to make this piece. I added an inner yoke as well.
For the sleeves, I referred to well-fitting sleeves as a guide. I didn’t change my sleeve cap yet, but I’m wondering if I should. The one thing I skipped when attaching my muslin sleeves was gathering the cap. I wound up with a little fold in the armpit of the sleeve. When I try the updated sleeve (I made it more tapered to my wrist), I will gather it and see if it makes a difference.
After trying the muslin on, I decided I would like for it to close, so I added 1″ to the CF to allow for a single button closure. Hopefully it doesn’t make my lapel humongous.

Overall, the muslin fits great! The lower side seams need a bit of reigning in – they’re very angular. I may still add ease in the shoulder, just a little bit to make sure I can wear other clothes under this thing!
It is heartening to see the OG sloper become so many different garments. Making it was one of the best sewing decisions I have made. It’s well worth the effort of drafting and testing (on repeat).