Pintucks are a great way to add texture and interest to a garment. I’m particularly fond of pintucks on shirt collar, so I’m sharing how to create a pintucked collar (or any garment).
Before anything else, determine the size of the tucks. Mine are 1/2″ wide blind tucks, meaning each tuck covers the stitching of the one following it.
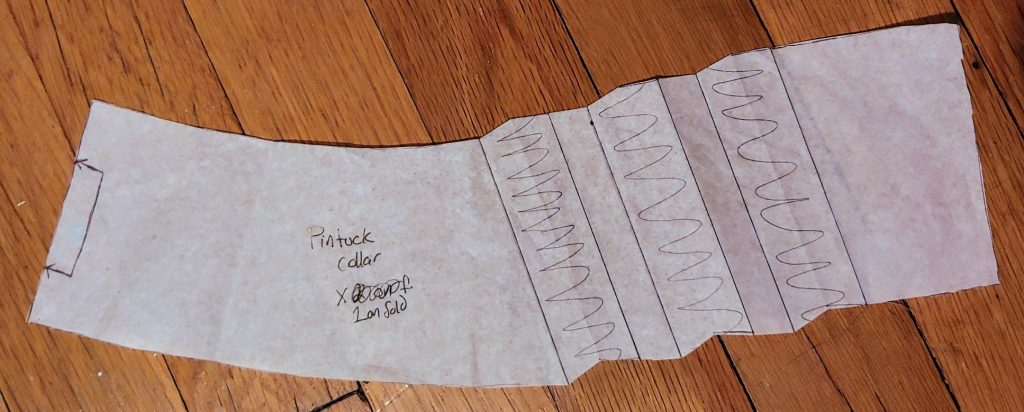
1. Mark the location of the tucks on your pattern. Make sure you’re happy with the placement before finalizing! Your pattern piece should have the seam allowance already added, too.
2. Draw the tucks on a separate piece of paper. You will have 2 different widths. The width of the fold is your finished tuck width x2 (because your fold has 2 sides). This is called the intake. So for a 1/2″ tuck, your intake is 1″. I mark my intakes with horizontal lines in between so I can’t get confused later.
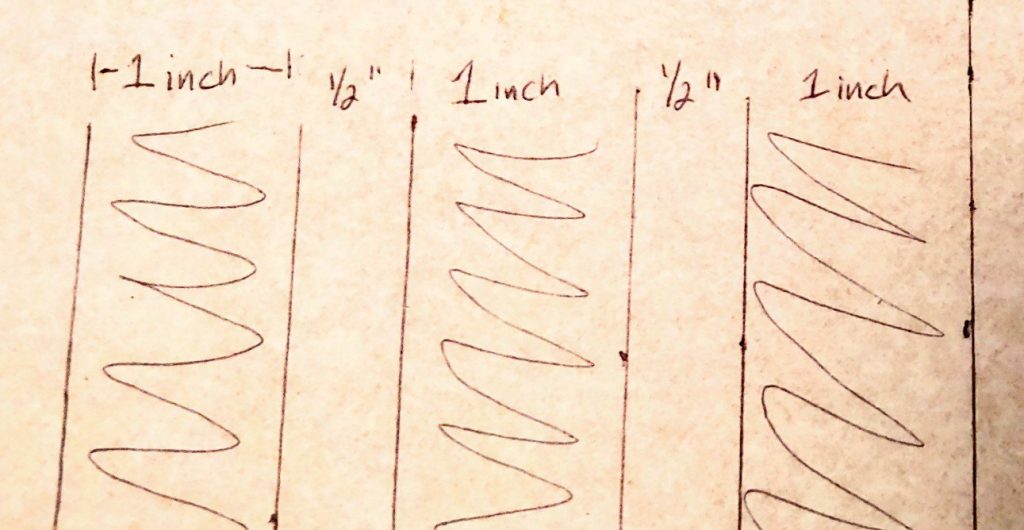
The second width is the same as your tuck (i.e. 1/2″). This represents the space that the finished tuck will occupy.
So your drawing will be intake, space, intake, space, etc. until all your tucks are drawn.
Make your tucks longer on this paper than what you’ll need on your final pattern. It will make tracing the pattern easier.
3. Once you’re finished drawing, fold all the tucks along the intake lines VERY CAREFULLY! Press the edges with your fingers so they are crisp. Smooth the tucks down in the direction you want them to lay.
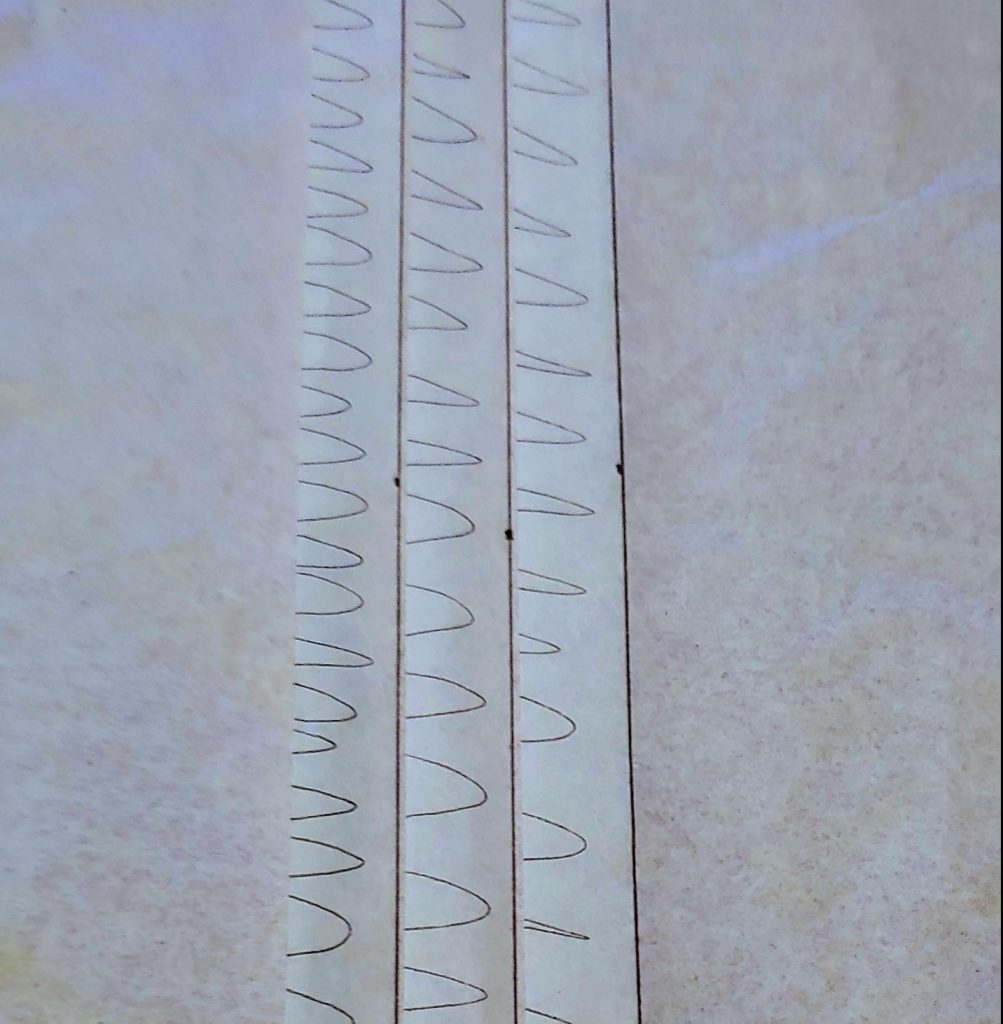
Pay careful attention to which direction they lay. There are no rules for choosing a direction, but it will change the look of your final product. Consider the placement and angle of the tucks to determine direction. My tucks on this collar lay toward the back of the collar for a smooth appearance from the front.
4. Layer pattern piece over the paper tucks. Match the markings on your pattern piece to the tucks on the paper underneath. Carefully trace around the pattern piece.
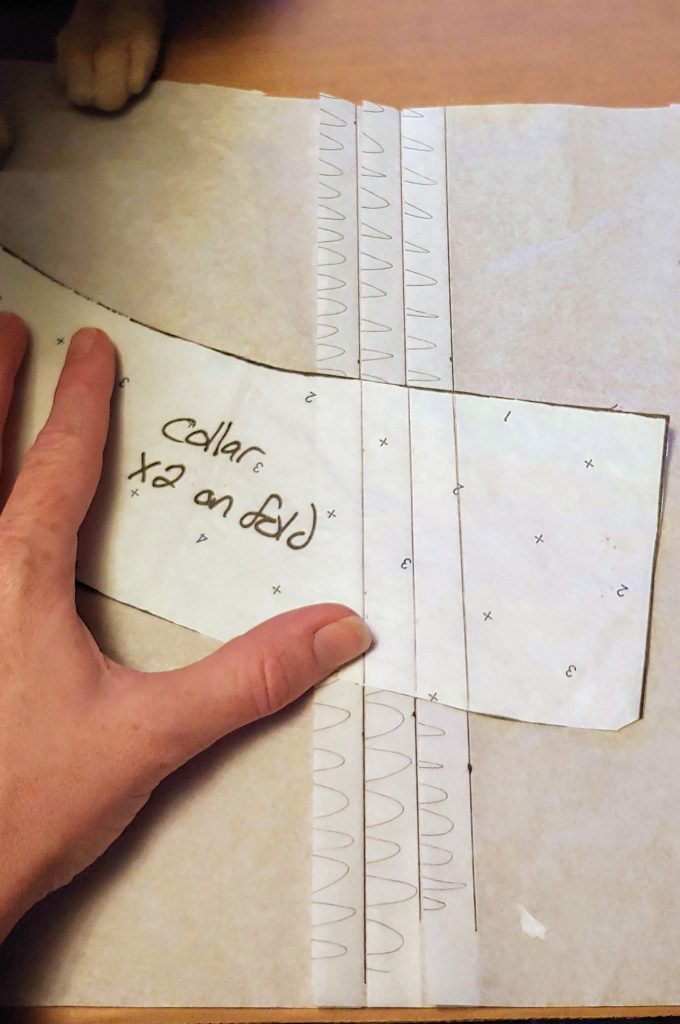
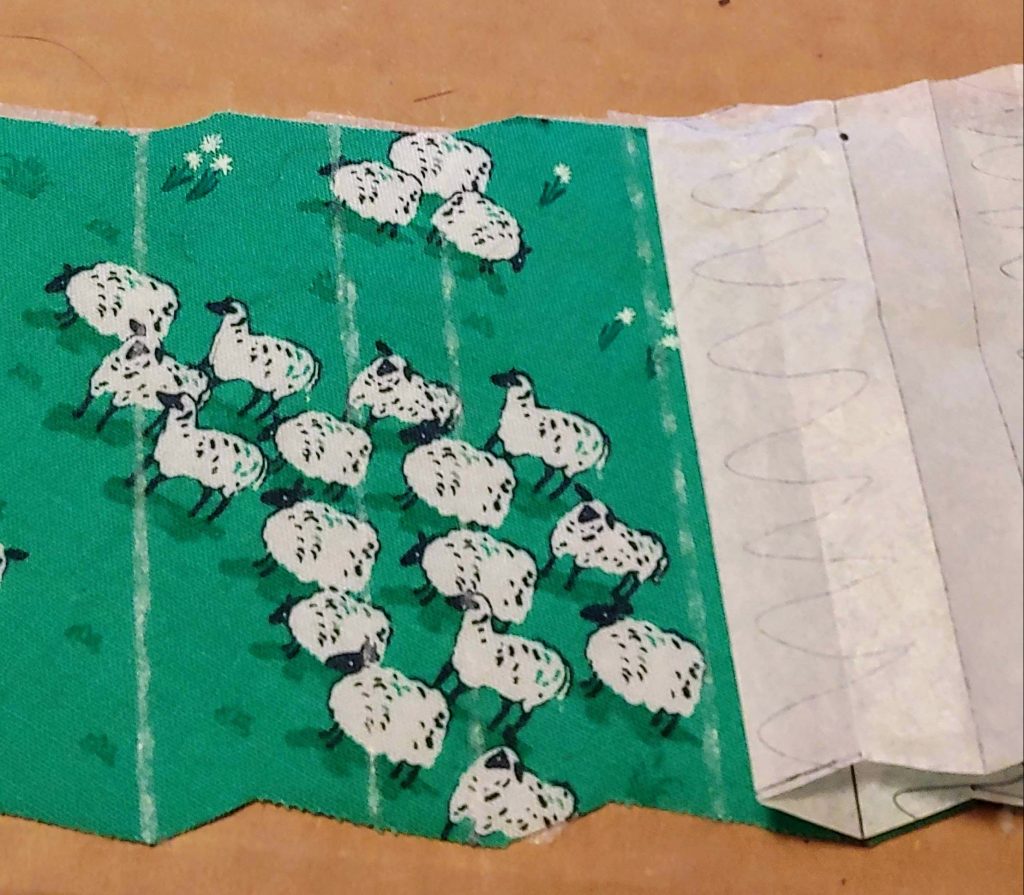
Cut out the new piece and unfold it for fabric cutting!
You have 2 guides for folding the tucks on your fabric. The first is the edges of the pattern piece – you can look at the peaks and dips along the edge and cut notches into the seam allowance.
I prefer to mark my intake lines with tailor’s chalk. First, I carefully align the pattern piece with the fabric, then I fold along each intake line and mark it. It’s a very similar process to marking darts.
Double check your tucks with a ruler!
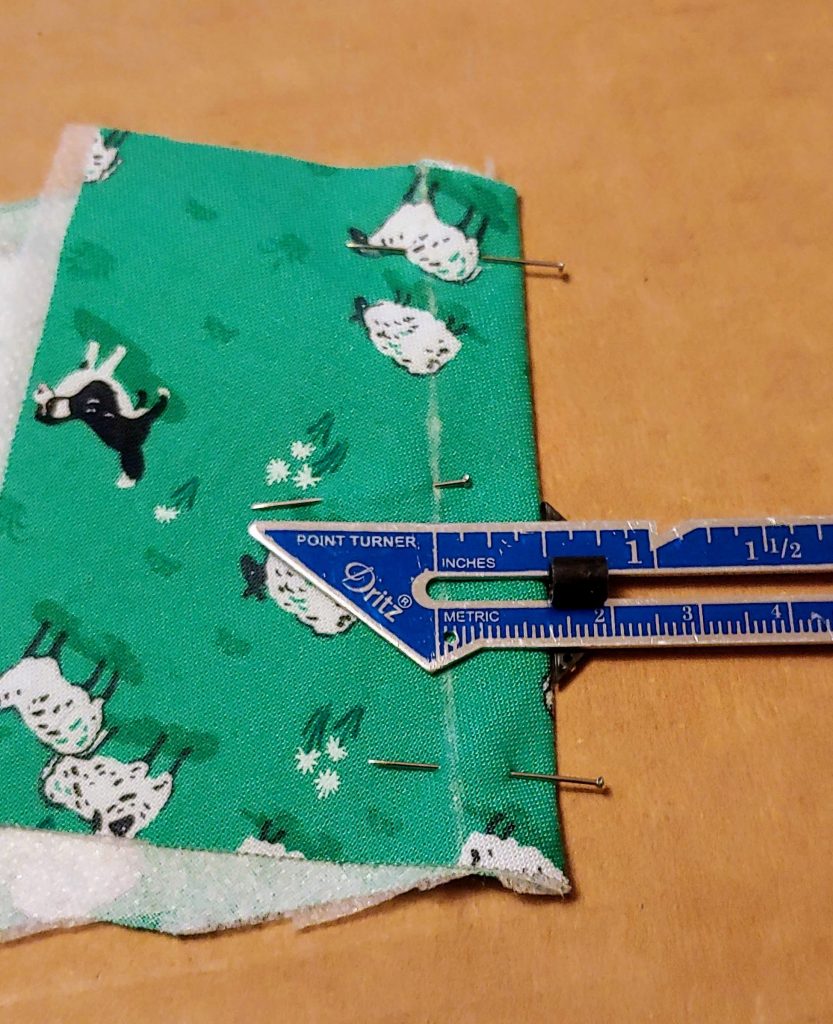
Once marked, match up the lines and pin the tucks. Sew them down using a longer stitch, like top stitching, and make sure you’re stitching from the right side (because one of your stitch lines will be visible and you want it to look nice!).
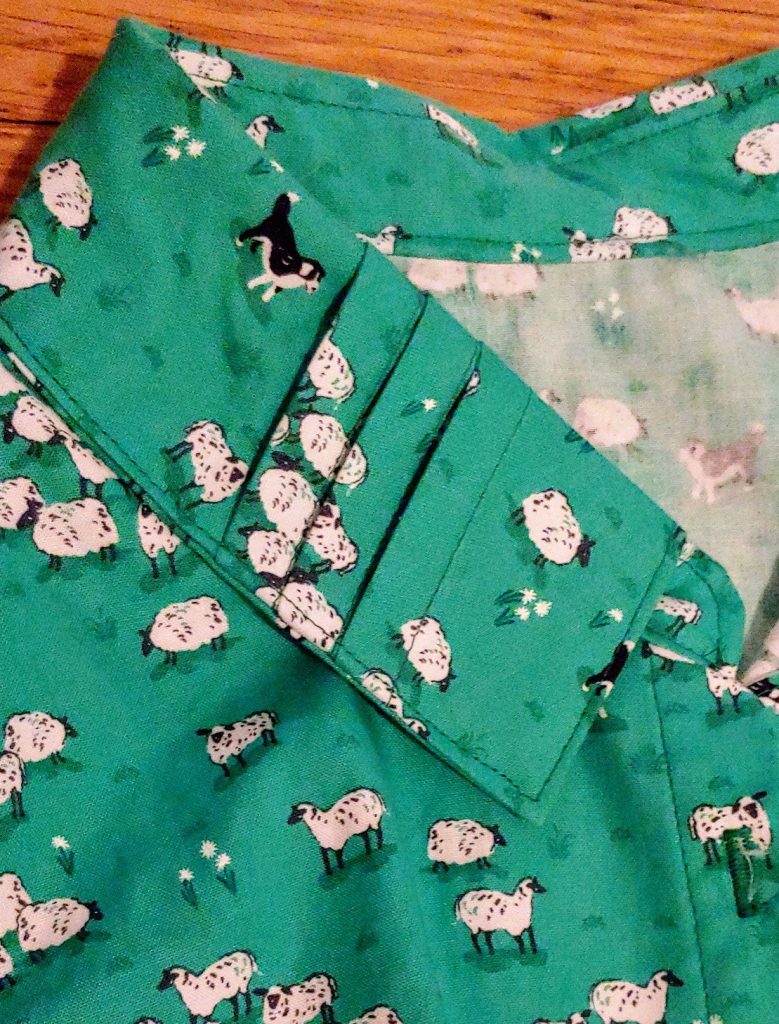
When you’ve stitched all the tucks, press them carefully and stitch them down close to the raw edge. You don’t want them shifting to the wrong direction while you sew!

Finish the garment as usual.
Thanks for reading <3